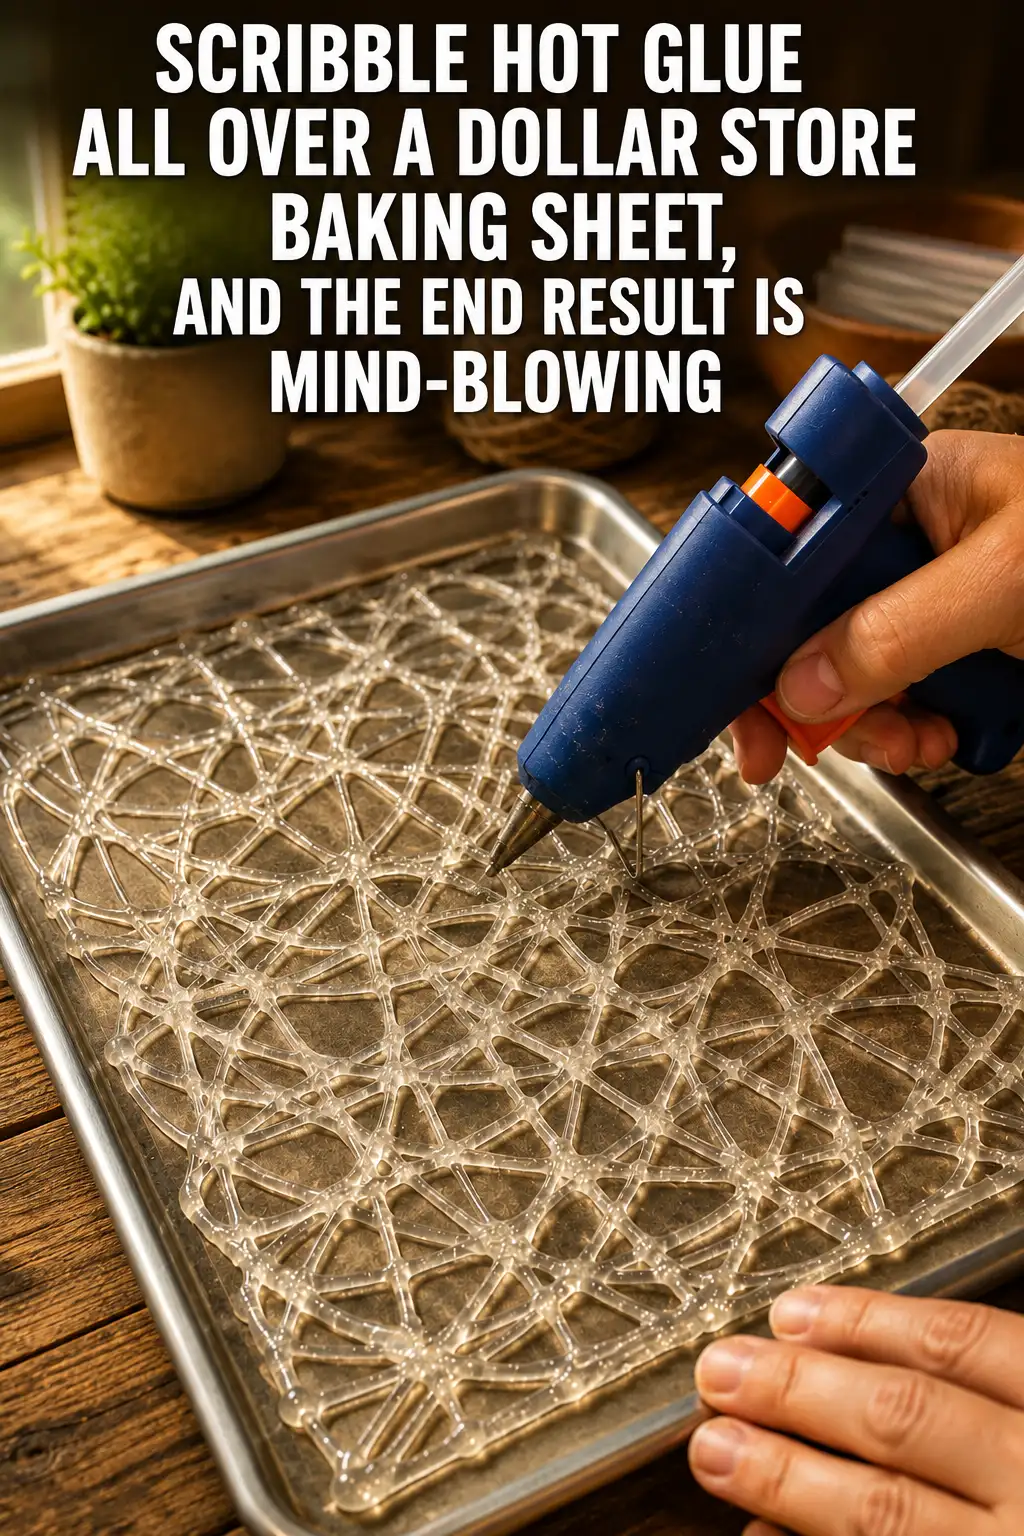
Okay, I’ll admit it: some Halloween crafts are way more work than they’re worth. You spend half the afternoon cutting, measuring, painting, and cleaning up, only to end up with something that looks… well, homemade in the wrong way.
This hot glue spiderweb craft is totally different.
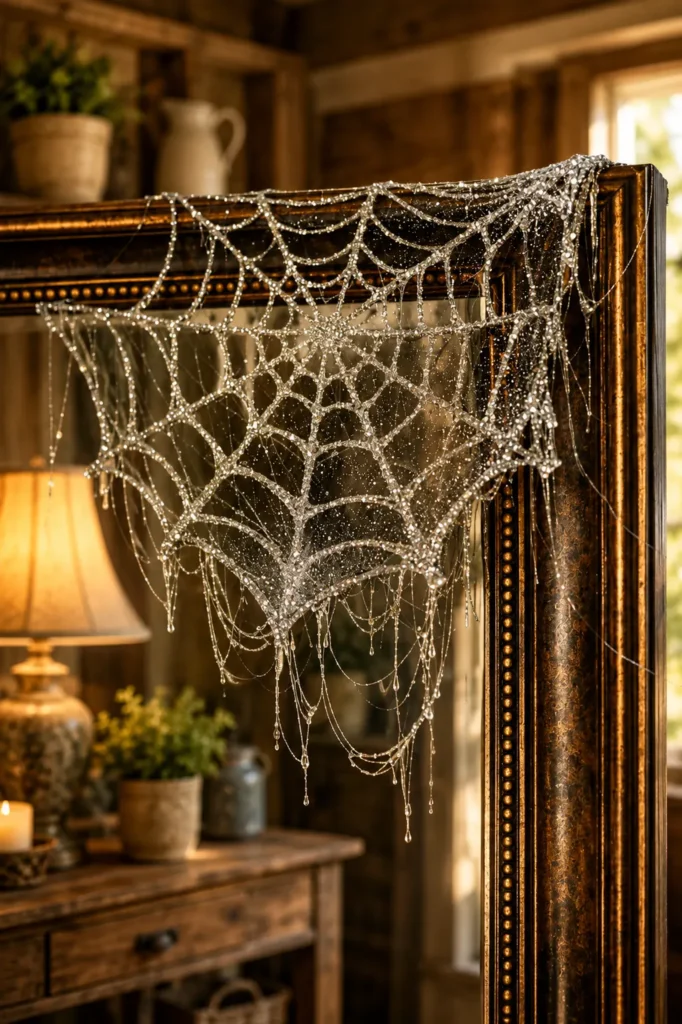
Grab a dollar store baking sheet, parchment paper, hot glue, and a little glitter, and you can make giant shimmering spiderwebs that look surprisingly fancy. The trick is ridiculously simple. You basically scribble a spiderweb pattern with hot glue, sprinkle glitter over it, let everything cool, and peel it right off.
Yep, that’s pretty much it.
The finished hot glue spiderweb stays slightly flexible, so you can drape it over mirrors, wreaths, window corners, shelves, and other Halloween decorations. And those annoying little strings that usually trail behind a hot glue gun? For once, they’re actually a good thing. They make the web look even more like a real cobweb.
If you love cheap Halloween decorations, this is one dollar store craft worth trying.
Why This Dollar Store Halloween Craft Works So Well
There’s something satisfying about turning basic craft supplies into Halloween decor that looks like it came from a seasonal home store.
A metal baking sheet gives you a sturdy, flat work surface. Parchment paper keeps the glue from permanently attaching itself to the pan. Once the hot glue cools, the whole spiderweb can be gently peeled away.
The real magic, though, is the texture.
Hot glue creates raised lines instead of a flat painted design. Glitter catches on those lines and reflects light, giving the finished web a sparkly, almost icy appearance. When you hang it near a window or drape it across a dark mirror, those glittery strands really stand out.
Plus, this craft doesn’t need to look perfect.
Actually, a slightly crooked web can look better than a perfectly measured one. Real spiderwebs aren’t drawn with rulers, you know. Uneven curves, thin glue strings, and slightly different spaces between the web sections give the decoration plenty of character.
And honestly, that takes some pressure off.
Materials You’ll Need for a Hot Glue Spiderweb
You don’t need a cart full of craft supplies for this project. Most of the materials are inexpensive, and you may already have several of them tucked into a kitchen drawer or craft bin.
Materials:
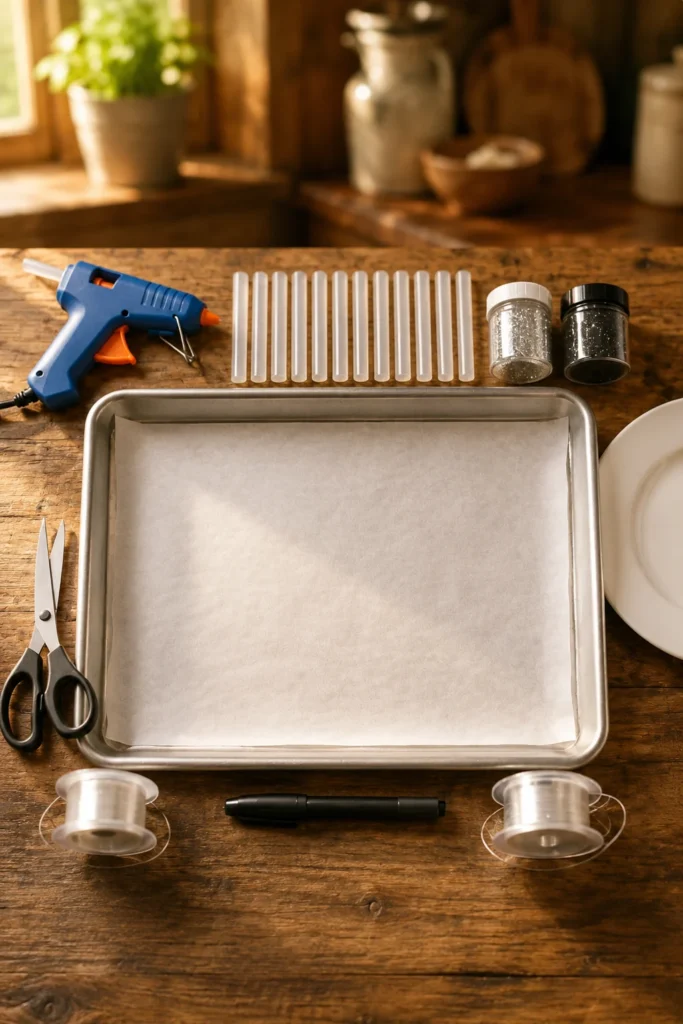
- 1 metal baking sheet, approximately 9 x 13 inches
- 1 sheet parchment paper, cut to fit the baking sheet
- 1 dinner plate, about 10 to 11 inches across
- 1 black marker
- 1 high-temperature hot glue gun
- 8 to 10 full-size clear hot glue sticks, about 4 inches each
- 2 tablespoons fine glitter in silver, black, or iridescent
- 1 pair of scissors
- 6 to 10 feet of clear thread or fishing line for hanging
If you already own a glue gun, this can be a seriously cheap Halloween craft. Dollar store baking sheets work nicely because you don’t need anything fancy. The pan is simply there to give the parchment paper a firm surface while you work.
One quick note: hot glue can cause burns. Keep kids away from the heated glue gun and fresh glue unless an adult is closely supervising the project.
Step 1: Prepare Your Baking Sheet
Start by covering the metal baking sheet with parchment paper.
Cut the parchment so it fits comfortably inside the pan, then smooth it down with your hands. You want a reasonably flat surface because wrinkles can change the shape of your glue lines.
Next, place a dinner plate in the center of the parchment.
Trace around the plate with a black marker to create a large circle. This circle acts as your basic guide for the spiderweb. It does not have to be perfectly centered.
And don’t stress about getting the circle exactly right. You’ll be peeling the finished web away from the parchment, so the marker line will not become part of your decoration.
Step 2: Make the Hot Glue Spiderweb Spokes
Plug in your hot glue gun and give it enough time to heat completely.
This part matters more than you might think. A fully heated glue gun produces smoother, more consistent lines. If the glue is barely warm, you may get thick blobs followed by skinny lines, which makes the web harder to connect.
Once the glue flows easily, begin near the center of your traced circle.
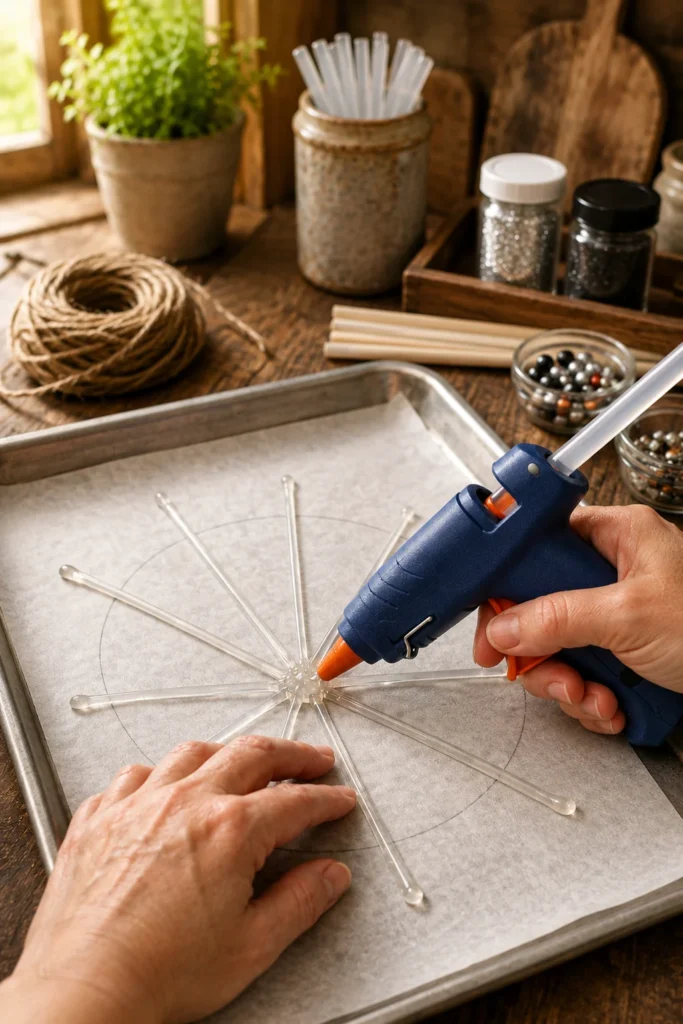
Draw a straight line from the center toward the outside of the circle. Continue slightly beyond your traced edge.
Return to the center and make another line in a different direction.
Keep adding straight lines until you have a series of spokes radiating from the middle, almost like slicing a pizza.
There’s no need to count every spoke. Around eight to twelve usually creates a nice full spiderweb, depending on the size of your pan and how detailed you want the finished decoration to look.
Step 3: Connect the Spokes With Curved Hot Glue Lines
Now comes the fun part.
Starting close to the center, connect one spoke to the next using a slightly curved line of hot glue. Instead of making perfect circles, allow each section to sag gently between the spokes.
Continue around the center until you complete the first ring.
Then move farther outward and repeat the process.
Keep adding curved sections until you reach the outside of the web. Leave some open space between each row. Those gaps create the classic spiderweb pattern and keep the finished craft from becoming one giant sheet of glue.
Most importantly, make sure each curved glue line physically touches the spokes.
Those little connection points hold everything together.
If a curved section stops short of a spoke, that piece may separate when you peel the web away from the parchment later. When in doubt, add a tiny dab of hot glue at the connection.
And yes, your glue gun will probably leave skinny strings everywhere.
Leave them alone for now.
For practically every other hot glue craft, I’m picking those strings off like they personally offended me. Here? They look fantastic.
Step 4: Add Glitter While the Hot Glue Is Warm
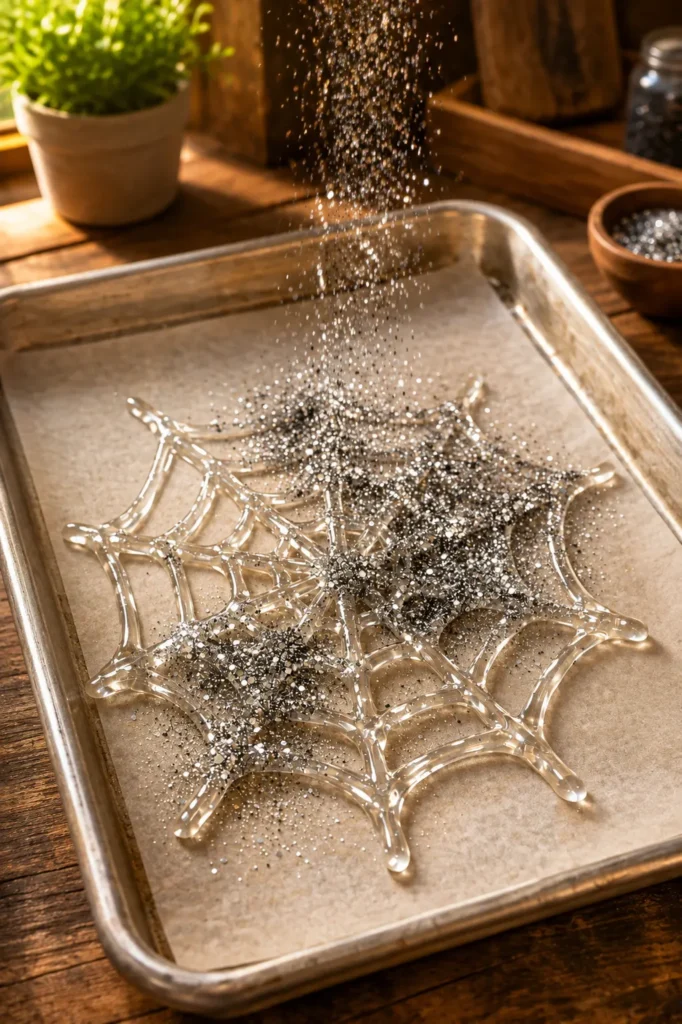
Before the glue completely cools, sprinkle fine glitter across the spiderweb.
You can go classic with silver glitter for a frosty, moonlit look. Black glitter creates a darker Halloween style, while iridescent glitter catches different colors as the light moves across it.
I’m partial to silver mixed with a little iridescent glitter. It gives the web that spooky-but-pretty Halloween look without becoming too flashy.
Work fairly quickly because hot glue develops a skin as it cools.
Sprinkle glitter across the spokes and curved sections while the surface is still tacky. You don’t have to bury the web under glitter. A light, even coating is usually enough to make those raised glue lines sparkle.
Let any loose glitter stay on the parchment until the web has cooled.
Otherwise, well… glitter will do what glitter does and somehow end up three rooms away.
Step 5: Let the Glitter Spiderweb Cool
Set the baking sheet somewhere safe and leave the web alone for about 10 minutes.
The exact cooling time can vary depending on how thick your hot glue lines are. Before removing anything, lightly touch an outer edge.
The glue should feel firm and cool rather than soft or tacky.
Don’t rush this part.
Trying to peel warm glue from the parchment can stretch the web out of shape or pull apart connection points. Ten minutes feels like forever when you want to see the finished result, but go refill your coffee or put away the glitter. It’ll pass.
Step 6: Peel the Spiderweb From the Parchment
Once everything has cooled completely, lift one outer point of the spiderweb.
Slowly peel it away from the parchment.
Use your other hand to support the nearby sections as you work. Avoid grabbing one corner and yanking the entire thing up at once. The hot glue remains somewhat flexible, but thinner sections can still stretch or tear.
If one spot feels stuck, bend the parchment paper slightly away from the glue instead of pulling harder on the web.
Keep peeling until the whole glitter spiderweb comes free.
This is the moment that makes the craft so satisfying.
What looked like random glue lines sitting on a baking sheet suddenly becomes a flexible Halloween decoration you can actually pick up, hang, bend, and drape.
Pretty cool for a pile of glue sticks, right?
Step 7: Clean Up the Edges
Take a quick look around your finished hot glue spiderweb.
You may see thick glue tails where you lifted the glue gun or extra blobs around the outer points. Trim any pieces you don’t like with scissors.
But don’t go crazy cleaning everything up.
Those super-fine glue strings stretched between sections can stay exactly where they are. Once the web is hanging, the tiny strands resemble delicate cobwebs.
Sometimes the messy bits are what make a Halloween craft look better. Who knew?
Shake the web gently over a trash can or piece of paper to remove excess glitter before decorating with it.
Step 8: Hang Your DIY Halloween Spiderweb
Now you get to decide where your glittery creation is going.
For an almost invisible hanging method, tie clear thread or fishing line around two or three sturdy outer points. Hang the web from small hooks, tacks, or other secure supports suitable for the surface.
You can also skip the thread completely and simply drape the flexible web over existing Halloween decor.
Try placing your DIY hot glue spiderweb on:
- A Halloween wreath
- The corner of a large mirror
- A window frame
- A mantel display
- A bookshelf
- A decorative picture frame
- A faux pumpkin arrangement
- A cool, unlit lampshade
- A Halloween party backdrop
A black background makes silver and iridescent glitter especially noticeable.
I also love the idea of making three or four webs in slightly different sizes and layering them around a Halloween display. Because each handmade web comes out a little differently, the group feels more natural than using identical store-bought decorations.
Easy Ways to Change the Look
Once you’ve made one hot glue spiderweb, you’ll probably start thinking about other versions. That happened to me, anyway.
For smaller webs, trace a salad plate instead of a dinner plate. These little versions work nicely around picture frames, pumpkins, tabletop displays, and Halloween wreaths.
Want something bigger?
Use a larger parchment-covered work surface and trace a serving platter. Just remember that larger spiderwebs need more glue and plenty of connection points to stay together.
You can also change the glitter color.
Silver creates a classic spooky sparkle. Black looks dramatic against light-colored walls or mirrors. Iridescent glitter has a ghostly shine that changes under different lighting.
Purple, orange, green, or even a mix of Halloween glitter colors can make the project more playful.
For a creepier look, skip heavy glitter and use mostly clear hot glue. Against a dark surface, the nearly transparent strands can look surprisingly eerie.
Tips for Stronger Hot Glue Spiderwebs
The biggest trick is making solid connections.
Every curved section should touch each spoke it crosses. If the glue lines merely sit close together without touching, the finished web can fall apart when you remove it.
You also want the main spokes to be a little thicker than the curved sections.
Think of those straight lines as the skeleton of your web. They support everything else.
If one section looks too thin after you finish drawing the pattern, go over it with another light pass of hot glue.
And don’t worry if you make a mistake.
A small blob can be trimmed after cooling. A broken connection can usually be repaired with another dab of hot glue. This craft is pretty forgiving, which is one reason it’s such a fun project for a casual fall afternoon.
How to Make This Halloween Craft Faster
Short on time? Same.
Instead of creating lots of closely spaced rings, make fewer curved rows with wider gaps between them. The spiderweb will still look great once it’s hanging.
You can also trace several parchment sheets before heating the glue gun. Then make one web after another while the gun is already hot.
If you’re decorating for a Halloween party, this little assembly-line approach can save quite a bit of time.
Another trick is to forget about perfect symmetry. Seriously. Trying to make every section identical slows the project down, and a slightly irregular spiderweb often looks more realistic anyway.
A Few Safety Tips Before You Start
Hot glue deserves some respect.
High-temperature glue guns get extremely hot, and fresh glue can stick to skin. Hold the gun by its handle, keep your fingers away from the metal tip, and avoid touching fresh glue to test whether it has cooled.
I always give myself a little more finger room than I think I need. That tiny habit has saved me from more than a few painful craft-room moments.
Finished hot glue spiderwebs should also stay away from heat sources.
Do not place them near candles, fireplaces, space heaters, hot light bulbs, or open flames. If you drape one over a lampshade, use it only where the shade and bulb remain cool and the decoration cannot contact the bulb or another hot component.
Battery-operated LED candles are a much better choice when you want that flickering Halloween glow nearby.
Why This Cheap Halloween Decoration Is Worth Making
I have a soft spot for dollar store Halloween crafts because there’s almost no pressure involved.
You’re not cutting into expensive fabric or hoping a pricey craft kit turns out right. You’re working with parchment, hot glue, glitter, and a basic metal pan.
Yet the finished result can make a big visual impact.
These glitter hot glue spiderwebs are lightweight, flexible, easy to hang, and simple to customize. You can make one for a mirror, several for a Halloween party backdrop, or a whole collection for windows and wreaths.
Better yet, imperfections actually help.
A crooked line? Fine.
A stray glue string? Even better.
A little extra glitter stuck in one corner? Call it Halloween magic and keep moving.
That’s my kind of craft.
So, the next time you’re walking through the dollar store and spot a plain metal baking sheet, don’t just think about cookies. Grab some parchment paper and hot glue, because that boring little pan can help you make one seriously cool DIY Halloween spiderweb decoration.
And when someone asks where you bought those sparkly spiderwebs?
Well… you don’t have to tell them how ridiculously easy they were to make.