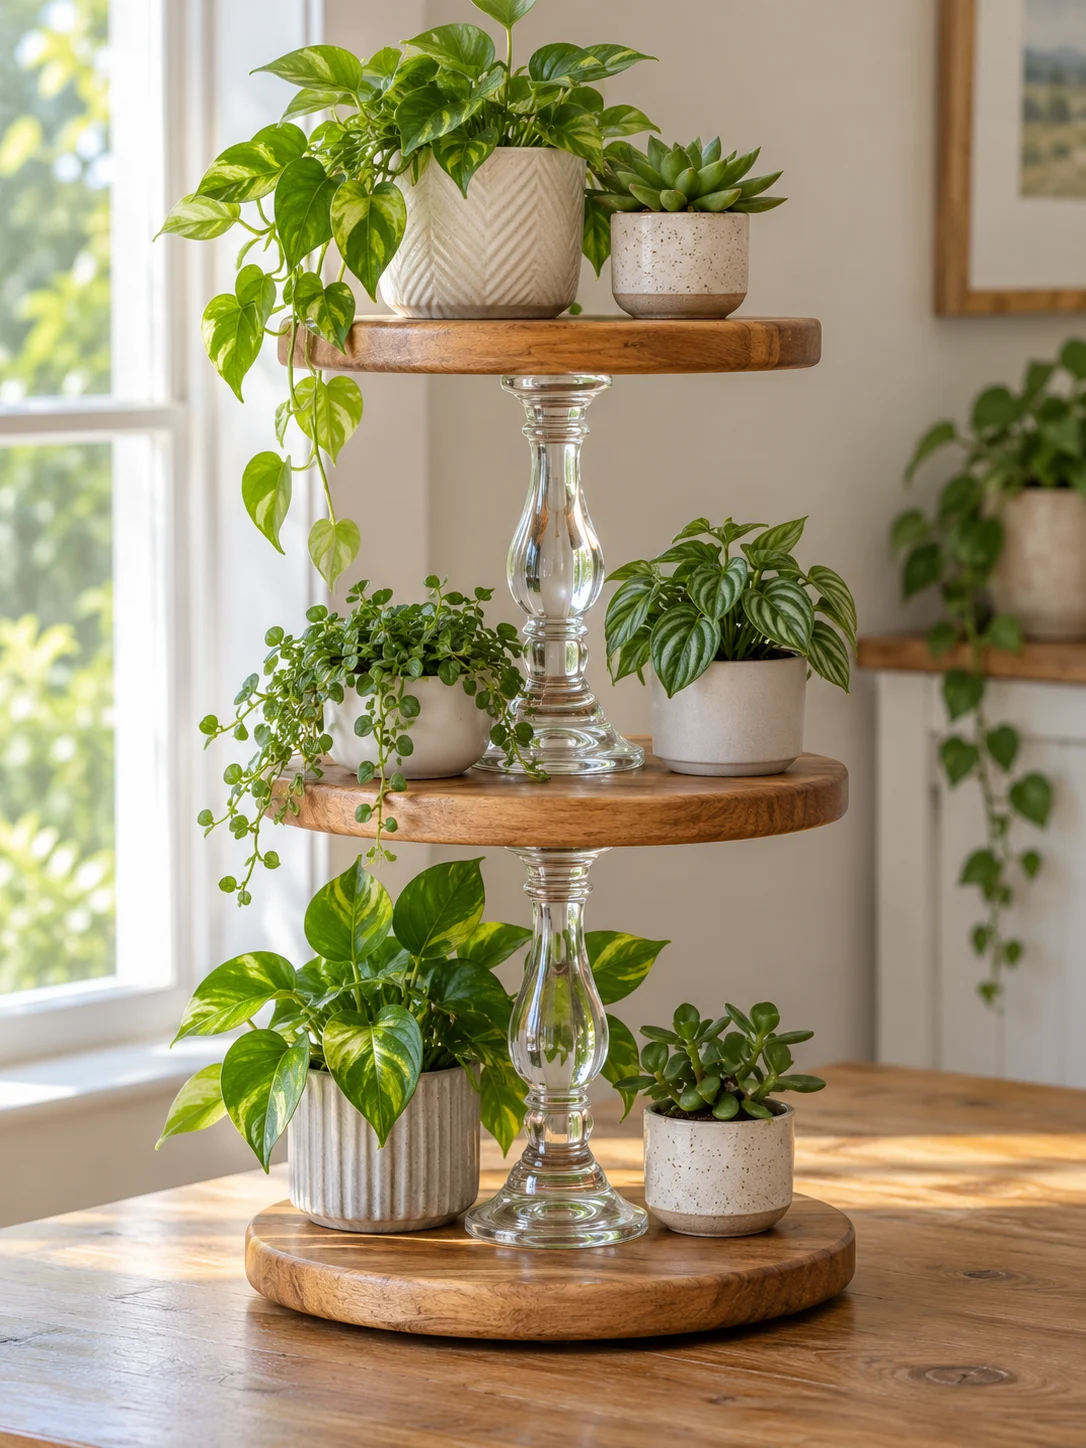
A few inexpensive pieces can become a striking place to display your favorite small plants. This three-tier stand pairs the warmth of wooden cutting boards with the light, airy look of glass candlestick holders. The key is careful centering, a compatible adhesive, and plenty of curing time before you add a pot.
What You’ll Need
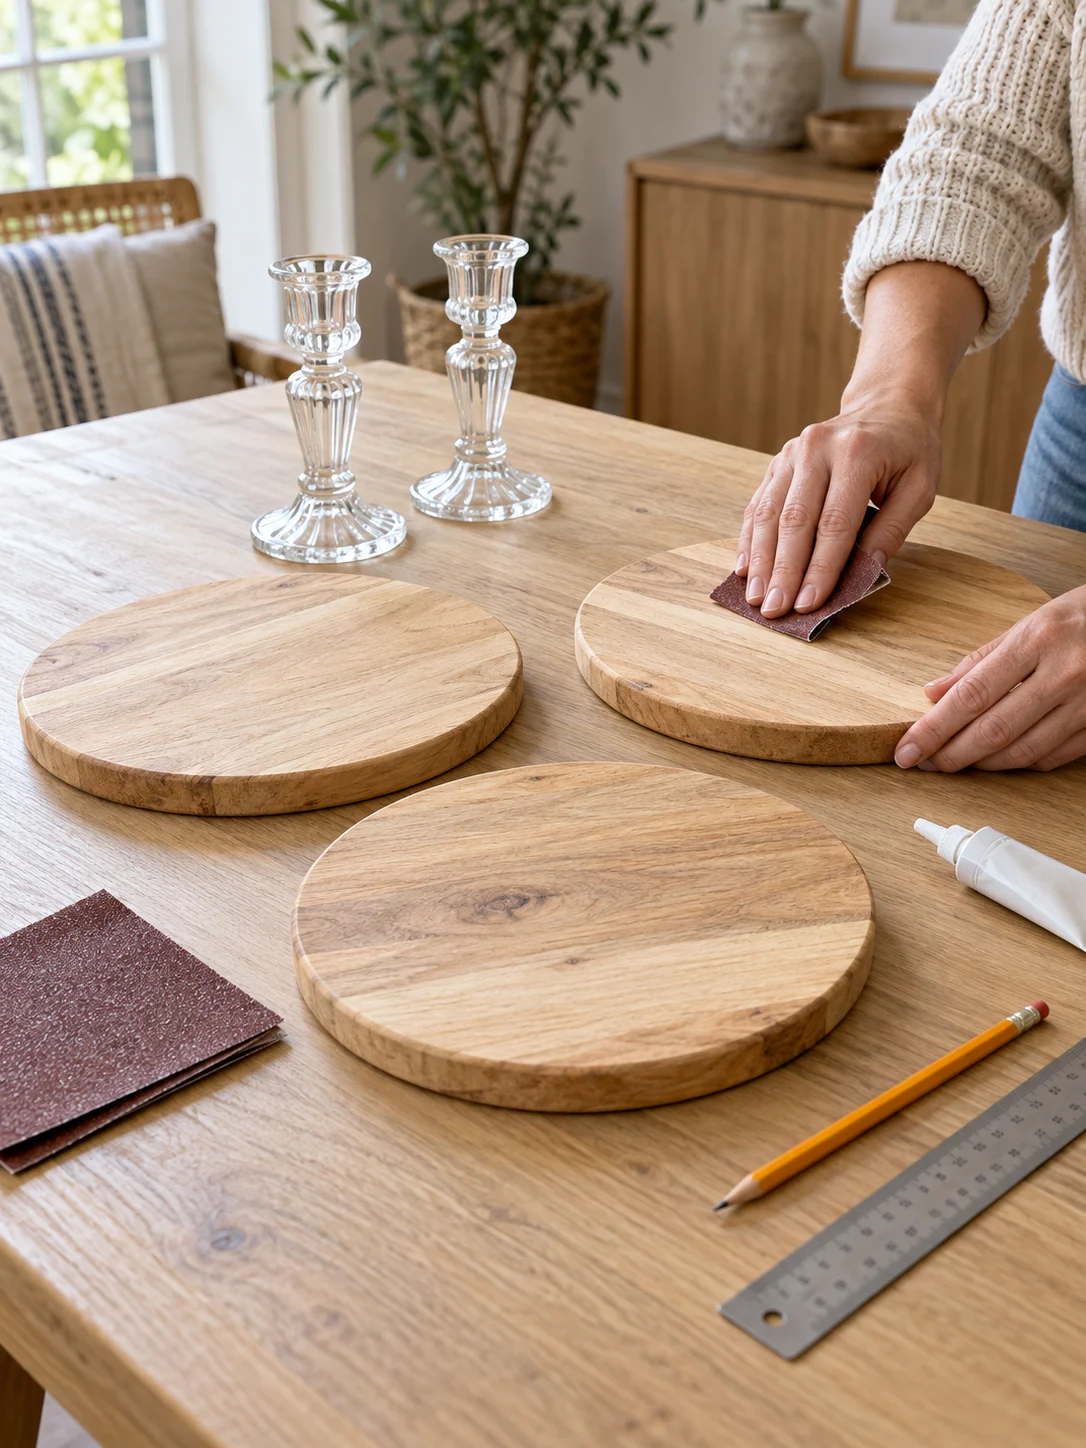
- 3 round wooden cutting boards, approximately 12 inches across
- 2 sturdy glass candlestick holders, approximately 8 inches tall
- Strong adhesive labeled for both glass and wood
- Fine-grit sandpaper, if the board edges are rough
- A ruler or tape measure and a pencil for marking centers
- A clean cloth to wipe the bonding surfaces
Before You Begin
Choose boards that sit flat and candlesticks with level, broad contact surfaces. Arrange the pieces without glue first to see whether the stand looks straight and balanced. Check the adhesive label for its surface-preparation and cure instructions; the finished stand should carry only light pots. Set it on a flat, stable surface away from the edge of a table.
How to Make the Tiered Plant Stand
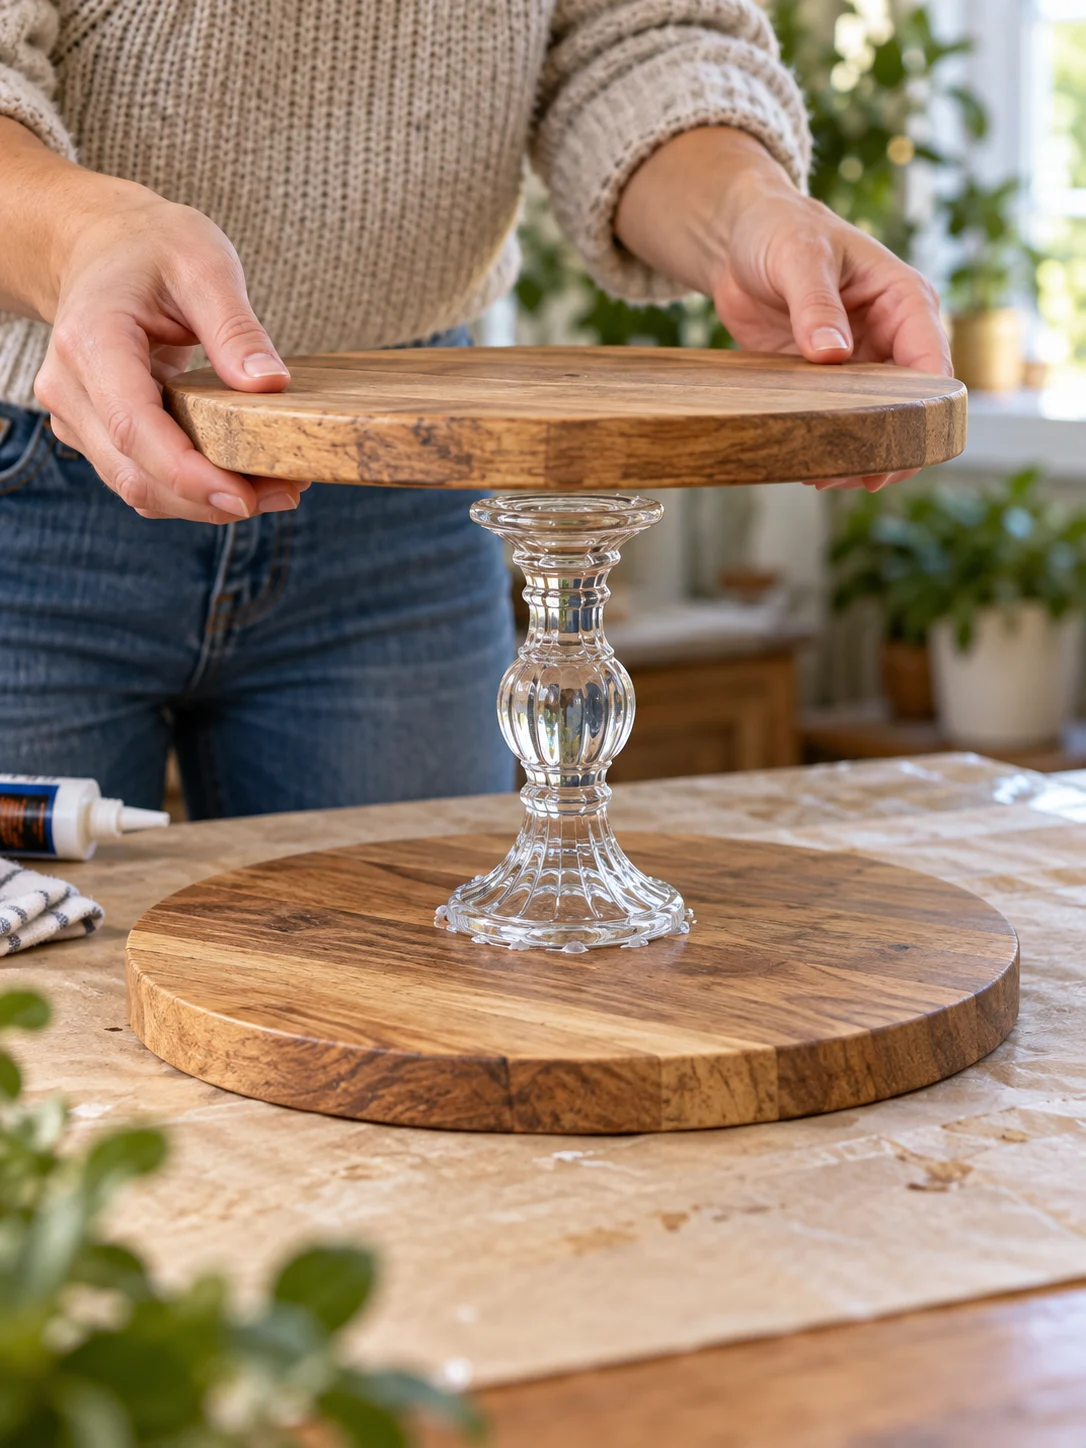
- Prepare the wood. Smooth any splintered board edges with sandpaper and wipe away the dust. Clean and dry the areas of glass that will meet the wood.
- Mark the centers. Measure each board and make a small removable center mark. This will help keep the two glass supports aligned vertically.
- Build the lower tier. Put the first board on a protected, level work surface. Apply adhesive to the base of one glass holder as directed by the manufacturer. Center it on the board and hold it in place until it stays steady.
- Add the middle board. Apply adhesive to the holder’s upper contact surface. Lower the second board onto it, lining up the center mark. Check from several angles that the board is level.
- Repeat for the top tier. Attach the second glass holder in the center of the middle board. Then bond the third board to its top, keeping all three boards aligned.
- Let it cure completely. Leave the stand undisturbed for the full time stated on your adhesive. Do not move or load it while the bond is setting.
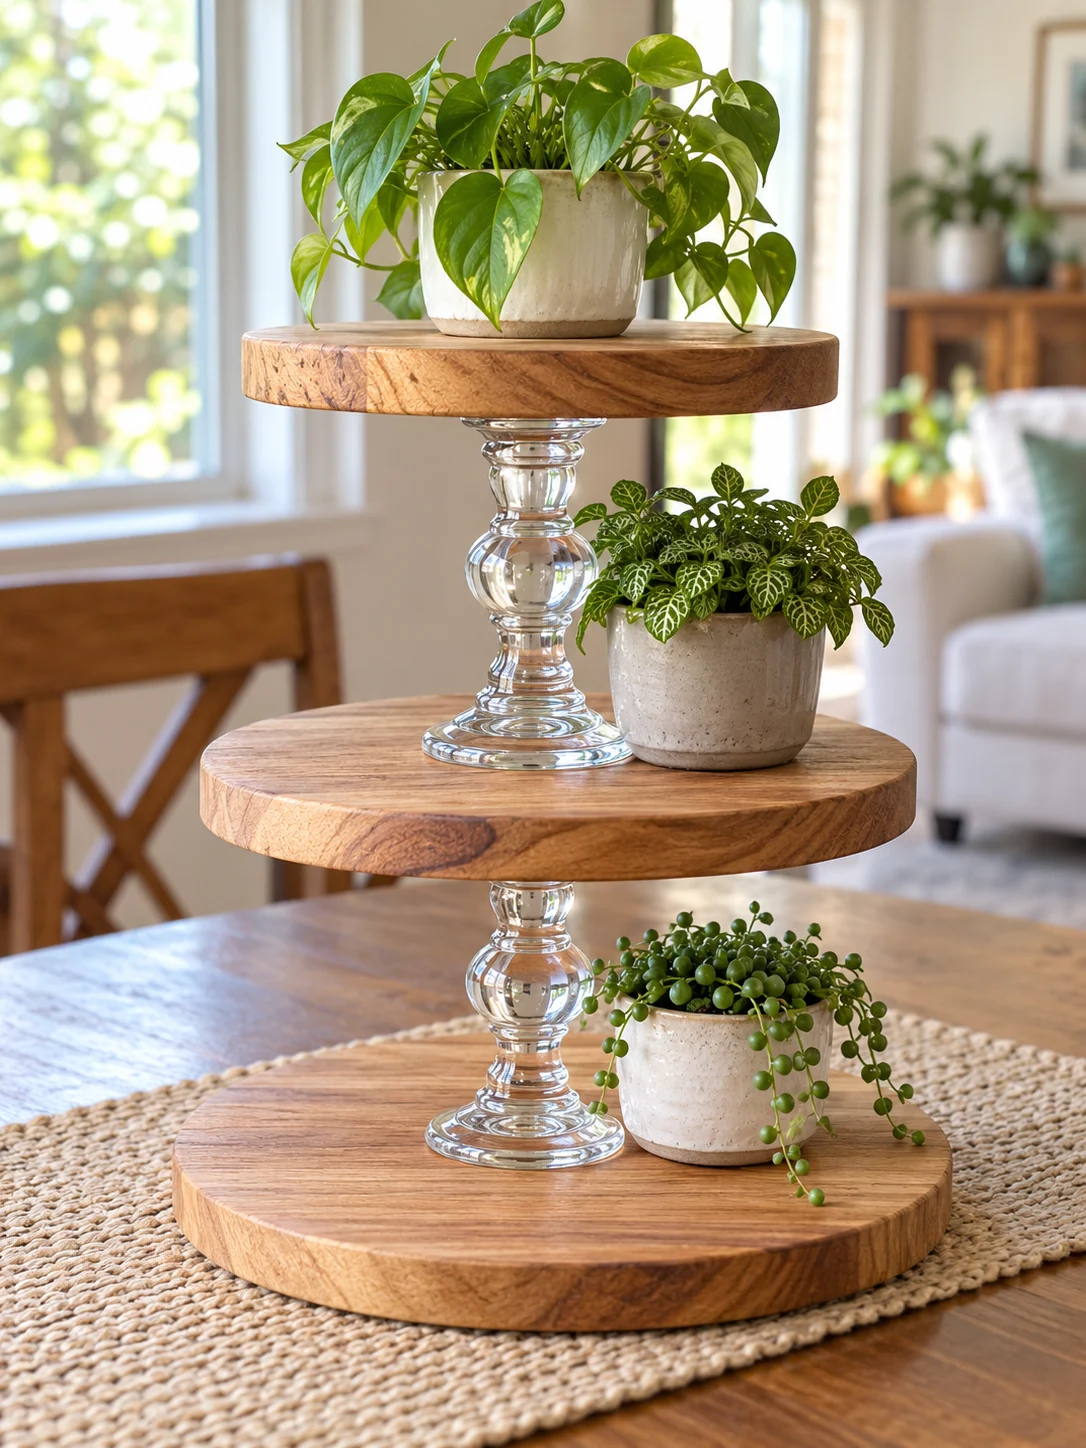
- Style it lightly. Start with small, lightweight potted plants. Keep their weight near the center of each board, use saucers to catch water, and stop using the stand if any joint shifts or wobbles.
Where to Display It
A bright living-room corner, covered porch, or dining-room sideboard can show off the wood-and-glass contrast. Use plants suited to the available light. Group a trailing plant with compact foliage or small succulents, leaving enough space to water them without soaking the wood or adhesive.
Variations & Tips
- Paint or stain the boards before assembly, allowing the finish to dry fully. Follow the finish label if the stand may be exposed to moisture.
- Try matching square or oval boards for a different silhouette, provided the stand remains balanced.
- For a more industrial look, choose sturdy metal holders with suitable flat bonding surfaces.
- Add small felt pads under the bottom board to protect your table.
- Use this as a decorative plant display rather than a step stool or a shelf for heavy items. Do not place lit candles near the plants or the finished stand.
With patient assembly and a few well-chosen plants, the finished piece becomes an easy focal point without taking up much floor space.