There is something especially satisfying about taking the simplest little dollar store find and turning it into a whole tray of winter charm. I’ve always had a soft spot for easy holiday crafts like this—projects you can finish in an afternoon at the kitchen table, with just enough handwork to feel cozy and creative without turning into a big production.
This one is perfect for anyone who likes inexpensive decorations that still feel thoughtful and homemade. I love making things in batches, and a dozen matching pieces like this can trim a tree, tuck into gift toppers, or fill a bowl on the mantel so beautifully that they look far more special than their humble beginnings would suggest.
Materials
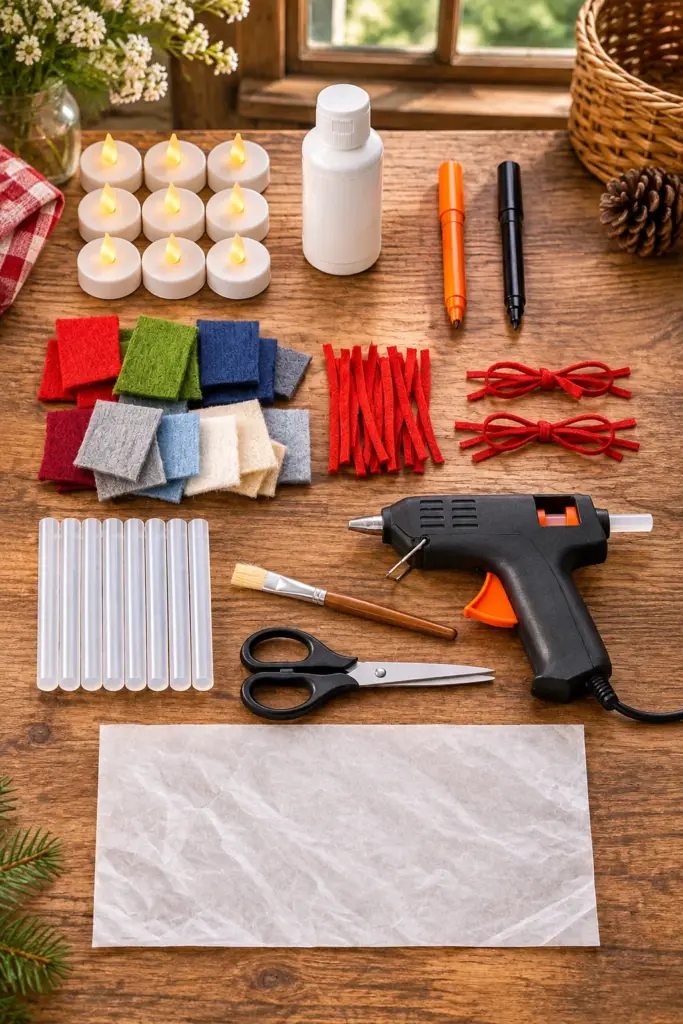
12 battery-operated dollar store tea lights
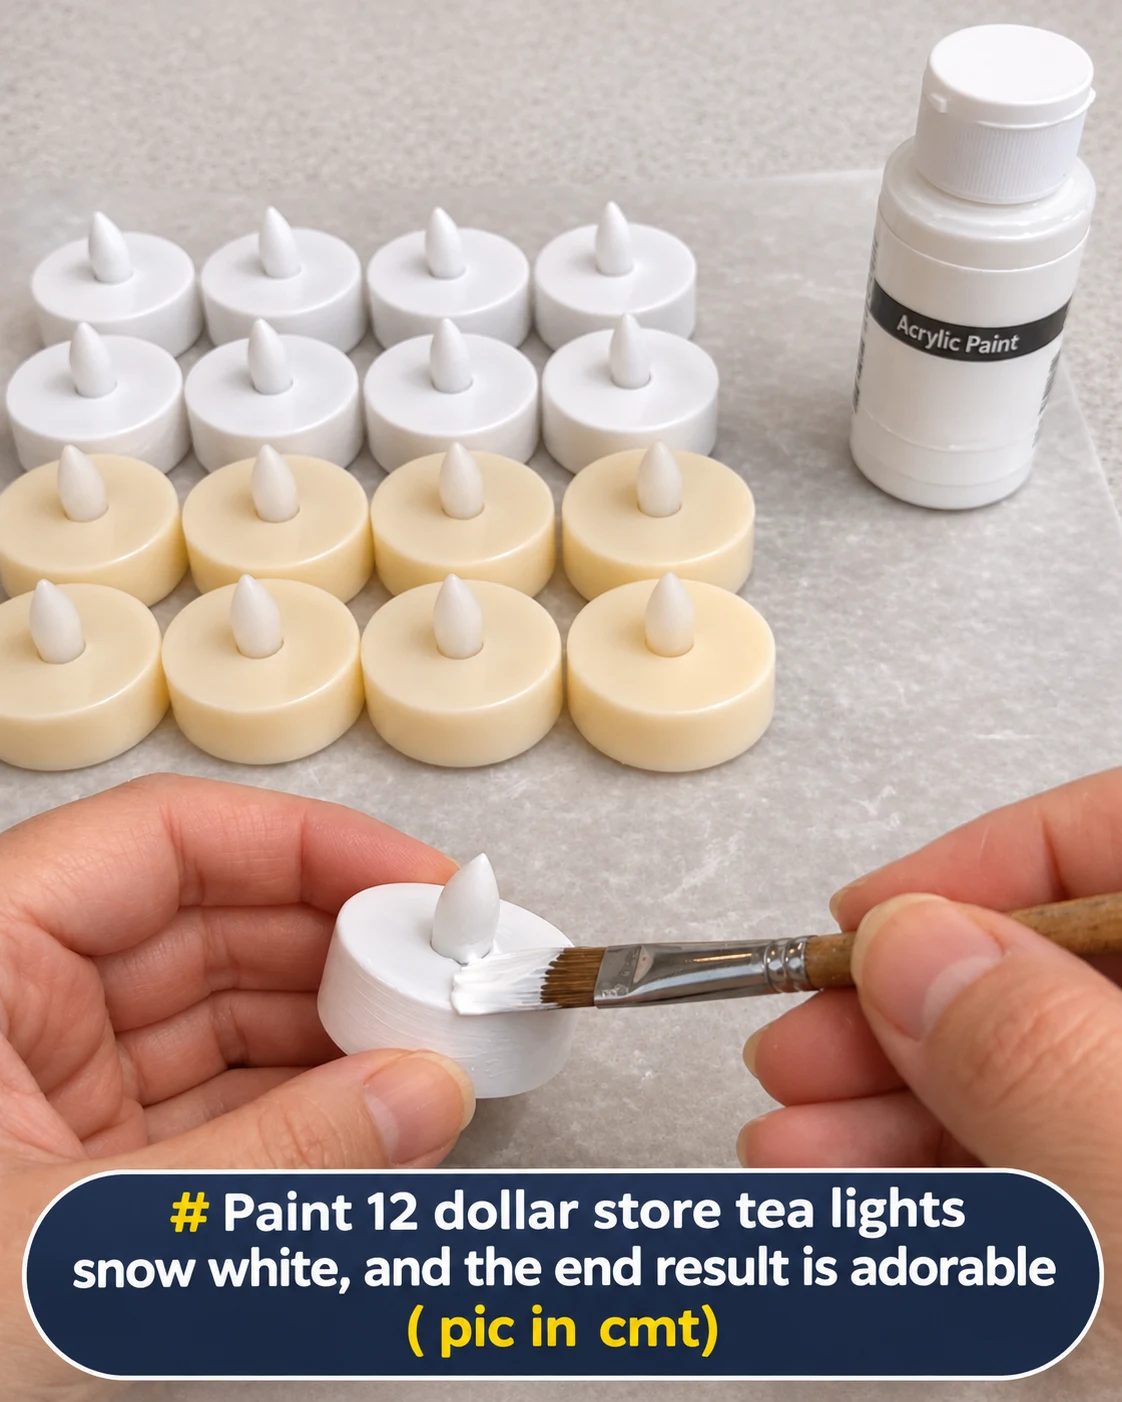
1 bottle white acrylic craft paint, about 2 fl oz
1 orange paint pen or 1 small bottle orange craft paint
1 black fine-tip paint pen
12 scraps of old sweater knit or felt, each about 1 inch x 4 inches
12 short pieces red ribbon or baker’s twine, each 6 to 7 inches long
2 hot glue sticks
1 small paintbrush, about 1/4 inch wide
1 hot glue gun
1 pair scissors
1 sheet wax paper, about 12 x 18 inches
Instructions
1. Cover your work surface with the wax paper and line up all 12 tea lights in rows, making sure the on-off switches are facing where you can reach them easily.
2. Paint the plastic shell of each tea light with white acrylic paint, working around the sides and top but leaving the flame-shaped bulb unpainted. Let the first coat dry completely, then add a second coat for a solid snowy finish.
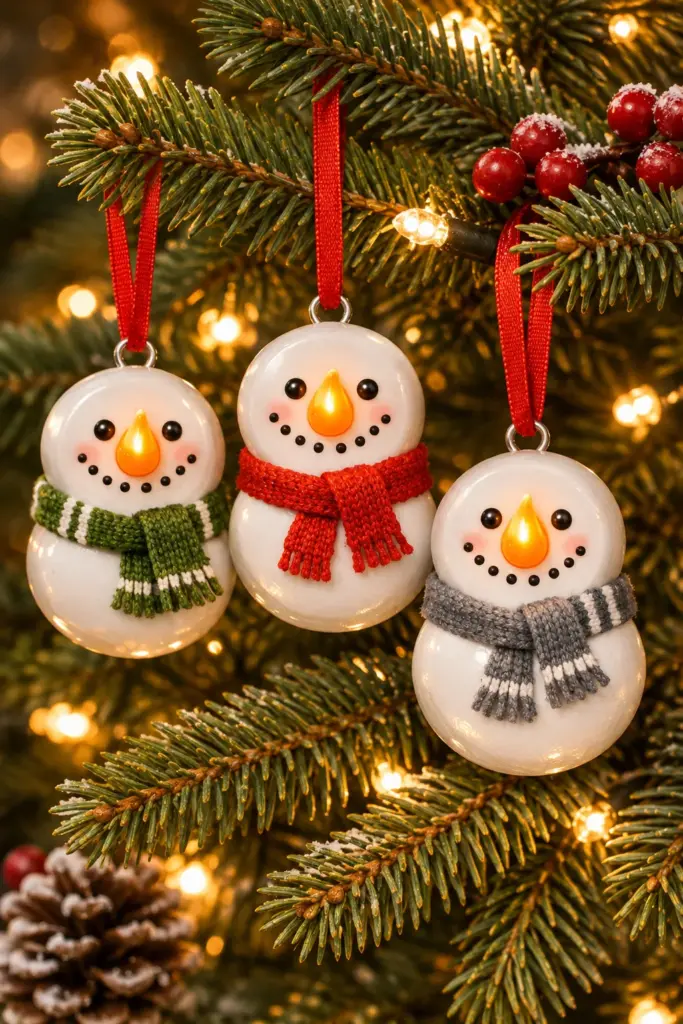
3. Once the white paint is fully dry, use the black fine-tip paint pen to add two eyes and a dotted smile on the front of each tea light, placing the face below the bulb so the bulb can become the nose.
4. Color the flame-shaped bulb with the orange paint pen, or brush on orange paint carefully if that’s what you have, and let it dry well before handling.
5. Cut each sweater or felt scrap into a tiny scarf shape if needed, then wrap one around the neck area of each tea light just under the bulb. Secure the overlap at the back with a tiny dot of hot glue.
6. Tie each 6- to 7-inch ribbon or twine piece into a loop, then hot glue the ends together at the back top of the tea light so the hanger sits neatly behind the bulb.
7. Turn each light on and check that the face is centered and the scarf doesn’t block the switch or battery door; trim any bulky ends so the ornament hangs straight.
8. Let all glue set for a few minutes, then fluff the scarf ends and arrange the finished pieces together so the little glowing faces can all show. If you’re giving them away, I like to group them in sets of three or four with a bit of ribbon—they make such sweet little gifts.
Variations & Tips
Scarf Fabrics: Old sweater knit gives these the coziest look, but felt is easier to cut cleanly and won’t fray. I often mix both so the finished batch has a little variety.
Face Style: Keep the features simple and bold. Tiny details can disappear from a distance, so two clear eyes and a dotted smile read much better on the tree.
Paint Coverage: If your tea lights are shiny plastic, two coats usually do the trick, but very slick ones may need a thin third coat. Let each layer dry before adding the next so the finish stays smooth.
Hanger Placement: Glue the ribbon loop to the back, not the top of the bulb, so the ornament hangs upright and the snowman’s face points forward.
Kid-Friendly Shortcut: If little ones are helping, an adult can handle the hot glue while children do the painting and faces. It makes a lovely family afternoon craft, and every snowman comes out with its own personality.
Gift Idea: Tuck a set into a cookie tin, holiday mug, or brown paper gift bag with tissue. Handmade ornaments like these have the sort of old-fashioned charm people remember from year to year.