
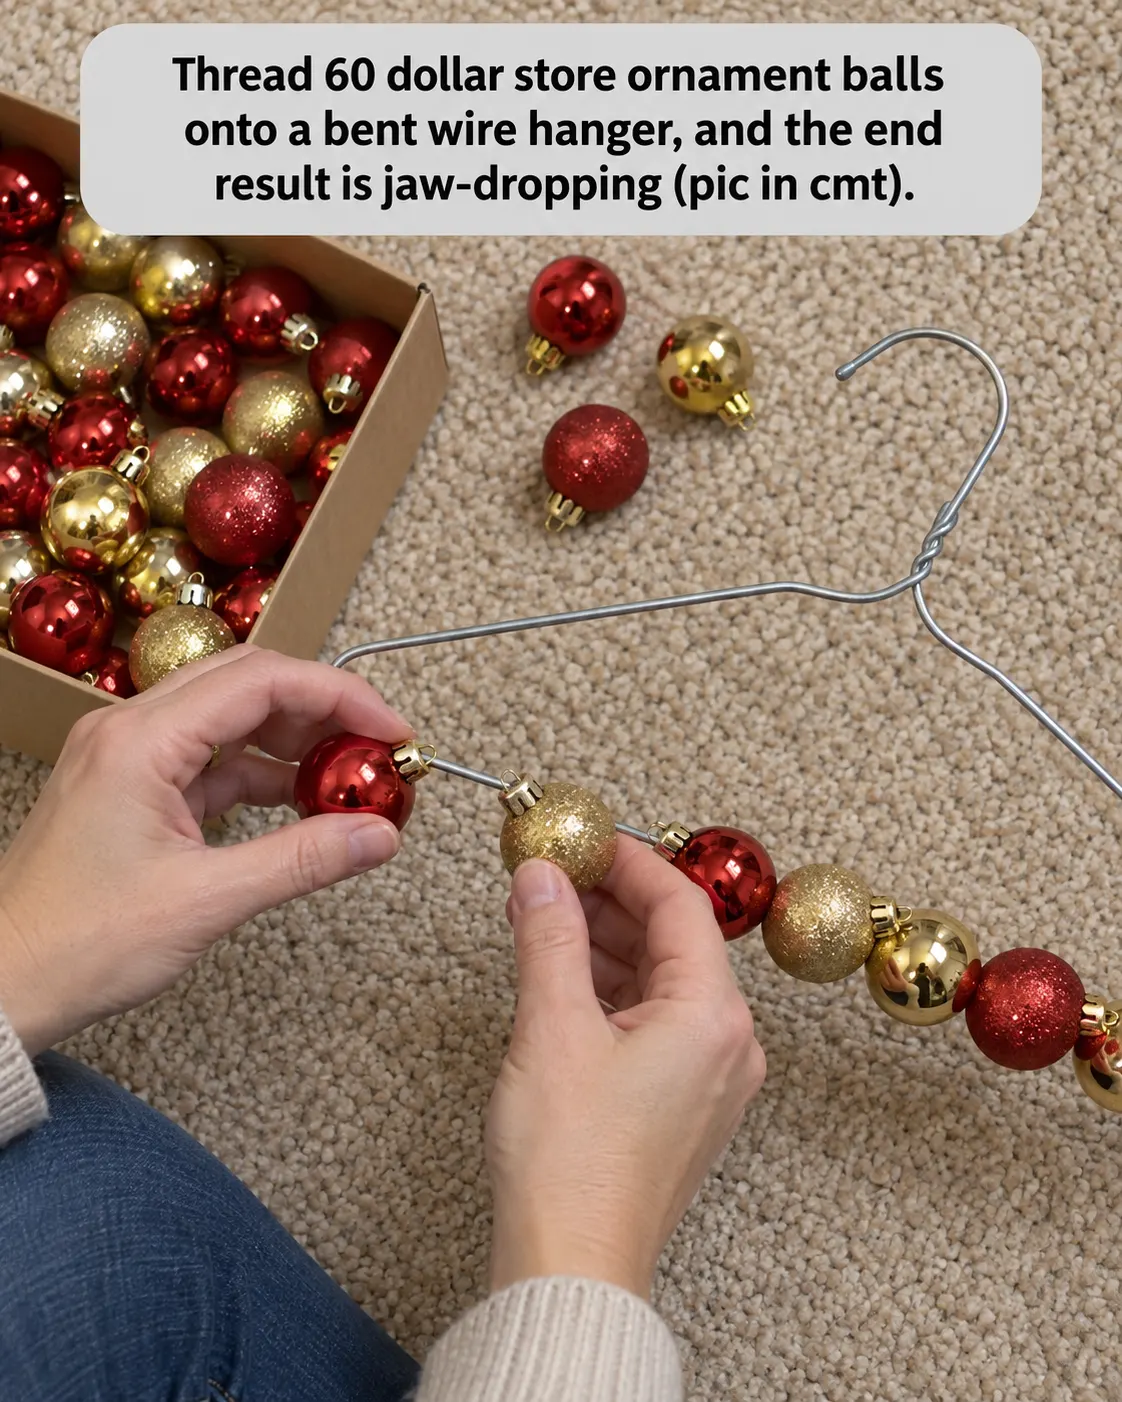
I’m a sucker for a holiday craft that looks like it came from a fancy home décor shop but costs about the same as lunch. And this dollar store ornament wreath made with a wire hanger checks every box.
You start with one ordinary wire coat hanger and about 60 shatterproof Christmas ornament balls. That’s it for the basic structure. Once those ornaments are packed tightly together, the plain hanger disappears and turns into a big, colorful Christmas wreath that looks surprisingly expensive.
Honestly, this is one of those projects where the finished result makes you say, “Wait… that came from a coat hanger?”
Even better, you don’t need advanced craft skills. Plan on roughly an hour of hands-on work and around $15 in supplies, depending on where you buy your Christmas ornaments and ribbon.
One thing matters before you start: use shatterproof plastic ornaments, not glass. You’ll be pushing, turning, and packing them closely together, so plastic ornament balls make the project much easier and safer.
This DIY Christmas ornament wreath works especially well indoors or on a covered front door where rain, wind, and strong sunlight won’t damage the finish.
Wire hanger, ornaments, glue, ribbon, and pliers laid out for the wreath
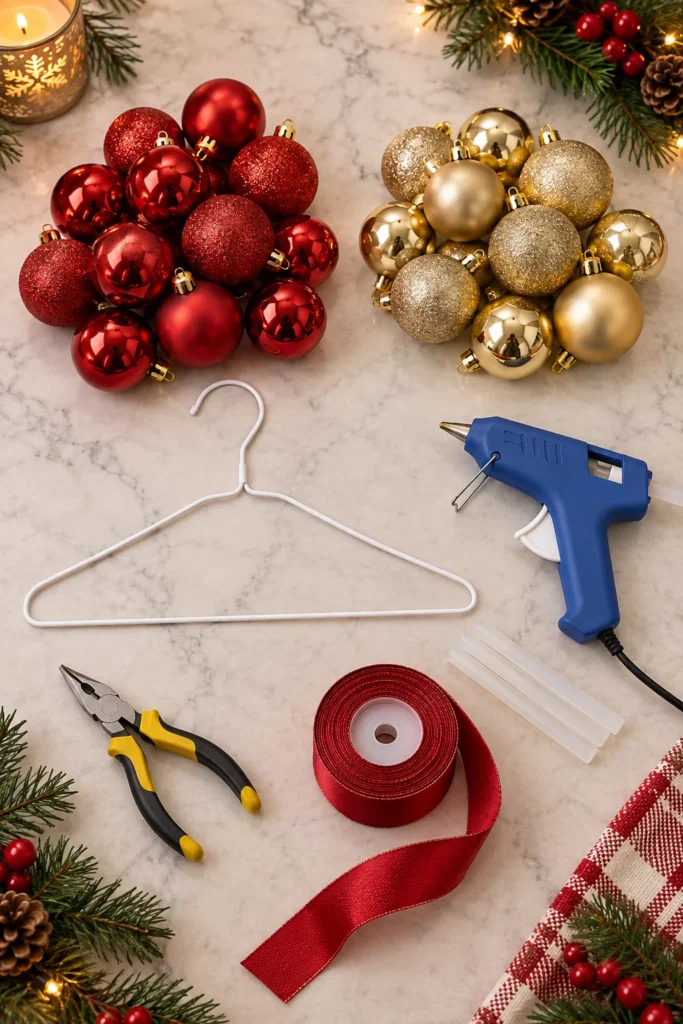
Materials for a Dollar Store Ornament Wreath
You don’t need a huge craft haul for this one. Most of the supplies may already be sitting in a closet, junk drawer, or holiday storage bin.
You will need:
- 1 standard wire coat hanger
- About 60 shatterproof ornament balls
- 20 mini ornaments, around 1 inch
- 20 medium ornaments, around 1.5 to 2 inches
- 20 large ornaments, around 2.5 to 3 inches
- 1 standard hot glue gun
- About 4 hot glue sticks
- 1 pair of needle-nose pliers
- 24 inches of wide ribbon, around 2.5 to 3 inches wide
- 1 small piece of floral wire or a twist tie, about 6 inches long
Red and gold ornaments create that classic Christmas look, but don’t feel boxed in by those colors. Silver, white, green, champagne, burgundy, blush, and even colorful candy-style ornaments can look fantastic.
The real trick is mixing ornament sizes. Large balls build the body of the wreath, while smaller ornaments slip into those awkward little spaces that would otherwise look empty.
How to Make a Christmas Ornament Wreath From a Wire Hanger
1. Sort Your Christmas Ornaments
Start by dividing your ornaments by size and color.
I like putting them into separate bowls or piles because once you start threading them onto the hanger, things move pretty fast.
Check every ornament cap while you’re sorting.
If a cap feels loose, don’t trust it. Actually, I wouldn’t trust any of them.
Hot glue each metal or plastic cap securely to its ornament ball before threading anything onto the wire. Let the glue cool completely.
This tiny step can save the entire project.
Without glue, an ornament may separate from its cap while the cap stays on the wire. Suddenly you’ve got a runaway Christmas ball rolling across the floor while the wreath develops a bald spot. Ask me how I know.
2. Open the Wire Coat Hanger
Grab your needle-nose pliers and untwist the wire near the hanger hook.
Open the hanger completely.
Next, gently shape the hanger into a large circle. It doesn’t have to look perfectly round yet, so don’t spend forever fussing with it.
Keep the original hanger hook at the top.
That hook becomes a built-in hanger for your finished Christmas wreath, which is pretty clever considering the whole thing started in a closet.
3. Thread the Ornament Balls Onto the Hanger
Now comes the fun part.
Slide the ornament caps directly onto one open end of the wire hanger.
Alternate your colors as you work. If you’re using red and gold, for example, you might add two red balls, one gold ball, another red, then a couple of gold ornaments.
Don’t follow the exact same pattern all the way around. A slightly random arrangement usually looks richer and more natural.
Mix the sizes too.
Place a large ornament next to a medium one, then work a mini ornament nearby.
Rotate the balls so they face different directions. This keeps the caps from lining up in one obvious row and gives the wreath a thicker, more layered appearance.
4. Pack the Ornaments Tightly
Here’s where this DIY ornament wreath starts changing from “cute craft” to “where did you buy that?”
Push those ornaments together.
Then push them together a little more.
The balls should feel crowded on the wire. You’re trying to hide as much of the hanger as possible.
At first, packing everything tightly may feel like too much. Trust the process here. A loose ornament wreath tends to look thin, while a packed wreath gets that big, rich holiday-store appearance.
The ornaments will naturally shift forward, backward, and sideways as you add more. That’s exactly what you want.
5. Check the Wreath for Empty Spots
Every few minutes, lift the wreath and look at it from the front.
You’ll probably notice a few gaps between the larger ornament balls.
Use smaller ornaments to break up those areas.
You can also rotate nearby ornaments until they sit in a better position.
This is why mixed-size ornament packs are such a great buy for this project. Those little balls aren’t just decorative extras—they’re gap fillers.
And yep, those tiny adjustments make a big difference.
6. Continue Until the Hanger Looks Very Full
Keep threading ornaments until they travel almost all the way around the wire circle.
You want the wreath to look slightly overfilled.
If you reach the point where you’re thinking, “Okay, surely that’s enough ornaments,” add a few more if you still have room.
That packed look is the secret.
Just leave enough bare wire at the ends so you can twist the hanger closed again.
7. Close the Wire Hanger
Once your ornaments fill the circle, bring the two open wire ends together.
Use your needle-nose pliers to twist them securely.
While closing the wire, gently pull and shape the wreath into a rounder circle.
Don’t worry if it looks a little lopsided at first. Plastic ornaments move easily, so you can adjust the final shape afterward.
Tuck any sharp wire end toward the inside of the wreath.
You definitely don’t want a little metal point scratching your front door or snagging the ribbon.
8. Add a Big Christmas Bow
Now for the part that makes everything look finished.
Take your wide ribbon and tie it into a full bow.
Place the bow near the hanger connection at the top of the wreath. This covers the twisted wire while adding another big decorative detail.
Secure the bow with floral wire, a twist tie, or a small amount of hot glue.
I prefer floral wire because it makes the bow easier to remove or replace later. So if you suddenly decide next Christmas that plaid ribbon is your whole personality, you can switch it without rebuilding the wreath.
9. Give the Ornament Wreath a Final Check
Before hanging your wreath, look at it straight on.
Fluff the bow.
Rotate any ornaments with awkward caps facing forward.
Move smaller balls toward visible gaps.
Then check that the original hanger hook sits near the center.
Once everything looks balanced, your homemade Christmas ornament wreath is ready to hang.
Finished red and gold ornament wreath with ribbon bow
Finished red and gold ornament wreath with ribbon bow
Why Shatterproof Ornaments Work Best
Plastic Christmas ornaments are the smart choice for a wire hanger wreath.
First, they’re lightweight. Sixty glass ornaments would add quite a bit of weight to a thin wire hanger.
Second, shatterproof ornaments can handle being pushed against one another while you shape the wreath.
And third, well, gravity happens.
If the wreath slips while you’re making it, plastic ornaments are far more forgiving than glass balls scattered across the floor.
Dollar stores, discount shops, and seasonal clearance sections often sell large packs of plastic ornaments in matching colors, which can keep the total cost pretty low.
How Many Ornaments Do You Need for a Wire Hanger Wreath?
About 60 ornaments works well for a standard adult-size wire hanger.
Your exact number may vary depending on ornament size.
If most of your ornaments are large, you may need fewer. If you’re working mainly with small Christmas balls, you’ll probably need more.
A mix of roughly 20 small, 20 medium, and 20 large ornaments gives you plenty of flexibility.
Personally, I’d grab a few extras if they’re cheap. Running out with four inches of empty hanger left is not the kind of holiday surprise anybody wants.
Christmas Ornament Wreath Color Ideas
Red and gold is hard to beat. It feels warm, traditional, and instantly festive.
But there are plenty of other color combinations worth trying.
Silver and white: This pairing gives the wreath an icy, snowy appearance that works beautifully with winter décor.
Emerald green and champagne: The colors feel rich without looking too busy.
Red, white, and green: Go full classic Christmas with the traditional holiday trio.
Blush pink and gold: This combo creates a softer, modern holiday look.
Blue and silver: Great for winter decorating when you want something less traditional.
Multicolor ornaments: Bright reds, blues, greens, pinks, and golds can give the wreath a cheerful vintage Christmas feel.
Try sticking with two or three main colors. Too many unrelated shades can make the wreath feel visually crowded instead of intentionally full.
The Best Budget Trick for This DIY Christmas Wreath
Buy ornaments in mixed-size tubs whenever possible.
You’ll often pay less per ornament, and the size variety is exactly what this wreath needs.
Check dollar stores, discount retailers, thrift stores, and post-holiday clearance bins too.
Old ornaments work perfectly well as long as the caps are secure and the surface still looks good.
You can even mix ornaments from several different packs. Once everything is crowded together on the hanger, slight differences in finish can add character.
Matte, shiny, glittered, and metallic ornaments look especially pretty when mixed together.
Don’t Skip Gluing the Ornament Caps
If you remember only one tip from this project, make it this one:
Glue every ornament cap before you thread it onto the hanger.
Seriously.
Those little caps are often held inside plastic ornaments by nothing more than a tiny wire or a snug fit.
When you start packing 60 ornaments tightly together, pressure builds between them. A loose ball can pop away from its cap, leaving the cap attached to your wreath and the ornament on the floor.
A tiny dab of hot glue takes seconds and saves a whole lot of annoyance later.
More Ornaments Make the Wreath Look Better
One common mistake is stopping too early.
When you first cover the entire hanger, the wreath may technically be finished, but it can still look sparse.
Keep pushing the ornaments closer together.
Turn larger balls slightly outward and let smaller ornaments settle between them.
The extra fullness creates depth, which makes the finished wreath look much more substantial.
Basically, when you think it looks full, give it one more look before calling it done.
Where to Hang Your Ornament Wreath
This ornament ball wreath works best indoors or in a sheltered outdoor spot.
Hang it on:
- An interior door
- A covered front door
- A pantry door
- A fireplace wall
- A hallway hook
- A bedroom door
- A large mirror
- A kitchen wall
Avoid placing it where rain, snow, or strong wind can hit it directly.
Repeated sun exposure may also fade some ornament finishes over time.
If you’re using the wreath on a door, check the back for exposed wire before hanging it. A small piece of felt or ribbon over any rough area can help protect painted surfaces.
How to Fix an Uneven Ornament Wreath
Don’t panic if your wreath looks a little wonky after you close the hanger.
Mine usually does at first.
Hold the wreath upright and gently press the outer edges into a round shape.
Then rotate individual ornaments instead of trying to bend the wire aggressively.
Large ornaments can move toward the outside edge, while smaller balls can shift toward the center or into empty spaces.
Once the wreath is hanging, gravity also helps everything settle.
Stand a few feet away, look for thin spots, and make another couple of adjustments.
Done.

A Simple Christmas Craft That Looks Surprisingly Expensive
There’s something satisfying about turning an ordinary coat hanger into Christmas décor that looks like it belongs in a holiday display.
You don’t need fancy tools. You don’t need pricey craft-store supplies. And you definitely don’t need an entire weekend.
With around 60 shatterproof ornament balls, one wire hanger, a little hot glue, and a big ribbon bow, you can make a full DIY Christmas ornament wreath for roughly $15.
Best of all, nobody looking at the finished wreath would guess how simple the starting materials were.
So yeah, save that wire hanger.
This might be the prettiest thing it ever wears.