
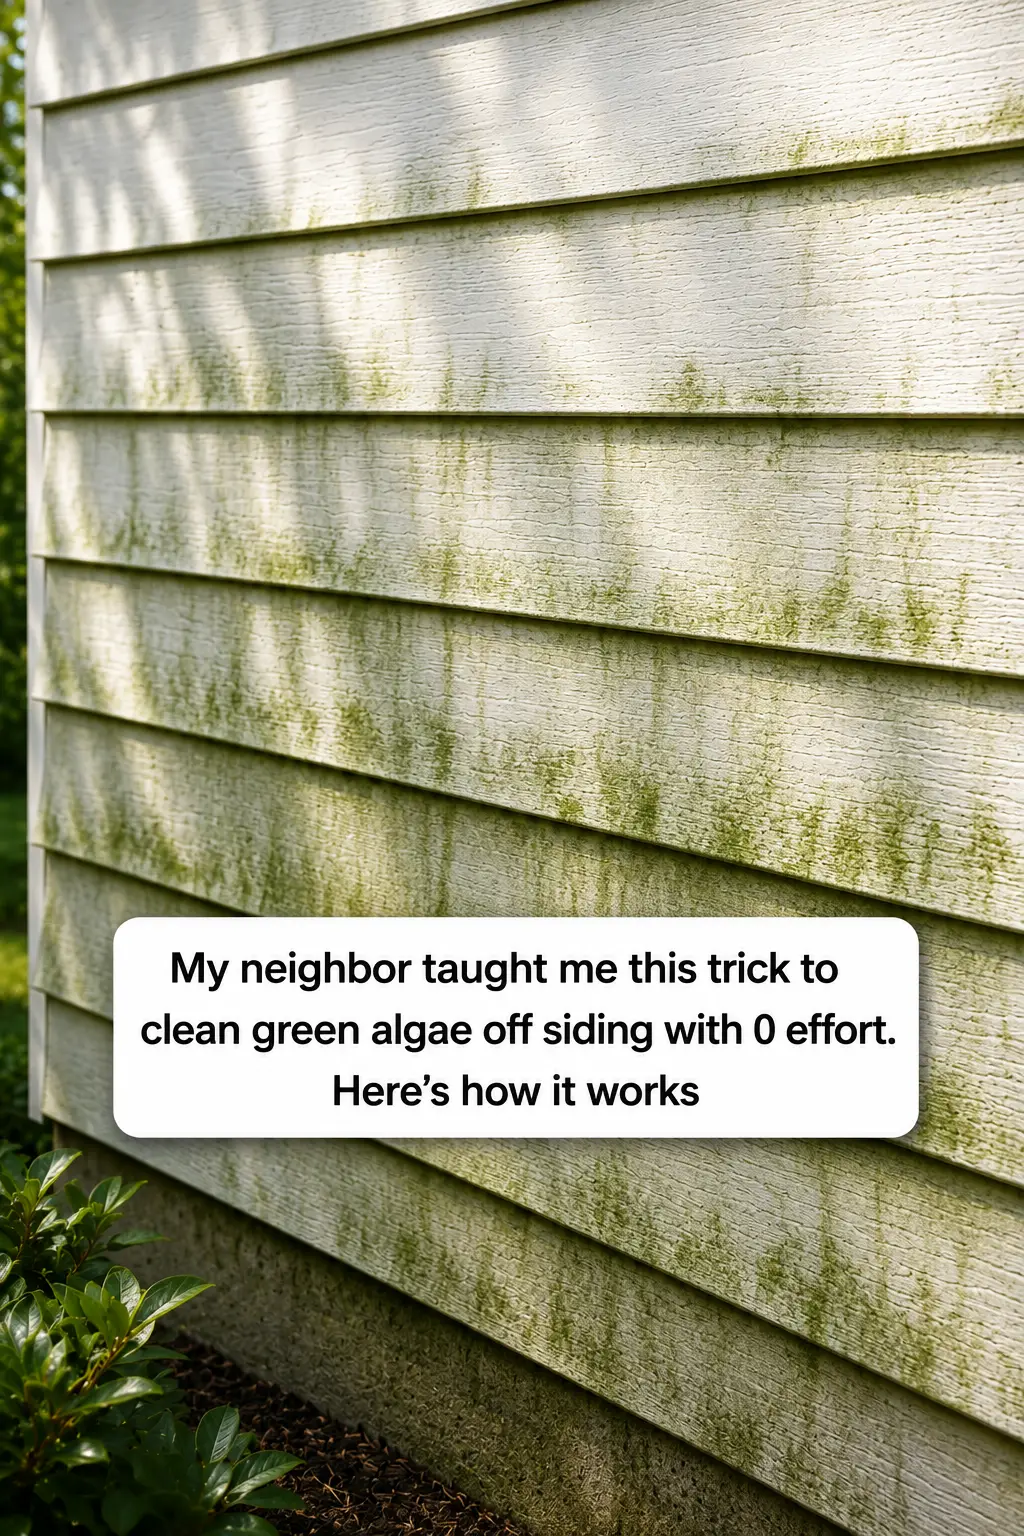
You know that green stuff that slowly creeps across the shady side of a house?
At first, it’s barely noticeable. Then one afternoon you look at the siding and think, “Wait… when did my house turn green?”
That green coating is often algae or another type of biological growth encouraged by moisture, shade, and poor airflow. North-facing walls, areas behind shrubs, and siding near downspouts tend to get hit especially hard.
The good news is that cleaning green algae off siding doesn’t always require hours of aggressive scrubbing or blasting the house with a pressure washer.
A gentler approach can do much of the work for you.
The basic method is simple: choose a siding-safe exterior cleaner, wet or protect nearby landscaping as directed, apply the cleaner according to its label, give it the required contact time, and rinse if the product calls for rinsing.
Yep, that’s pretty much the trick.
But there are a few important details that can mean the difference between clean siding and a Saturday afternoon you seriously regret.
Why Does Green Algae Grow on House Siding?
Green growth needs moisture.
When part of your siding stays damp for long periods, algae can begin forming on the surface.
Shade makes the problem worse because sunlight isn’t available to dry the wall as quickly.
That’s why one side of a house can look perfectly clean while another looks like it’s auditioning to become part of the forest.
Common problem areas include siding near trees, shrubs, gutters, leaking downspouts, outdoor faucets, sprinkler systems, and heavily shaded walls.
Humidity can also contribute.
If you live somewhere with warm, damp summers, you probably know exactly what I’m talking about.
Is the Green Stuff on Siding Always Algae?
Not necessarily.
Green or dark discoloration can come from algae, mildew, mold-like growth, dirt, pollen, moss, or a combination of several things.
The appearance alone doesn’t always tell you exactly what’s growing there.
Fortunately, many exterior cleaners are designed for common organic stains on siding.
Read the product label carefully and confirm that it’s intended for both the surface you’re cleaning and the type of staining you’re trying to remove.
Don’t just grab the strongest bottle in the garage.
Stronger isn’t automatically better.
The Easy Way to Clean Green Algae Off Siding
The biggest misconception is that you need to scrub every inch of the wall.
Usually, the cleaning product needs time to do its job.
People often spray cleaner onto siding and immediately start scrubbing like they’re trying to erase a bad memory.
Give the product its labeled contact time instead.
That waiting period can loosen grime and organic buildup, making the final cleaning much easier.
Some products require rinsing afterward.
Others are made for different application methods.
Always follow the directions for the exact cleaner you’re using.
What You’ll Need
Before starting, gather the basics.
You may need:
- A cleaner labeled as suitable for your type of siding
- Garden hose
- Hose-end sprayer or pump sprayer if recommended
- Soft-bristle brush for stubborn areas
- Protective gloves
- Eye protection
- Old clothes
- Drop cloths or plastic coverings where appropriate
- Access to clean water
- A stable extension cleaning tool for higher areas
Avoid climbing a wet ladder while holding cleaning equipment if you can safely reach the area another way.
Wet siding projects and questionable ladder decisions are not a great combo.
Step 1: Identify Your Siding Material
Before spraying anything, figure out what your siding is made from.
Vinyl siding is common, but homes may also have painted wood, fiber cement, aluminum, engineered wood, stucco, brick accents, or combinations of materials.
A cleaner that’s appropriate for one surface may not be appropriate for another.
Check the siding manufacturer’s care recommendations when available.
This is particularly important with painted or coated surfaces because harsh chemicals can affect color or finish.
When in doubt, test first.
Step 2: Pick a Cool, Calm Day
Timing matters more than you’d think.
Avoid cleaning siding when the surface is blazing hot from direct sunlight.
Heat can cause some cleaning products to dry too quickly.
A mild, overcast day can be much easier to work with.
Also avoid very windy conditions.
You want the cleaner on the siding—not blowing toward your face, your neighbor’s car, or the flower bed.
Check the cleaner’s temperature and weather instructions before beginning.
Step 3: Protect Plants and Outdoor Items
Before applying any exterior cleaner, read its landscaping precautions.
Move patio furniture, toys, grills, cushions, pet bowls, and other movable objects away from the work area.
Cover or otherwise protect sensitive items when appropriate.
Some products instruct users to thoroughly wet nearby plants before application and rinse them afterward.
Follow the product label rather than assuming every cleaner is harmless around landscaping.
Your siding can look fantastic without sacrificing Grandma’s hydrangeas.
Step 4: Close Windows and Doors
This sounds obvious until you’re halfway through spraying.
Close nearby windows.
Close doors.
Check screens.
Move anything sitting directly against the house.
Also inspect outdoor electrical fixtures and outlets.
Don’t intentionally spray water or cleaning solution into electrical equipment, vents, openings, or gaps in the exterior.
A little preparation saves a whole lot of “Oh no.”
Step 5: Test the Cleaner on a Hidden Area
I always like a small test spot before covering an entire wall.
Choose an inconspicuous section.
Apply the product according to its instructions.
Wait the recommended amount of time.
Rinse if required.
Then inspect the area after it dries.
Look for discoloration, streaking, fading, or changes to the finish.
If everything looks normal, continue.
Five extra minutes here can save you from discovering that your entire wall now has a surprise new color.
Step 6: Apply the Siding Cleaner Evenly
Follow the cleaner’s instructions for dilution and application.
Some products come ready to use.
Others need dilution.
Never assume that making the mixture stronger will make it work better.
It could damage the siding, landscaping, or surrounding finishes.
Apply an even amount across the stained section.
Work in manageable areas so you can control contact time and prevent unwanted drying.
Step 7: Let the Cleaner Sit
Here’s the low-effort part.
Wait.
Really.
Let the cleaner remain on the surface for the amount of time stated on its label.
This gives it time to work on the green buildup.
Don’t wander off for two hours, though.
Some cleaners should not be allowed to dry on the siding.
Set a timer if you’re forgetful.
I do.
Because “I’ll remember in ten minutes” has betrayed me before.
Step 8: Gently Brush Stubborn Areas
If the green staining is heavy, you may still need a little physical cleaning.
Use a soft-bristle brush or another tool recommended for your siding.
Work gently.
You shouldn’t need to attack the wall.
Pay extra attention to textured areas, seams, trim, and spots where grime has built up heavily.
Often, once the cleaner has had enough contact time, stubborn material comes away much more easily.
That’s the whole point of letting chemistry handle part of the job.
Step 9: Rinse Thoroughly When Required
If your chosen cleaner requires rinsing, use clean water and follow its directions.
A regular garden hose is often sufficient for routine cleaning.
Rinse away loosened grime and cleaner residue.
Be mindful around seams, windows, doors, vents, and electrical fixtures.
You want water moving across the exterior surface rather than being forced behind it.
Then let the wall dry.
That’s when you can really see the difference.
Do You Need a Pressure Washer?
Usually, you don’t need to start there.
Pressure washers can clean exterior surfaces quickly, but excessive pressure or poor technique can damage siding, strip paint, force water behind panels, or affect seals around openings.
Vinyl siding can also be damaged if a powerful stream is used incorrectly.
If your siding manufacturer allows pressure washing, follow its recommendations carefully.
Otherwise, a garden hose, suitable cleaner, and soft brush can be a much gentler starting point.
Honestly, I’d rather spend a little more time cleaning than accidentally turn a siding project into a repair project.
Why Spraying Upward Can Cause Problems
Many siding systems are designed to shed rainwater coming from above.
That doesn’t necessarily mean they’re designed for a concentrated stream of water shooting upward beneath overlapping sections.
Directing high-pressure water upward can push moisture behind siding.
Keep this in mind when rinsing.
Use controlled water pressure and avoid intentionally forcing water into seams or gaps.
What About Bleach?
Bleach-based solutions are commonly discussed for exterior cleaning, but they aren’t appropriate for every siding material, finish, landscaping situation, or household setup.
They can discolor some surfaces and harm plants when mishandled.
They also require careful handling.
Never mix bleach with ammonia, acids, vinegar, or other household cleaners. Dangerous gases can form.
If you choose a bleach-containing exterior product, use one specifically labeled for the intended application and follow its directions exactly.
Don’t create a random chemical cocktail from something you saw in a comment section.
Can Vinegar Remove Green Algae From Siding?
Vinegar gets recommended for almost everything around the house.
Sometimes that’s reasonable.
Sometimes… not so much.
Its acidity can affect certain materials and finishes, and homemade concentrations aren’t standardized.
Before applying vinegar to exterior siding, check the siding manufacturer’s care recommendations.
A product made and labeled for exterior siding can be a more predictable choice.
The goal isn’t simply killing green growth.
You also want the siding to look good afterward.
What About Dish Soap?
A mild cleaning solution may help with ordinary dirt on some siding types, but dish soap isn’t automatically the right answer for heavy biological growth.
It can also leave residue when used too heavily.
Again, check the siding manufacturer’s instructions.
If you’re dealing with substantial green growth, choose a product intended for that specific job rather than pouring half the kitchen under the sink into a bucket.
Why You Should Never Mix Cleaning Chemicals
This deserves repeating.
Don’t mix cleaning products unless their labels specifically instruct you to do so.
Household cleaners can contain ingredients that react dangerously when combined.
Bleach and ammonia are a particularly dangerous combination.
Bleach and acidic cleaners can also release hazardous gas.
More chemicals do not mean more cleaning power.
Use one appropriate product according to its directions.
Simple is good.
Breathing comfortably is better.
How to Clean High Siding Without Risky Ladder Work
Green algae always seems to pick the most annoying section of the house.
Of course it does.
For higher areas, consider an extension cleaning brush, long-reach applicator, or hose-end cleaning system that’s suitable for your siding and cleaner.
Avoid stretching sideways from a ladder.
Don’t stand on makeshift platforms.
And don’t climb onto a wet roof to clean siding.
If the affected area can’t be reached safely from the ground, hiring a professional may be worth every penny.
Your siding isn’t worth a trip to the emergency room.
Why Algae Keeps Coming Back
Cleaning removes the visible problem.
It doesn’t necessarily change the conditions that caused it.
If the wall stays damp and shaded, green growth can return.
Look around the problem area after cleaning.
Are gutters overflowing?
Does a downspout leak?
Are sprinklers hitting the siding?
Are shrubs pressed directly against the house?
Are tree branches creating dense shade?
Does the area receive very little airflow?
Fixing those conditions can help the siding stay cleaner longer.
Trim Plants Away From the House
Dense shrubs can trap moisture against siding.
Branches and leaves also block airflow and sunlight.
Keep plants reasonably trimmed away from exterior walls.
You don’t need to remove your landscaping.
Just give the house some breathing room.
Better airflow can help surfaces dry faster after rain or morning dew.
Plus, you’ll actually be able to see your freshly cleaned siding.
Win-win.
Check Your Gutters
If algae repeatedly appears beneath the roofline, inspect the gutter system.
Overflowing or leaking gutters can keep exterior walls wet.
Look for clogs, leaks, poorly positioned downspouts, and areas where water spills against the building.
Cleaning the siding without fixing a water problem is like mopping the floor while the sink is still overflowing.
You’ll be doing the same job again soon.
Check Your Sprinklers
This one gets overlooked constantly.
Turn on your sprinkler system and watch where the water goes.
Is one sprinkler spraying the house every morning?
If so, adjust it.
Repeated watering can keep siding damp and encourage green growth.
Your lawn needs water.
Your vinyl siding does not.
How Often Should You Clean House Siding?
There’s no universal schedule.
Climate, shade, humidity, landscaping, siding material, and surrounding trees all affect how quickly exterior surfaces get dirty.
Some homes may need light cleaning annually.
Others can go longer.
Instead of waiting until the entire wall turns green, deal with small patches when you first notice them.
A little maintenance is much easier than tackling years of buildup.
The Biggest Mistakes People Make
Most siding-cleaning problems come from doing too much rather than too little.
Common mistakes include:
Using excessive pressure.
Applying an overly strong chemical mixture.
Ignoring product dilution instructions.
Mixing different cleaners.
Letting products dry when the label says not to.
Skipping the test patch.
Forcing water behind siding.
Ignoring nearby plants.
Working from an unstable ladder.
Cleaning in intense direct sunlight.
The gentlest method that gets the job done is usually the smarter place to start.
Can This Method Work on White Vinyl Siding?
A siding-safe exterior cleaner can work well on green organic staining on many vinyl surfaces when used according to both the cleaner and siding manufacturer’s directions.
White siding makes green staining especially obvious, so the before-and-after difference can be pretty satisfying.
Still, test the product first.
Pay attention to colored trim, shutters, painted surfaces, metal fixtures, and nearby landscaping.
The wall isn’t the only thing getting sprayed.
Can You Clean Siding Without Scrubbing?
Sometimes.
Light surface growth may respond well to a suitable cleaner with little physical agitation.
Heavier buildup may need gentle brushing.
The trick is giving the cleaner its proper contact time rather than immediately reaching for aggressive scrubbing tools.
If the stain has been sitting there for years, though, don’t expect magic in five seconds.
“Low effort” and “zero laws of physics” are two different things.
How to Keep Siding Cleaner Afterward
Once your siding looks good again, focus on moisture control.
Keep gutters working properly.
Redirect sprinklers.
Trim dense vegetation.
Correct leaks.
Maintain airflow around the exterior.
Inspect shady sections occasionally.
Deal with small patches early.
These simple habits can make future cleaning much easier.
And that means fewer weekends spent staring at a green wall while holding a garden hose.
Frequently Asked Questions
What is the green stuff growing on my siding?
Green staining is often associated with algae or other biological growth encouraged by moisture and shade. Dirt, pollen, mildew-like growth, and moss can also contribute to exterior discoloration.
What is the easiest way to clean green algae off siding?
Start with a cleaner labeled for your siding material and the type of staining present. Apply it according to the label, allow the stated contact time, gently brush stubborn areas if needed, and rinse when directed.
Can I pressure wash algae off siding?
Pressure washing may be allowed for some siding materials, but excessive pressure can cause damage or push water behind the exterior. Check the siding manufacturer’s instructions before using a pressure washer.
Can I use bleach on vinyl siding?
Some products intended for exterior cleaning contain bleach-based ingredients, but suitability depends on the siding, surrounding materials, and product directions. Never mix bleach with ammonia, vinegar, acids, or other cleaners.
Does vinegar kill algae on siding?
Vinegar is often suggested as a home remedy, but acidic solutions may not be appropriate for every siding material or finish. Check manufacturer recommendations before applying it.
Why does algae grow mostly on one side of my house?
Shadier walls tend to remain damp longer. North-facing areas, dense landscaping, trees, gutter problems, and sprinkler spray can create conditions that favor green growth.
How do I stop algae from returning?
Reduce prolonged moisture where possible. Maintain gutters, adjust sprinklers, correct leaks, trim vegetation, and improve airflow around exterior walls.
Should I scrub vinyl siding?
If brushing is needed, use a soft tool suitable for the siding and work gently. Avoid abrasive brushes that could scratch or dull the finish.
Can I clean siding on a sunny day?
Check the cleaning product’s instructions. Strong direct sun can cause some cleaners to dry too quickly, so cooler or overcast conditions may be easier.
How often should siding be cleaned?
It depends on your climate and surroundings. Inspect the siding periodically and clean developing stains before heavy buildup forms.
Final Thoughts
That green wall isn’t necessarily asking for an entire weekend of scrubbing.
The real trick to cleaning green algae off siding is giving the right cleaner enough time to work.
Choose something suitable for your siding.
Read the label.
Protect nearby plants and outdoor items.
Test a small area.
Apply the cleaner evenly.
Wait for the recommended contact time.
Gently brush stubborn spots if necessary.
Then rinse when the instructions call for it.
Afterward, look at why the siding stayed damp in the first place.
Maybe it’s a sprinkler.
Maybe it’s an overflowing gutter.
Maybe those giant shrubs have practically moved into the house.
Correcting the moisture problem can help keep that ugly green coating from returning quite so quickly.
And honestly, that’s the best kind of cleaning trick—not working harder, just avoiding unnecessary work in the first place.