You know those pinecones scattered around the yard that usually get stepped on, kicked aside, or tossed into the compost pile?
Well, apparently they’ve been waiting for their Christmas makeover.
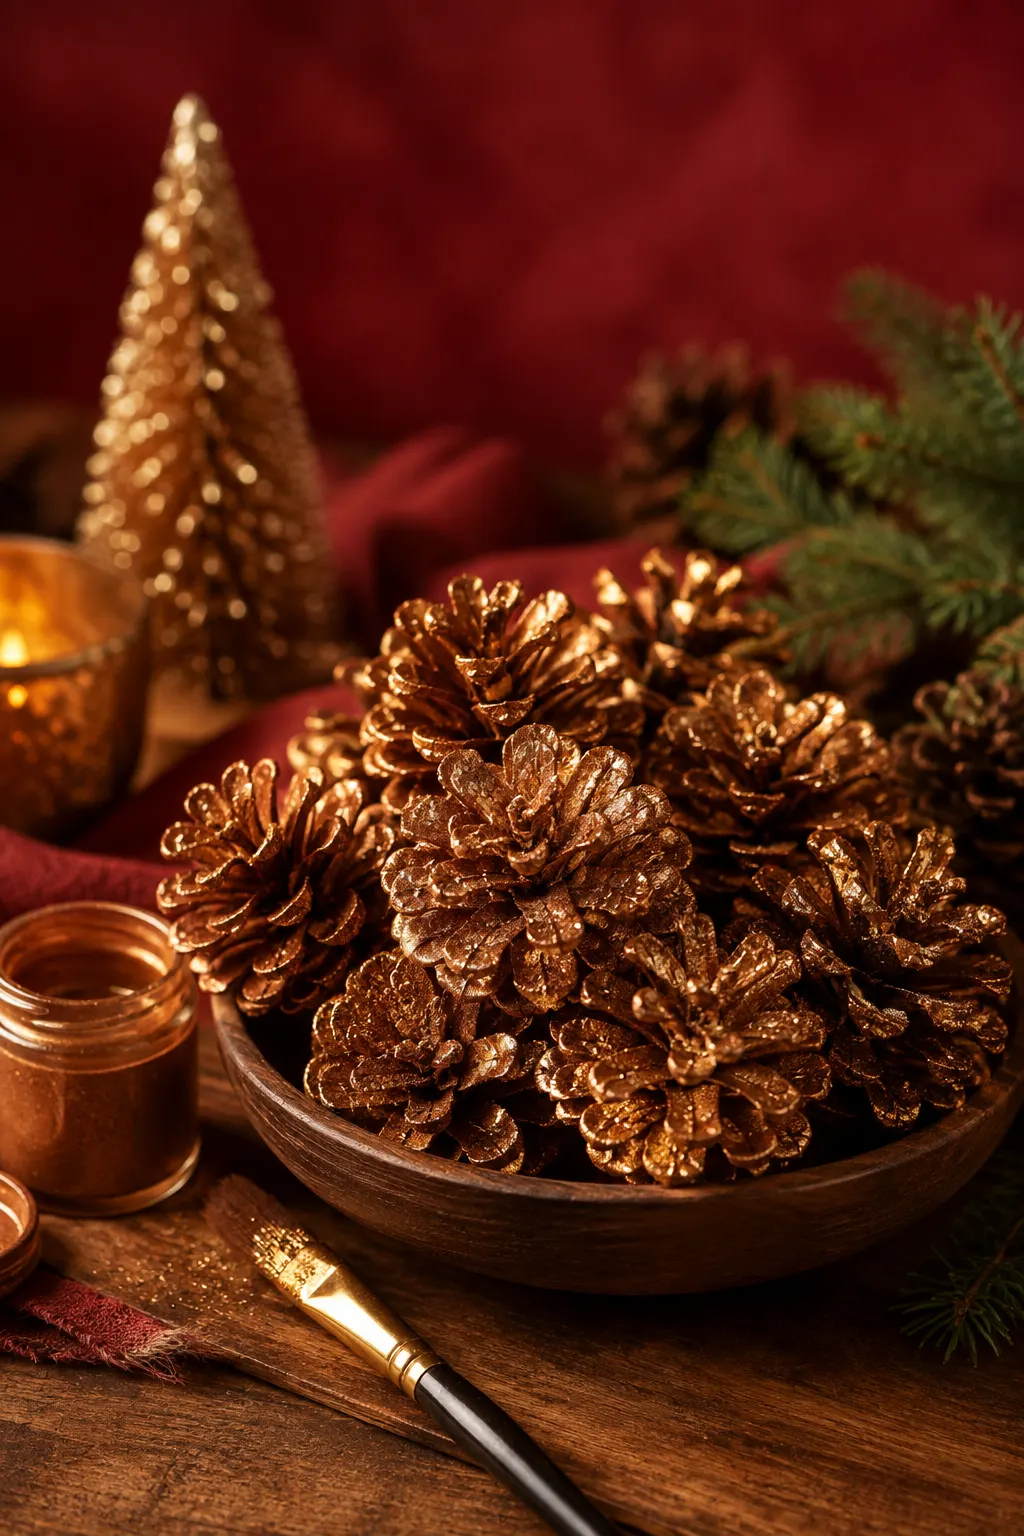
This crushed pinecone ornament idea takes dried pinecones, breaks them into textured pieces, adds shimmer or metallic paint, and turns the pieces into rustic holiday decorations.
And this is my favorite kind of Christmas craft: inexpensive, imperfect, and actually pretty enough to hang on the tree.
You don’t need fancy craft supplies or perfect artistic skills, either. In fact, the irregular pinecone pieces are what give these ornaments their character.
Here’s how to make DIY crushed pinecone ornaments, plus several easy ways to give them your own Christmas style.
Why Pinecones Work So Well for Christmas Crafts
Pinecones already look like they belong in Christmas decor.
Their warm brown color works beautifully with evergreen branches, wooden ornaments, red ribbon, berries, warm white lights, and metallic accents.
They’re also easy to find in many areas.
If you collect pinecones outside, you can turn something completely ordinary into holiday decor without buying another box of plastic ornaments.
And because every pinecone has a slightly different shape, no two finished decorations look exactly alike.
That little bit of imperfection? That’s the good stuff.
What Are Crushed Pinecone Ornaments?
Don’t let the word “crushed” make you picture pinecone dust.
The goal is to break dried pinecones into usable fragments while keeping their natural texture.
Place dry pinecones inside a sturdy paper bag and gently break them with your hands or a rolling pin. You want a mixture of larger and smaller pieces.
Those fragments can then be painted with shimmer or metallic craft paint and fitted with ribbon or twine for hanging.
The finished ornaments catch the Christmas lights while still keeping that cozy woodland look.
Materials You’ll Need
You’ll need:
- 10 to 15 dried pinecones
- Shimmer or metallic craft paint
- Paintbrush
- Sturdy paper bag
- Ribbon or twine
- Hot glue gun
- Glue sticks
- Scissors
- Disposable plate or paint palette
- Cardboard or another covering for your work surface
I’d also keep an old baking sheet nearby for drying the painted pieces.
Because somehow glittery paint always finds its way across the entire table.
Start With Completely Dry Pinecones
Don’t bring damp pinecones inside and immediately start painting them.
Choose clean, dry pinecones without visible mold or decay.
If you collect them outdoors, inspect them for dirt and insects before bringing them to your craft table.
Brush away loose debris and allow any damp pinecones to dry fully.
Trust me, nobody wants a tiny surprise guest crawling across the Christmas decorations halfway through craft night.
Break the Pinecones Into Decorative Pieces
Place several dried pinecones inside a sturdy paper bag.
Close the bag and gently press or roll over them.
Don’t smash them into tiny crumbs.
You want textured pieces that still show the beautiful natural scales of the pinecone.
Once you open the bag, separate the larger pieces from the smaller fragments.
The larger ones work nicely as individual ornaments, while smaller pieces can become accents for wreaths, garlands, gifts, and centerpieces.
Add Shimmer Paint
Now comes the fun part.
Pour a small amount of shimmer paint onto a disposable plate.
Use your paintbrush to lightly coat the pinecone pieces.
For a bold Christmas look, cover most of the visible surface.
For something more rustic, lightly brush only the raised edges so plenty of natural brown remains visible.
I prefer starting with less paint.
You can always add another coat.
Trying to remove an enthusiastic layer of gold paint afterward? Yeah, not nearly as fun.
Let the Pieces Dry Completely
Place the painted pinecone fragments on cardboard, parchment paper, or an old baking sheet.
Then leave them alone until the paint is completely dry.
While you wait, prepare your hanging loops.
Cut ribbon or twine into pieces about 6 to 8 inches long.
Tie the ends together to create loops.
Now everything will be ready once the paint dries.
Add Ribbon or Twine
Choose the top of each dried pinecone piece.
Apply a small amount of hot glue and attach the ribbon or twine loop.
Hold it carefully until the glue sets.
Be cautious with hot glue because it can cause burns.
If children are helping, let them handle painting and decorating while an adult takes care of the glue gun.
Try Gold for a Cozy Christmas Look
Gold may be my favorite choice for this project.
Brush warm metallic gold lightly across the pinecone scales while leaving some natural brown visible.
Then add jute twine.
Pair your ornaments with warm white lights, dried orange slices, wooden beads, cinnamon sticks, and evergreen branches.
It gives the tree that cozy, old-fashioned Christmas feeling without costing much at all.
Try Silver for a Snowy Look
Silver creates a totally different mood.
Use silver shimmer paint with white, gray, or icy blue ribbon.
You can also lightly brush the pinecone pieces with white paint first and add silver to the edges once the white layer dries.
Suddenly that pinecone you almost stepped on outside looks like a tiny winter decoration.
Not bad.
Use Red, Burgundy, or Copper
Gold and silver aren’t your only choices.
Deep red, burgundy, copper, champagne, pearl white, and forest green can all look beautiful.
Burgundy with cream ribbon gives a traditional Christmas feel.
Copper looks fantastic beside natural greenery.
Forest green works well with gold.
Choose colors that already match your holiday decorations so you don’t need to buy a whole new decorating collection.
Leave Some Pinecones Natural
Not every Christmas decoration needs sparkle.
Leave some pinecone fragments completely natural and mix them with your painted ones.
The natural brown pieces break up all that metallic color and make the shiny ornaments stand out more.
Try combining brown, gold, cream, and dark green.
Simple, warm, and cozy.
Add Evergreen or Decorative Berries
Want something a little fuller?
Glue a tiny piece of artificial greenery near the ribbon.
You can also add small decorative berries.
Just don’t pile on too many extras.
The pinecone texture should still be the main attraction.
Otherwise, your simple ornament can turn into a whole botanical event pretty quickly.
Turn Them Into Gift Toppers
These decorations don’t have to stay on the Christmas tree.
Smaller pinecone fragments make beautiful gift toppers.
Wrap a present in brown kraft paper.
Add twine.
Then attach a gold pinecone piece and a tiny evergreen sprig.
Done.
It looks thoughtful, rustic, and way more expensive than it actually was.
Plus, the person receiving the gift can keep the decoration afterward.
Make a Pinecone Garland
Have lots of pieces?
Make a garland.
Attach the painted fragments along a long piece of twine or ribbon.
Leave a little space between each piece.
You can alternate them with wooden beads, bells, bows, dried orange slices, or decorative berries.
Hang the finished garland across a fireplace mantel, shelf, staircase, doorway, or window.
Create a Christmas Centerpiece
Grab a decorative bowl or wooden tray.
Add natural pinecones, painted fragments, Christmas ornaments, greenery, and wooden beads.
Then tuck in battery-operated fairy lights for a soft glow.
There’s really no complicated technique here.
Arrange everything until it looks good.
If something feels missing, add a little more greenery.
Christmas decorating has forgiven worse.
Add Them to a Rustic Christmas Wreath
Painted pinecone fragments can also give a plain wreath more texture.
Start with an evergreen or grapevine wreath.
Attach several pinecone pieces around one area.
Then add ribbon, berries, greenery, or small bells.
You don’t need to cover the whole wreath.
A few metallic pinecone accents can catch the light beautifully without making the decoration feel too busy.
Make Several Ornaments at Once
If you’re already pulling out paint, ribbon, and the glue gun, make a batch.
Break all the pinecones first.
Sort the fragments.
Paint everything at once.
While the pieces dry, cut your ribbon.
Then glue all the hanging loops.
Working in stages makes the project much faster.
Put on a Christmas movie, grab some snacks, and suddenly you’ve got yourself a pretty fun little holiday assembly line.
Don’t Worry About Making Them Perfect
This might be the most important part.
Pinecones are naturally irregular.
Your pieces won’t match perfectly.
Some will be bigger.
Some will be crooked.
The paint won’t land exactly the same way on every piece.
Good.
That’s what makes handmade natural decorations charming.
If you wanted 20 identical ornaments, you could buy a plastic box of them.
These are supposed to look handmade.
Let them.
Frequently Asked Questions
What are crushed pinecone ornaments?
Crushed pinecone ornaments are holiday decorations made from pieces of dried pinecones. The pieces are often painted with metallic or shimmer craft paint and finished with ribbon or twine.
Do pinecones need to be dry before crafting?
Yes. Use clean and fully dried pinecones. Avoid pinecones with mold, decay, or excessive moisture.
What paint can I use on pinecones?
Acrylic craft paint, metallic paint, and shimmer paint are all good choices for decorative pinecone projects.
Can I make pinecone ornaments without glitter?
Absolutely. Metallic paint creates shine without loose glitter. You can also leave the pinecones completely natural.
What colors look good on Christmas pinecones?
Gold, silver, champagne, copper, white, red, burgundy, and forest green all work well.
Can children make pinecone ornaments?
Children can help sort and paint pinecones. Adults should handle or closely supervise the hot glue gun.
What else can I make with painted pinecones?
Use them for garlands, wreaths, gift toppers, table decorations, Christmas centerpieces, mantel displays, and decorative bowls.
How do I make pinecone ornaments look more expensive?
Stick with a simple color palette. Use metallic paint lightly, choose attractive ribbon or natural twine, and pair the pinecones with greenery, wooden beads, or warm white lights.
Final Thoughts
There’s something pretty satisfying about turning an ordinary pinecone into Christmas decor.
No expensive craft kit.
No complicated pattern.
No project that looked easy online and somehow left you covered in glue at midnight.
You just need dry pinecones, paint, ribbon, and a little creativity.
Go rustic with twine and gold. Try silver for a snowy theme. Add burgundy ribbon for traditional Christmas color. Or leave some pieces natural for a softer woodland look.
And the next time you see pinecones scattered around the yard?
Maybe don’t kick them aside.
Your next Christmas decorations might be lying right there.