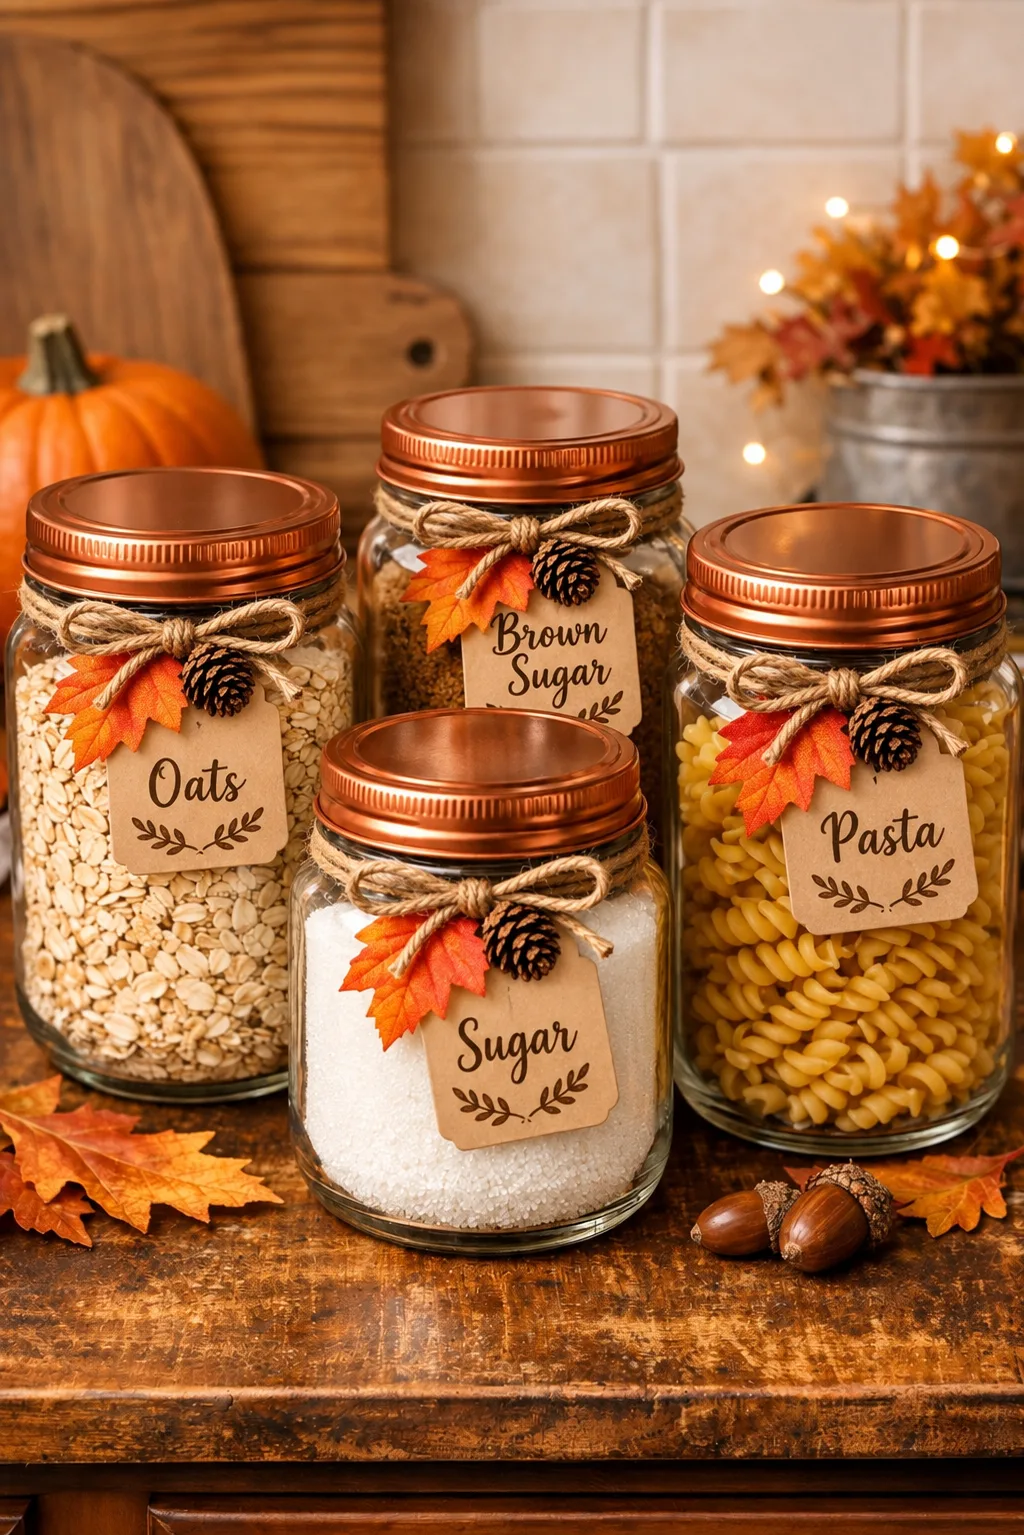
You know those empty peanut butter jars that usually get rinsed out, tossed into the recycling bin, and forgotten about five minutes later? Well, hold onto a few of them. With some copper spray paint, jute twine, and a couple of fall decorations, those plain glass jars can turn into a charming set of fall kitchen canisters that looks way more expensive than it actually is.
I love crafts like this because they don’t just sit around looking cute. These jars can actually work for you. Fill them with sugar, tea bags, coffee pods, wrapped candy, baking supplies, snack mix, or whatever else tends to clutter your kitchen shelves.
And honestly, fall is the perfect time for this kind of project. Once the weather starts cooling down, I always want my kitchen to feel warmer and cozier without buying a whole cart full of seasonal decor. Copper lids, natural twine, little leaves, and pinecones hit that sweet spot. They feel festive, but not so over-the-top that you have to pack them away the second November ends.
Why Peanut Butter Jars Make Great Fall Kitchen Canisters
Glass peanut butter jars are surprisingly handy for DIY kitchen storage. They are sturdy, easy to clean, and usually have wide openings that make them practical for everyday ingredients.
The best part, though, is how much potential they have once the labels come off. A plain glass jar is basically a blank canvas.
I’ve used similar jars for flour, sugar, loose tea, cocoa mix, nuts, and little snack blends. Once you line several matching jars up on a shelf, the whole kitchen suddenly looks more pulled together. Funny how four containers can do that, right?
This DIY fall kitchen canister project also gives old jars another purpose instead of sending them straight to recycling. You get useful kitchen storage and seasonal decor from something you already had sitting around.
What Makes the Copper Lids Look So Good
Copper works especially well for fall kitchen decor because it brings in those warm orange-brown tones we already associate with pumpkins, dried leaves, cinnamon, and cozy baking days.
When copper paint goes onto an ordinary peanut butter jar lid, the whole jar changes. Suddenly it looks less like reused packaging and more like something you might spot in a farmhouse kitchen shop.
The matte clear sealer also matters. It takes away some of that freshly sprayed look and gives the lids a softer finish.
One thing I’ve learned from painting jar lids: resist the urge to cover everything in one thick coat. I know, waiting between coats is boring. Still, two or three light passes usually give a much smoother finish than one heavy blast of paint.
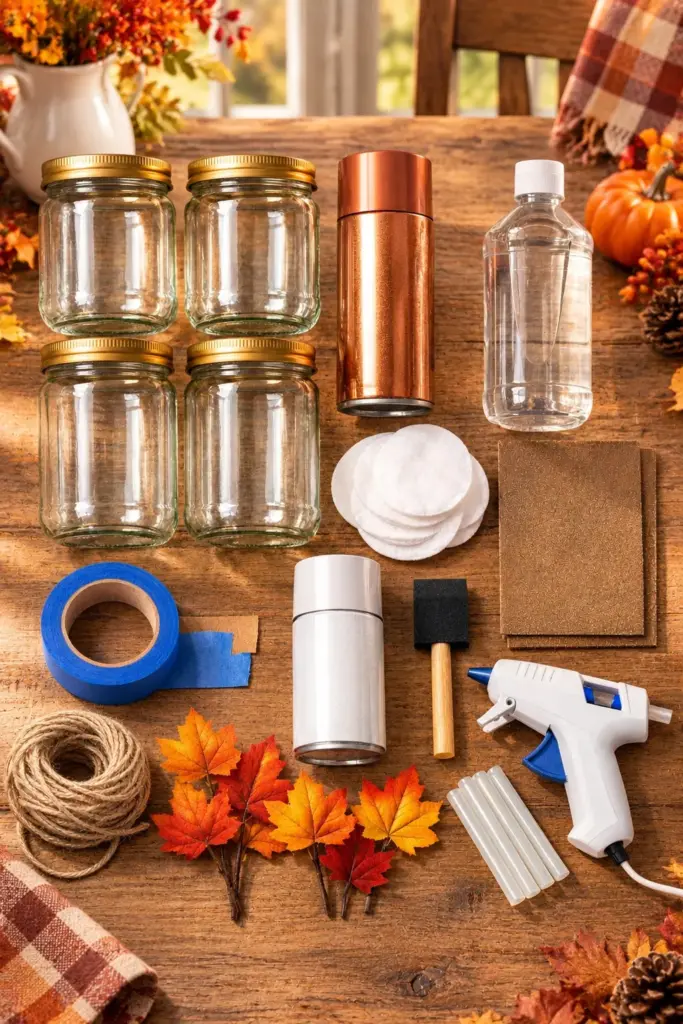
Materials for DIY Fall Kitchen Canisters
You only need a short list of supplies for this project, and you may already have several of them at home.
- 4 empty 16-ounce glass peanut butter jars with lids
- 1 can copper spray paint, about 12 ounces
- 1 can matte clear sealer spray, 10 to 12 ounces
- 2 tablespoons rubbing alcohol or white vinegar
- 4 cotton pads or 1 clean lint-free rag
- 1 sheet 220-grit fine sandpaper
- About 2 feet of 1-inch painter’s tape
- 4 pieces of jute twine, about 18 inches each
- 4 small faux fall leaf sprigs, 3 to 4 inches long
- 8 mini pinecones, about 1 inch each
- 1 standard hot glue stick
- Brown kraft paper, newspaper, or scrap cardboard for protecting the work surface
If you’re missing the leaf sprigs or pinecones, don’t sweat it. This project still looks great with simple twine, small wooden tags, dried-looking faux leaves, or even no extra decoration at all.
Step 1: Clean the Peanut Butter Jars
Start by washing all four peanut butter jars and lids in hot, soapy water.
Remove every trace of peanut butter, paper label, and sticky adhesive. This step matters more than it seems because leftover glue makes the finished jars look messy.
If the labels are stubborn, soak the jars in warm water for a while before peeling them off. A little cooking oil can also help loosen sticky residue from the glass. Just wash the jars again afterward so they don’t feel greasy.
Once they are clean, rinse them well.
Step 2: Dry Everything Completely
Let the jars and lids dry fully before you start painting.
Water trapped around the rim or under the lid can interfere with paint and make the finish patchy. I usually leave everything upside down on a clean towel while I gather the rest of my supplies.
Then wipe the lids with rubbing alcohol or white vinegar.
This removes oily fingerprints and residue that regular dish soap may leave behind.
Step 3: Lightly Sand the Lids
Take your 220-grit sandpaper and gently rough up the tops and sides of each lid.
You do not need to scrape off the original finish. A light sanding is enough.
The goal is simply to give the spray paint a slightly textured surface to grip.
After sanding, wipe away every bit of dust with a clean lint-free cloth.
This little prep step helps the copper paint look smoother and last longer.
Step 4: Set Up a Safe Painting Area
Cover your work surface with kraft paper, cardboard, or another disposable covering.
Spray paint should always be used in a well-ventilated outdoor or suitable workspace according to the product directions.
Set the lids upside down with a few inches between each one. Giving them some breathing room makes it easier to spray around the edges without accidentally hitting the neighboring lid too heavily.
If there is any section you do not want painted, cover it with painter’s tape before spraying.
Step 5: Spray the First Copper Coat
Shake the copper spray paint according to the directions on the can.
Hold the can roughly 8 to 10 inches away from the lids and spray in light, smooth passes.
Keep your hand moving instead of aiming at one spot.
That motion helps prevent drips, thick patches, and those annoying little paint puddles that seem to show up exactly where you don’t want them.
The first coat does not need to look perfect. In fact, it probably won’t.
That’s okay.
Step 6: Add the Second Coat
Let the first layer dry for the amount of time listed on the spray paint can.
Then add another light coat.
This second pass is usually where the copper color starts looking rich and even.
Check the lids from different angles so you don’t miss the edges. Those narrow side areas are easy to overlook.
If you still see thin spots, add another light coat after the proper drying time instead of spraying heavily.
Patience wins here.
Step 7: Seal the Copper Finish
Once the copper paint is completely dry, add a light coat of matte clear sealer.
The sealer gives the painted lids a finished look and adds some protection against normal handling.
Again, follow the drying and curing directions on the product label.
Don’t rush this part and screw the lids onto the jars while the paint still feels soft. Fresh paint can stick, dent, or chip if it hasn’t had enough time to cure.
I know the temptation is real once the lids start looking pretty, but give them the time they need.
Step 8: Clean the Glass One More Time
While the lids finish curing, wipe the outside of each glass jar.
Fingerprints become extra noticeable once you put shiny copper lids on top, especially if the jars are sitting near a sunny window.
A quick wipe with a clean cloth makes the glass look crisp and polished.
If you plan to fill the jars with food, make sure the inside stays completely free from paint, glue, sealer, and decorative materials.
Step 9: Prepare the Fall Decorations
Separate your faux fall leaf sprigs into four small clusters.
Pair each cluster with two mini pinecones.
I like keeping the decorations fairly small because giant toppers can make the lids awkward to open. A tiny cluster looks cute without getting in the way.
Try laying out all four decoration sets before gluing anything down. This helps you keep the jars looking balanced.
They don’t have to match perfectly, either. A little variation gives them more personality.
Step 10: Wrap Each Jar With Jute Twine
Take one 18-inch piece of jute twine and wrap it around the neck of the jar.
Tie a simple knot or small bow in the front or slightly off to one side.
Trim the ends if they look too long.
This is one of those tiny details that makes a big visual difference. The twine breaks up the plain glass and brings in a natural farmhouse-style texture.
If bows aren’t your thing, a basic knot looks just as nice.
Step 11: Attach the Leaves and Pinecones
Use a small dab of hot glue to attach one leaf cluster and two mini pinecones to each lid.
Place the decorations near one edge instead of directly in the center.
Keeping them off to the side makes the lids easier to grip when you open the jars.
Also, go easy on the glue. You only need enough to hold the decorations in place.
Too much glue can squeeze out around the edges and make the finished canisters look bulky.
Step 12: Put Your Fall Kitchen Canister Set Together
Once everything is dry and secure, screw the lids onto the glass jars.
Then arrange the four canisters together on your kitchen counter, pantry shelf, coffee bar, baking station, or open shelving.
This is the fun part because you finally get to see the full set.
Line them up in a row for a clean look, or group them with a small pumpkin, wooden cutting board, candle, or folded kitchen towel for a fuller fall display.
Seriously, once the jars are side by side, it’s kind of hard to believe they started as peanut butter containers.
What Can You Store in These DIY Kitchen Canisters?
These fall kitchen canisters work best for dry foods or wrapped items, as long as the inside of the jar and food-contact areas remain clean and suitable for food storage.
You could use them for:
- Granulated sugar
- Brown sugar
- Tea bags
- Coffee pods
- Cocoa powder
- Baking chips
- Wrapped candy
- Pretzels
- Nuts
- Homemade snack mix
- Crackers
- Dry beans
- Small pasta
- Cookie decorating supplies
You can also skip food completely and use the jars for craft supplies, clothespins, pet treats, small office items, or seasonal odds and ends.
Add Simple Labels for Everyday Use
If you plan to use the canisters every day, labels can make the set even more practical.
Removable vinyl labels work well because you can change them later. Small kraft paper tags tied onto the twine also fit the fall look.
Try labels such as:
“Sugar”
“Flour”
“Tea”
“Coffee”
“Cocoa”
“Snacks”
“Treats”
Short labels look clean and are easy to read from across the kitchen.
Chalkboard-style stickers are another cute option if you change the contents often.
Try These Color Variations
Copper is my favorite choice for this fall kitchen canister set because it instantly brings warmth to the glass jars.
Still, you can change the lid color depending on your kitchen style.
Brushed gold feels warm and a little dressier.
Matte black gives the jars a modern farmhouse look.
Cream feels softer and works well with neutral kitchens.
Bronze gives you an earthy, vintage feel.
Deep green can work beautifully if your fall decor leans more natural than orange.
You could even paint all four lids different muted autumn shades, though I personally like the clean look of a matching set.
Make a Simpler Version
Not everyone loves pinecones and leaf clusters all over the kitchen, and that’s totally fair.
For a cleaner version, paint the lids copper and tie one piece of jute around each jar.
That’s it.
You could also attach one tiny leaf to the twine instead of decorating the lid.
The simpler style works especially well if your kitchen already has a lot of pattern, color, or open-shelf decor.
Sometimes less really does look better.
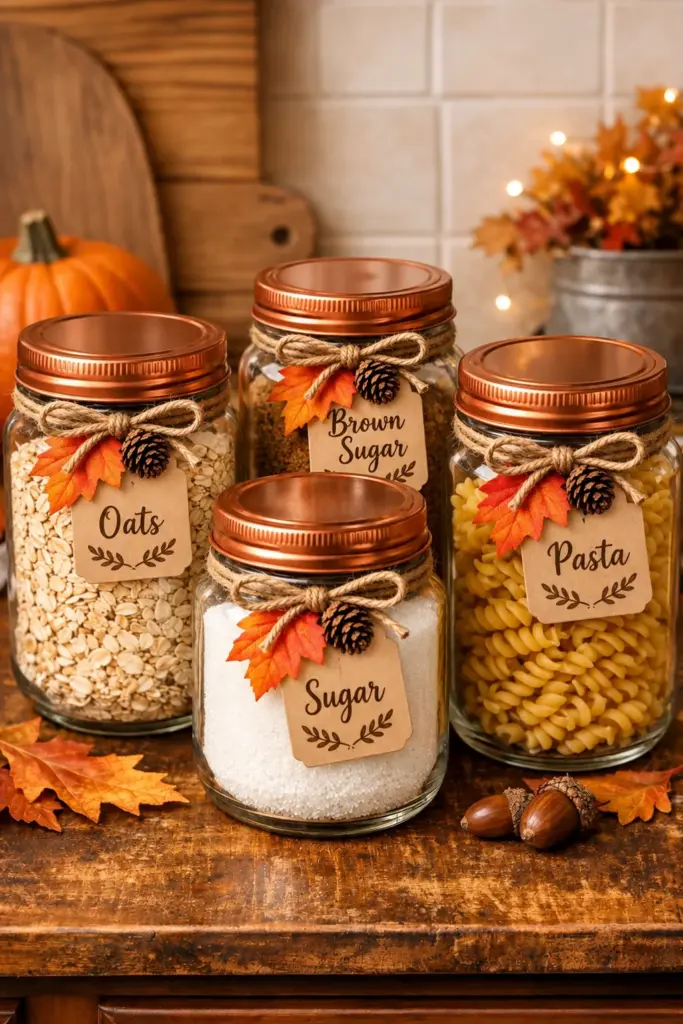
Turn the Canisters Into a Homemade Gift Set
These jars can also make an easy fall gift.
Fill them with cookie mix, tea bags, wrapped caramels, homemade snack mix, coffee beans, or baking treats.
Then add a handwritten tag.
A group of two or four jars looks especially cute as a housewarming present, hostess gift, teacher gift, or Thanksgiving thank-you.
And because the jars themselves cost almost nothing if you already saved them, you can put more of your budget toward whatever goes inside.
I love gifts like this because they feel personal without becoming a giant craft project that takes over the dining room table for three days.
Painting Tips That Make the Lids Look Better
Spray paint can make or break this project, so a few small habits help.
Always clean and degrease the lids first.
Lightly sanding them helps the paint stick.
Use several thin coats instead of one thick coat.
Keep the spray can moving.
Let every layer dry according to the product directions.
Add sealer only after the paint is fully dry.
Let the finished lids cure before regular handling.
And please, protect your workspace. Copper overspray has a funny way of traveling farther than you think.
Ask me how I know.
Important Tip for Food Storage
If you use these jars for edible ingredients, keep spray paint, sealer, glue, twine, and decorative pieces on exterior surfaces only.
Do not paint the inside of the jar.
Do not allow glue or decorative materials to touch stored food.
Keep the interior glass and food-contact portions of the lid clean and suitable for food storage.
For items that need airtight or long-term storage, use containers designed for that purpose and check whether the original peanut butter lids provide the seal you need.
These upcycled jars are especially handy for dry ingredients you use regularly.
How to Make This Project Faster
If you want to finish the set with less fuss, work on all four jars at the same time.
Wash them together.
Sand every lid in one sitting.
Spray the first coat on all four lids before moving to the second coat.
Prepare the twine and decorations while the paint dries.
You can also skip the pinecones if you’re short on time. Copper lids plus jute already give the jars plenty of fall charm.
Honestly, the decoration is just the cherry on top.
Why This Simple Fall Craft Works So Well
There’s something satisfying about taking an object that looks completely ordinary and giving it a second life.
These peanut butter jar canisters are inexpensive, useful, easy to personalize, and simple enough for a relaxed weekend craft.
More importantly, they don’t scream “DIY project” once they’re finished.
The copper-painted lids tie the jars together as a set. The jute adds texture. The tiny leaves and pinecones bring in just enough autumn color.
Put them on a kitchen shelf with a little pumpkin nearby, and suddenly the whole corner feels ready for crisp mornings, warm drinks, and something good baking in the oven.
Not bad for four jars that almost ended up in the recycling bin.