I’ve baked more yellow cakes from a box than I can count, usually on busy weeknights when I need a dependable dessert and don’t feel like pulling out every canister in the pantry. So when I reached for water one evening and accidentally grabbed a can of evaporated milk instead, I had that little moment every home cook knows well: do I start over, or do I keep going and see what happens?
I decided to keep going, and 45 minutes later I pulled out a cake that looked ordinary at first glance but turned out to be anything but. The texture was softer, the crumb was tighter and more velvety, and the flavor had that gently rich, almost bakery-style finish that made everyone ask what I did differently. If you’ve ever wondered whether swapping evaporated milk for water in yellow cake mix is worth trying, here’s exactly what happened in my kitchen, what changed, what to watch for, and how to make the most of it.
1. What I changed in the cake mix
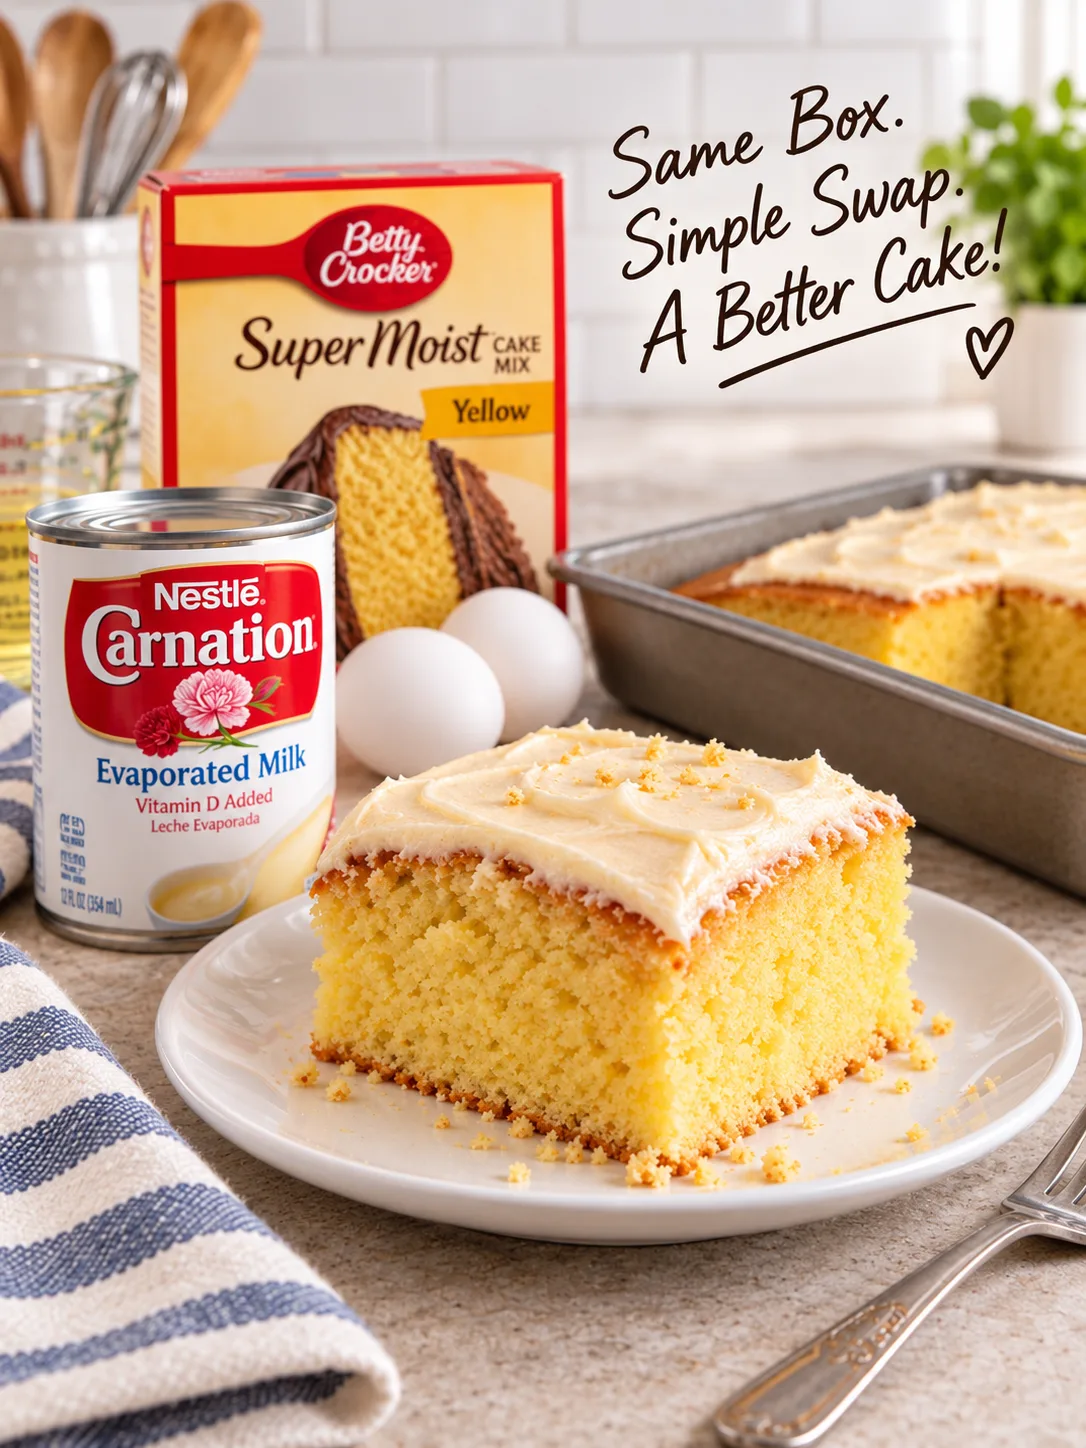
I used a standard 15.25-ounce box of yellow cake mix, the kind that typically calls for 1 cup water, 1/2 cup vegetable oil, and 3 large eggs. Instead of the 1 cup water, I poured in 1 cup of evaporated milk straight from a 12-ounce can. I left everything else the same: same eggs, same oil, same 9-by-13-inch metal baking pan, and the same oven temperature listed on the box, 350 degrees Fahrenheit.
This is important, because when you’re testing a single swap, it helps to keep every other variable as steady as possible. I didn’t add extra sugar, pudding mix, butter, or sour cream. The evaporated milk was the only real difference, so the results were easy to notice.
2. Why evaporated milk behaves differently than water
Water gives cake mix moisture, but not much else. Evaporated milk, on the other hand, is cow’s milk that has had about 60 percent of its water removed. That means it brings moisture, yes, but also milk proteins, a bit of natural milk sugar, and fat if you’re using the regular version.
Those extra solids make a real difference in baking. They contribute to a finer crumb, a fuller flavor, and a cake that feels more substantial without becoming heavy. In plain kitchen terms, water helps a cake mix come together, but evaporated milk helps it taste homemade.
3. What the batter looked like right away
The first thing I noticed was the batter itself. It was slightly thicker than usual, not dramatically so, but enough that I paused. A water-based cake batter from a box often pours quickly and looks a bit looser. This one flowed more slowly off the spatula and looked smoother, almost silkier.
After mixing for about 2 minutes with a hand mixer on medium speed, the batter had fewer large bubbles and a more creamy appearance. It spread evenly in the pan with just a few taps on the counter. If you try this yourself, don’t be alarmed if the batter seems a touch thicker than what you’re used to. That’s part of the change.
4. How it baked over those 45 minutes
I baked the cake for 43 to 45 minutes, checking at the 40-minute mark. In my oven, which runs fairly true to temperature, the top was lightly golden by then, with slightly deeper color around the edges. The center needed just a couple more minutes.
What stood out most was the smell. A standard yellow cake from a mix smells sweet and pleasant, but this had a richer aroma, almost like a butter cake from a bakery case. The milk solids seemed to encourage better browning, so the top developed a prettier golden finish than I usually get with plain water.
5. The texture after cooling
Once the cake cooled for about 20 minutes in the pan, I cut a square and could see the difference right away. The crumb was finer and more uniform. Instead of being fluffy in that airy, slightly coarse boxed-cake way, it was soft and tender with a more velvety feel.
My family described it as “moister,” and that’s the easiest word for it, though I’d say it was also a little denser in a good way. Not pound-cake dense, not at all, but more plush. It held together nicely on a fork and didn’t crumble apart into dry little bits.
6. The flavor difference was bigger than I expected
This is where the swap really earned a permanent spot in my kitchen notebook. The cake tasted richer, but not in an over-the-top way. It didn’t suddenly become custardy or milky. It still tasted like yellow cake, just a better version of it.
There was a subtle creaminess and a slightly deeper vanilla-butter impression, even though I didn’t add extra vanilla or butter. For a dessert that started with a boxed mix, it had a more rounded flavor. If you serve cake often at potlucks, birthdays, or Sunday dinners, this is exactly the kind of little upgrade people notice without being able to immediately name.
7. Whether you should use straight evaporated milk or dilute it
I used evaporated milk full strength, cup for cup in place of water, and the cake turned out beautifully. That said, if you prefer a lighter crumb or you’re worried about making the batter too rich, you can dilute it. A good middle-ground option is 1/2 cup evaporated milk plus 1/2 cup water.
For most standard yellow cake mixes in the 13.25- to 15.25-ounce range, a full 1-cup swap works well. If your mix is especially small or the batter already includes pudding, I’d watch consistency more carefully. The batter should still be pourable, even if it’s thicker than usual.
8. The best pans and bake times for this swap
I tested this in a 9-by-13-inch metal pan, which tends to bake evenly and gives nice edge structure. If you use two 8-inch round pans, start checking around 26 to 30 minutes. For two 9-inch rounds, check around 24 to 28 minutes. Cupcakes will usually land around 18 to 22 minutes at 350 degrees Fahrenheit.
Because evaporated milk can encourage a slightly deeper color, I recommend checking doneness by more than appearance alone. Insert a toothpick in the center; you want a few moist crumbs, not wet batter. Also press lightly with a fingertip. The top should spring back instead of leaving an indentation.
9. When this works best and when I’d skip it
I love this trick for yellow cake, white cake, butter cake, and spice cake mixes. It’s especially nice when I want a cake to stand on its own without much frosting, because the crumb and flavor are better balanced. It also works beautifully for sheet cakes headed to church suppers, school events, and family birthdays where cakes may sit out for a bit before serving.
I would be a little more cautious with very delicate angel food-style mixes or ultra-light chiffon-style batters, since those rely on a different structure. I’d also skip this if the recipe specifically counts on a thinner batter for a special effect. But for a basic yellow cake mix, this is one of the easiest upgrades I’ve found.
10. Frostings that pair especially well with it
Because the cake itself tastes richer, you can go two directions with frosting. You can keep things simple with a whipped vanilla frosting, which lets that creamy cake flavor shine through. Or you can lean into comfort-food territory with chocolate buttercream, which is what I did the second time I made it.
For a 9-by-13-inch cake, I like about 2 cups frosting if I want a moderate layer, or closer to 3 cups for a thicker, bakery-style finish. If I’m serving kids or picky eaters, a classic canned chocolate frosting works just fine here. If I’m serving adults, I’ll sometimes add a pinch of salt and 1 teaspoon vanilla to the frosting to make the whole dessert taste more balanced.
11. A few easy variations for families and picky eaters
This cake is mild enough that it takes little changes really well. For children who like simple flavors, I leave it exactly as is and add rainbow sprinkles on top of vanilla frosting. For a birthday version, I stir 1/2 teaspoon extra vanilla into the batter and top it with funfetti-style frosting decorations.
If your family likes warmer flavors, add 1/2 teaspoon cinnamon and a tiny pinch of nutmeg to the dry mix before blending. For a lemon version, I’ve had good luck adding 1 teaspoon lemon extract to the batter and finishing the cooled cake with a powdered sugar glaze made from 1 cup confectioners’ sugar and 2 to 3 tablespoons lemon juice.
For coconut lovers, a white or yellow cake made with evaporated milk and topped with toasted coconut is especially good. My oldest prefers it plain, my youngest likes chocolate frosting, and my husband swears a scoop of vanilla ice cream makes it even better. That’s the nice thing about a sturdy, richer cake base: it plays nicely with everyone’s preferences.
12. Common mistakes to avoid
The biggest mistake is confusing evaporated milk with sweetened condensed milk. They are not interchangeable. Sweetened condensed milk has a great deal of added sugar and a much thicker texture, so substituting it cup for cup would throw off the entire cake.
Another mistake is overmixing. Since the batter already has extra richness, beating it too long can still make the final texture tougher than it needs to be. I stick to about 2 minutes with a hand mixer or just until smooth, scraping the bowl once. Also, if your evaporated milk has been in the fridge after opening, bring it closer to room temperature before mixing so the batter blends more evenly.
13. Cost, pantry convenience, and why I keep doing it
One reason I’ve repeated this swap is that it’s practical. A 12-ounce can of evaporated milk is shelf-stable, so I can keep 2 or 3 cans in the pantry for last-minute baking. Around here, a can often costs somewhere between $1.50 and $2.50 depending on the brand and store, which is a pretty affordable way to make a boxed cake taste more special.
For busy families, pantry tricks matter. I don’t always have buttermilk or sour cream in the refrigerator, but I often have evaporated milk tucked away next to the broth and beans. That makes this one of those little homemaking shortcuts I rely on when I want dessert to feel thoughtful without creating more work.
14. My honest final verdict after 45 minutes
What happened 45 minutes later was simple: my basic yellow cake mix came out tasting richer, feeling softer, and looking more golden than usual. It didn’t fail, sink, or turn gummy. It actually improved in all the ways most of us hope for when we try to dress up a boxed mix.
If you’re looking for a low-effort trick that makes a noticeable difference, this is one I’d absolutely recommend. Start with a standard yellow cake mix, replace the 1 cup water with 1 cup evaporated milk, bake as directed, and keep an eye on doneness during the last 5 minutes. In my kitchen, it turned an ordinary weeknight cake into the kind of dessert people go back for twice, and honestly, that’s the kind of cooking win I never mind repeating.