Okay, I’ll admit it: a pile of wrinkled grocery bags is not exactly the first thing that makes me think, “Wow, that would look cute on the patio.”
Usually, I’m just trying to figure out why I somehow have 87 bags stuffed inside one other bag under the kitchen sink.
You know the situation.
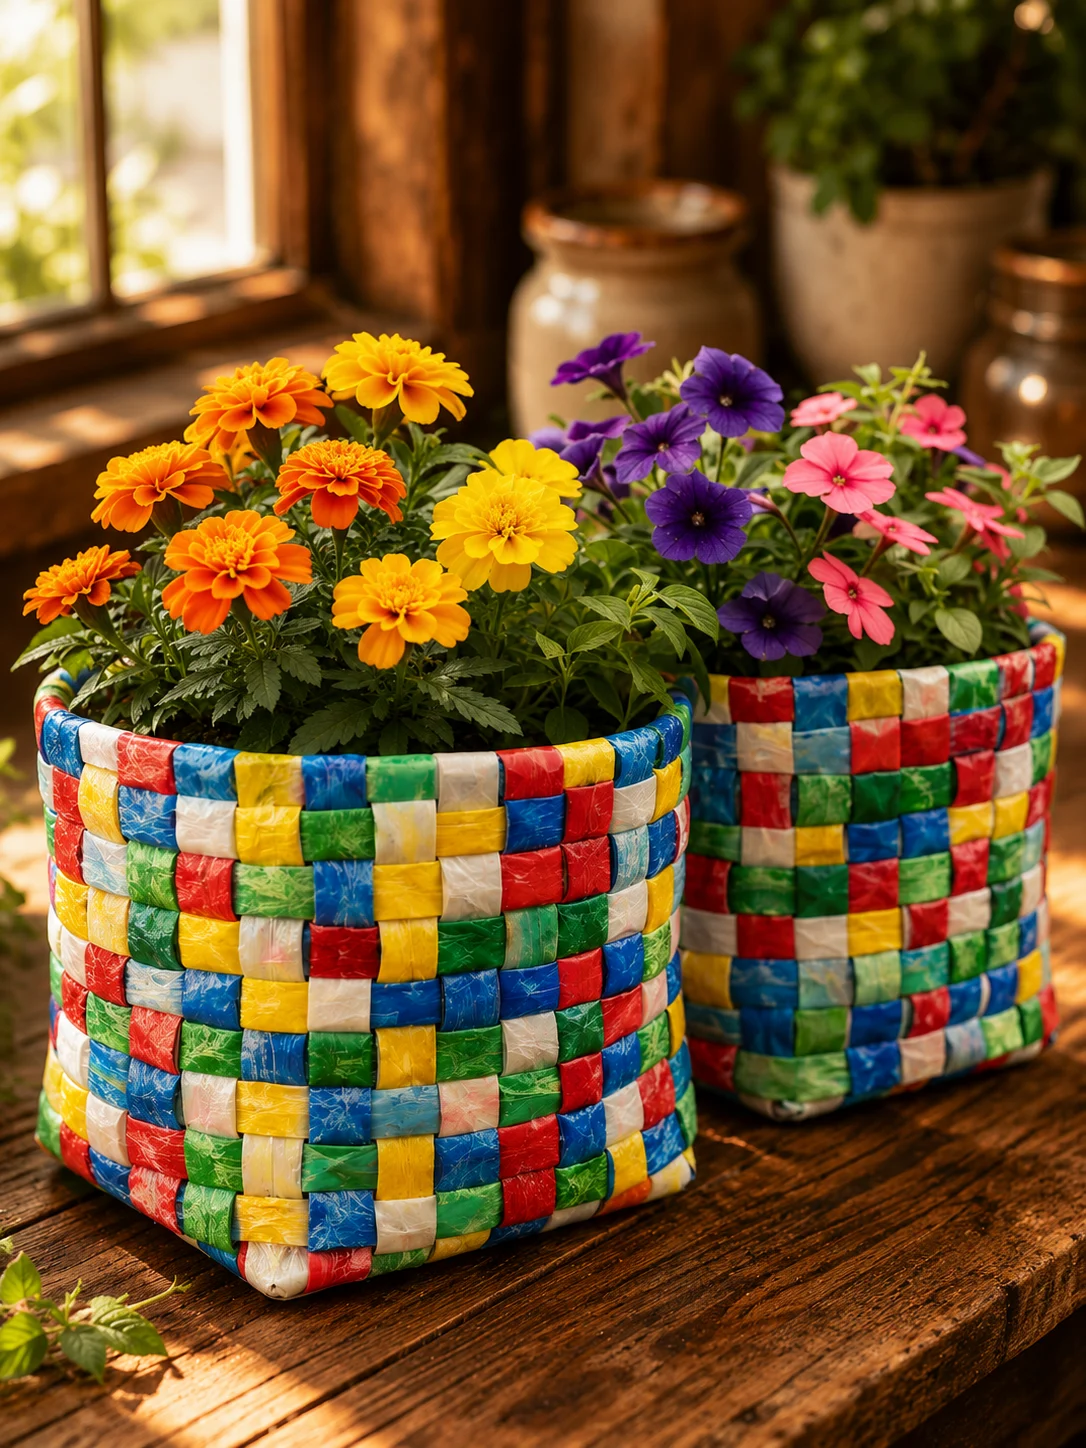
But plastic grocery bags can become surprisingly useful craft material, especially when they’re cut into strips and woven into baskets, plant-pot covers, or backyard storage containers.
That’s the idea behind this DIY woven plastic bag basket.
And while you may see projects online that fuse grocery bags together with a hot iron, I’d take a safer route with household plastic whose exact composition and heat behavior you may not know. Instead of heating and melting bags, this version uses a no-heat cutting, braiding, and weaving method.
Same clever upcycling spirit.
No melted-plastic experiment in the kitchen.
And honestly? The woven texture looks pretty darn good.
Here’s how I’d make one.
Why Plastic Grocery Bags Work for Basket Crafts
Plastic grocery bags have a few qualities that make them surprisingly handy for crafting.
They’re lightweight.
They’re flexible.
They can handle a little moisture better than ordinary paper.
And most households already have a bunch sitting around.
When you cut bags into long strips, those flimsy pieces become much easier to braid, twist, crochet, or weave.
Once several strips are layered together, the material feels much stronger than one grocery bag on its own.
That means you can turn something normally headed toward recycling or disposal into a decorative basket for lightweight backyard items.
Pretty satisfying.
Especially when the original material cost you exactly zero dollars.
Why I Wouldn’t Melt Unknown Grocery Bags With an Iron
This part matters.
Plastic bags can be made from different polymers, additives, inks, dyes, and recycled materials.
Heating household plastic can create fumes, unpleasant odors, melted residue, and a mess on your iron or work surface.
The material can also soften much faster than expected.
And once plastic sticks to a hot iron?
Oh boy.
That crafting afternoon just took a very different turn.
For home projects, I’d skip direct heat-fusing unless you’re using material and instructions specifically intended for that purpose.
A no-heat weave still gives you a durable-looking basket while keeping the project much simpler.
What You’ll Need
For one medium woven plastic bag garden basket, gather:
- 50 to 150 clean plastic grocery bags
- Sharp craft scissors
- Measuring tape or ruler
- Cardboard for a temporary weaving form
- Large clips or clothespins
- Strong polyester thread or waxed cord
- Large hand-sewing needle
- Plastic-safe craft adhesive, optional
- Jute twine, optional
- Rope, optional
- Fabric scraps, optional
- Decorative ribbon, optional
- A lightweight plastic plant saucer if using the basket around a pot
The number of bags depends on the basket size and how thick you make the strips.
For a small basket, you may need far fewer than 150.
For a large, chunky basket?
That bag stash finally has its moment.
Start With Clean, Dry Bags
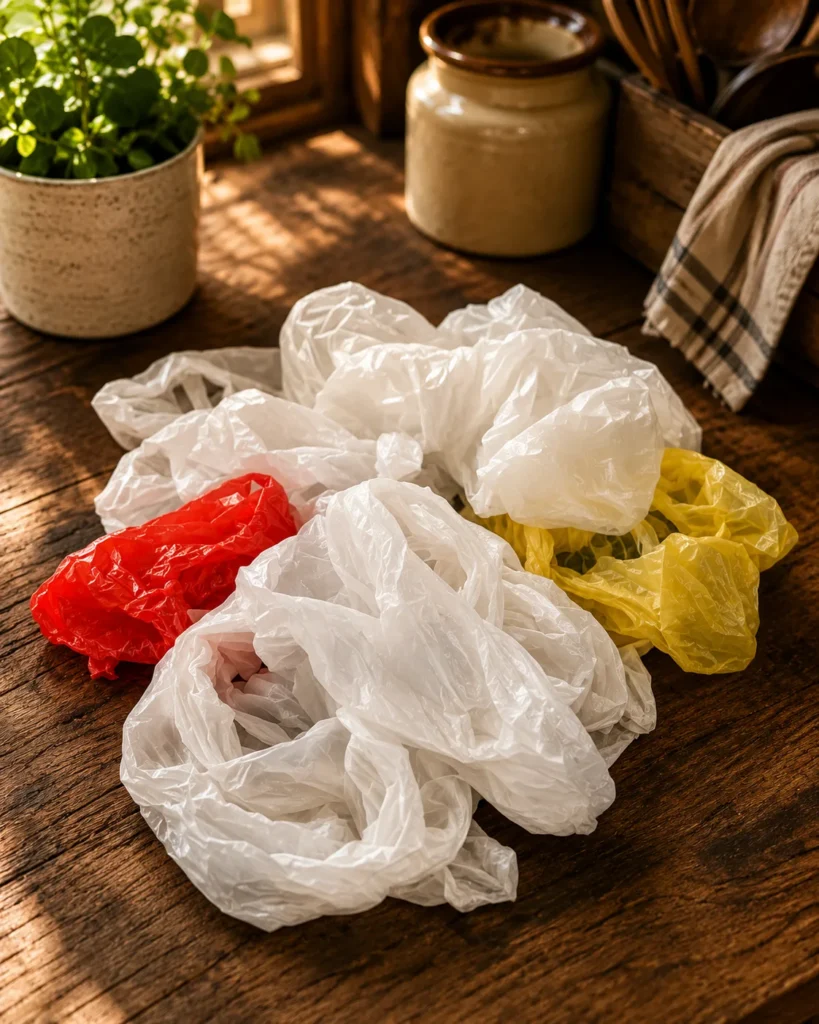
Don’t pull bags straight from the grocery pile and begin weaving.
Sort them first.
Remove receipts.
Shake out crumbs.
Discard bags with food residue, grease, mold, chemical contamination, or heavy damage.
Use only clean, dry bags for a decorative craft.
If a bag carried raw meat and leaked?
Let that one retire.
We’re making patio decor, not preserving memories of the chicken aisle.
Sort the Bags by Color
This step can make the finished basket look much more intentional.
Separate your bags into groups such as:
White
Cream
Gray
Brown
Green
Blue
Printed
Clear
If most of your bags are one color, great.
That creates a clean woven look automatically.
If you have lots of colors, you can create stripes.
For example:
Cream + brown = rustic
White + gray = modern
Green + white = garden-inspired
Blue + white = coastal
Mixed colors = cheerful recycled craft
Pick your palette before cutting everything.
It saves you from realizing halfway through that one bright red grocery bag has become the unexpected star of your neutral patio basket.
Step 1: Flatten Each Grocery Bag
Lay one bag flat.
Smooth out major wrinkles with your hands.
You don’t need perfection.
Straighten the handles and sides so the bag lies reasonably flat.
Then fold it lengthwise several times.
You’re making a long, narrow strip that’s easier to cut evenly.
Repeat with several bags before moving to the next step.
Doing them in batches makes this process much faster.
Step 2: Remove the Handles and Bottom Seam
Cut off the handles.
Then cut away the sealed bottom edge.
Now you should have a plastic tube.
Don’t throw the handles away yet.
You can save clean pieces for stuffing, tying, or another craft project.
Or recycle them according to the options available in your area.
Once the top and bottom are removed, flatten the tube again.
Step 3: Cut the Plastic Into Loops
Cut across the flattened tube at regular intervals.
For a chunky basket, strips around 1 to 2 inches wide are easy to work with.
Each cut section becomes a plastic loop.
You’ll end up with a pile of rings.
At this stage, everything looks pretty unimpressive.
Basically plastic noodles.
Give it a minute.
Step 4: Join the Loops Into Long Strands
Take two plastic loops.
Pass one loop through the other.
Then pull the end of that loop through itself to create a simple connection.
Tighten gently.
Now add another loop.
Continue until you have a long strand.
This method is often used for making “plarn,” or plastic yarn.
Make several long strands before beginning the basket.
I like keeping them loosely coiled so they don’t become one giant plastic knot.
Because, apparently, every crafting material eventually tries to become a knot.
Make the Strands Thicker for a Stronger Basket
One thin strand can feel flimsy.
For a chunkier result, combine multiple strands.
You can braid three strands together.
Or twist two or three strands into a cord.
Braided plastic has a nice textured appearance and feels considerably sturdier.
If you’re making a decorative basket that needs to hold garden gloves, seed packets, clothespins, or lightweight tools, thicker cords make sense.
For a simple plant-pot cover, you can use slightly softer woven strips.
How to Braid Plastic Grocery Bag Strips
Secure three long plastic strands to a table with a clip.
Then braid them exactly as you would hair.
Left strand over center.
Right strand over center.
Repeat.
Keep the tension consistent.
Don’t pull aggressively.
Plastic can stretch and become narrower when pulled too hard.
Once you reach the end of one strand, attach another loop or tie in additional material and continue.
Make several long braids.
These become your main basket-building material.
Step 5: Decide on Your Basket Size
Before weaving, decide what the basket needs to do.
For garden tools, a medium rectangular basket works well.
For a plant-pot cover, create a round basket slightly wider than the actual pot.
For patio storage, make a larger square container.
I wouldn’t make the first project enormous.
A small or medium basket is easier to shape while you’re learning how the plastic behaves.
Start with something manageable.
Future gigantic basket ambitions can wait until basket number two.
Make a Simple Cardboard Form
A cardboard box makes a fantastic temporary weaving guide.
Choose a box close to the size you want your basket to be.
You’re not attaching the plastic permanently to the box.
You’re simply using the box as a form.
Turn it upside down.
Now you’ll weave the basket around it.
This keeps the walls straighter and makes the project considerably easier than trying to freehand an empty basket in midair.
Sometimes cardboard deserves more credit.
Step 6: Create the Basket Base
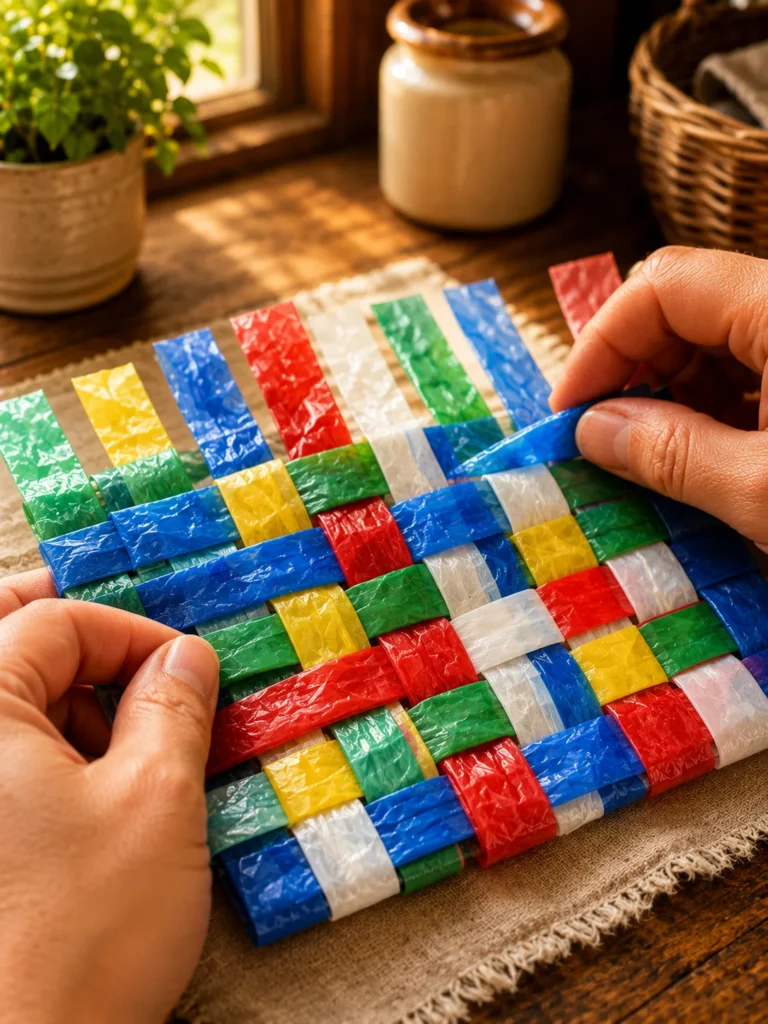
For a rectangular basket, lay several plastic braids or thick strips parallel across your work surface.
Then weave another set across them in the opposite direction.
Over.
Under.
Over.
Under.
Continue until you form a flat rectangle.
Pull the strips snug enough that the base feels connected without crushing the pattern.
Clip the edges temporarily so they don’t shift.
Keep checking the size against your cardboard form.
Make the Base Stronger
The bottom usually carries the most weight.
So don’t make it too loose.
You can double some strips.
You can also stitch intersections together using strong polyester thread.
For a decorative basket that will sit outdoors occasionally, synthetic thread may hold up better around moisture than ordinary paper-based craft materials.
Keep knots on the inside where possible.
And remember that this is still an upcycled plastic craft.
I wouldn’t use it to carry bricks.
Garden gloves?
Absolutely.
Step 7: Turn the Weave Up the Sides
Once the base reaches the correct size, place your cardboard form on top.
Bend the long weaving strips upward along the sides of the box.
Clip them near the top.
These vertical strips become the basket’s supports.
Now begin weaving a long horizontal strand around them.
Go over one vertical strip.
Under the next.
Then over.
Then under.
Continue around the basket.
On the next row, reverse the pattern.
That’s what locks the weave together.
Keep the Weave Tight but Not Too Tight
This is where people sometimes pull too hard.
If you tighten every row aggressively, the basket can shrink around the cardboard box.
Then removing the form becomes a wrestling match.
Keep the weave snug but flexible.
Slide each new row close to the row beneath it.
Check the corners.
Straighten any twisted sections.
And occasionally try moving the cardboard form slightly.
If it refuses to budge after three rows, loosen things now.
Not 45 minutes later.
Step 8: Build the Basket to the Desired Height
Continue weaving upward.
This is the repetitive, almost relaxing part.
Over.
Under.
Over.
Under.
After several rows, you really start seeing the basket take shape.
Keep the height consistent around all sides.
Use your ruler occasionally if you’re aiming for a clean modern look.
For rustic decor, tiny variations are totally fine.
Honestly, handmade baskets look better when they don’t resemble something stamped out by a machine.
Step 9: Finish the Top Edge
When the basket reaches the height you want, stop adding rows.
Now fold the vertical strips inward.
Tuck them underneath nearby woven rows.
For more security, stitch the folded sections into place using strong thread.
Trim excess plastic carefully.
The top edge should feel neat and reasonably sturdy.
You can leave it plain or cover it with another material.
This is where jute rope looks especially cute.
Add a Jute-Rope Rim
Want the recycled plastic to look more like a store-bought garden basket?
Add jute around the upper edge.
Measure enough rope to go around the basket.
Attach it with strong stitching or an adhesive suitable for your materials and intended use.
Keep the rope even.
A natural fiber rim gives the basket a warmer look and helps visually break up the plastic.
Suddenly the grocery bags feel a lot less grocery-bag-ish.
That’s the technical term.
Add Handles
For a lightweight basket, handles are easy.
Create two short braids from several plastic strands.
Or use jute rope.
Attach one handle to each side with strong stitching.
Reinforce the attachment points.
Don’t rely on one tiny thread loop.
If you plan to carry anything heavier than a handful of seed packets, distribute the handle attachment across several rows of weaving.
And test the basket with a light load first.
No dramatic lifting test over your toes.
Make a Round Plant-Pot Cover
This is one of my favorite uses.
Instead of a rectangular box form, use a round bucket or plant pot as your temporary guide.
Create a circular woven base.
Then bend strips upward and weave around the pot.
Leave enough space for easy removal.
Once complete, slide the decorative basket off.
Place a separate waterproof plant pot and saucer inside.
That way, your woven basket acts as a decorative outer cover rather than holding wet soil directly.
Much smarter.
Don’t Plant Directly Into the Plastic Basket
I wouldn’t fill this woven plastic basket directly with soil.
The weave has gaps.
Water can escape unpredictably.
Soil can work its way through.
And the basket wasn’t made as a structural plant container.
Instead, place a proper nursery pot or planter inside.
Use a saucer if needed.
Then the outer woven basket hides the plain pot.
You get the cute look without asking your grocery-bag creation to become professional horticultural equipment.
Make a Herb Basket
Use a low, wide woven basket as a cover for several small herb pots.
Arrange basil, parsley, thyme, or other herbs suited to your growing conditions.
Keep each herb in its proper container.
Place the woven basket around the group.
This looks especially cute on a covered patio or outdoor table.
Just make sure water doesn’t sit inside the decorative basket for long periods.
Remove pots for watering if necessary.
Plastic may handle moisture better than paper, but trapped dirt and standing water can still make a mess.
Make a Garden-Tool Basket
This is probably the most practical version.
Create a medium rectangular basket with sturdy handles.
Use it for lightweight items such as:
Garden gloves
Seed packets
Plant labels
Twine
Small hand tools
Clothespins
Empty nursery pots
Plant ties
Keep sharp tools protected so they don’t poke through the weave.
A pair of pruning shears pointing directly through plastic strips?
Yeah, let’s not.
Make a Backyard Toy Basket
A larger version can hold lightweight outdoor toys.
Think:
Plastic balls
Sidewalk chalk containers
Bubble wands
Small pool toys
Frisbees
Keep the basket somewhere sheltered when possible.
And don’t leave small pieces where young children can access them unsupervised.
A fun storage basket still needs normal household common sense.
Make a Coastal Version
White grocery bags can create a surprisingly beachy look.
Combine white plastic braids with natural jute.
Add rope handles.
Place the basket near blue patio cushions or white planters.
The combination of woven white material and tan rope feels relaxed and coastal.
And nobody needs to know the “fancy basket material” previously carried cereal and paper towels.
That’s between us.
Make a Rustic Brown-and-Cream Basket
If you have brown and cream bags, alternate them.
Create broad horizontal stripes.
Add a jute top edge.
Use rope handles.
This version works beautifully around:
Wooden patio furniture
Terracotta pots
Neutral cushions
Natural greenery
A few imperfections actually make it look more handcrafted.
Don’t obsess over perfectly identical stripes.
Rustic decor can handle a little personality.
Make a Modern Black-and-White Basket
For something cleaner, combine black and white strips.
Try a simple alternating pattern.
Or make the basket mostly white with a black top stripe.
Keep the handles black.
Skip the jute.
This creates a sharper graphic look that works well on modern patios.
Who knew grocery bags had interior-design ambitions?
Apparently they’ve been waiting for us to notice.
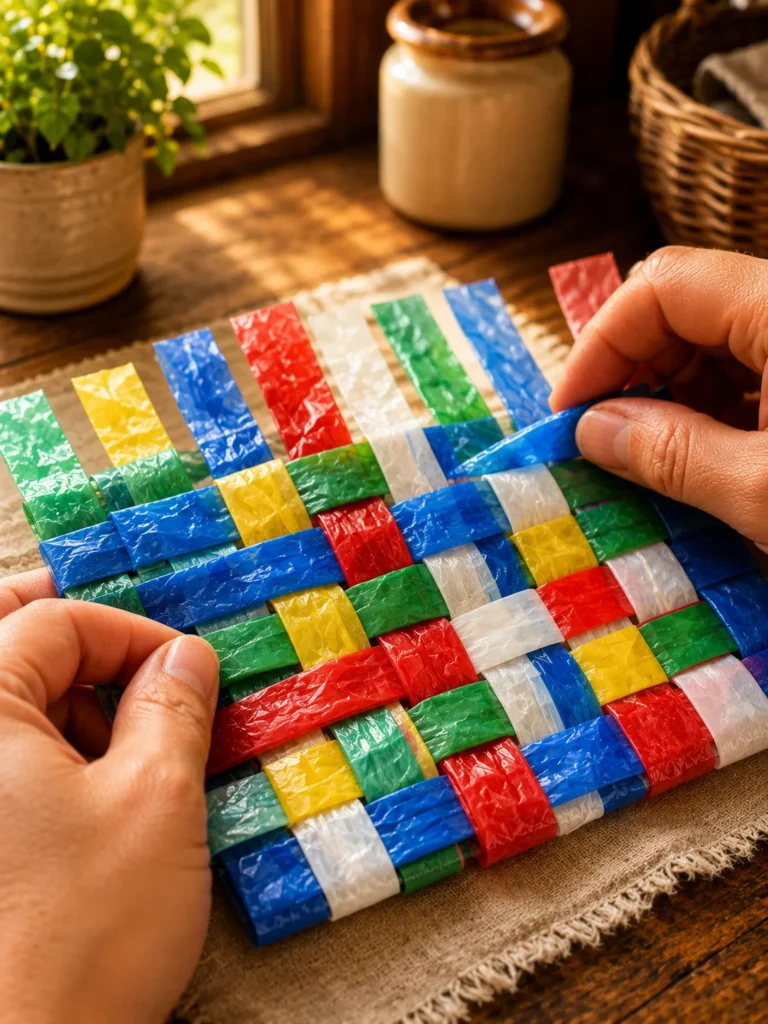
Try a Checkerboard Weave
Once you’re comfortable with basic weaving, alternate two colors.
Use one shade for vertical strips.
Use another for horizontal strips.
You’ll get a checkerboard effect.
This works best when the bag colors have strong contrast.
Black and white.
Blue and white.
Brown and cream.
Keep the pattern simple.
The woven texture already gives you plenty to look at.
Add Fabric Strips
Want something softer?
Mix strips of old fabric into the weave.
Cotton fabric scraps can bring color and texture.
Old sheets can work.
So can pieces of worn clothing that are clean and suitable for crafting.
Alternate plastic rows with fabric rows.
Just remember that fabric absorbs moisture much more readily.
A mixed-material basket belongs in a covered area rather than sitting in rain.
Add Ribbon for Color
Wide outdoor-suitable decorative ribbon can become an accent row.
Weave one ribbon strip around the center of the basket.
Or use ribbon around the top.
This is an easy way to coordinate the basket with patio cushions or seasonal decor.
For summer, try blue.
For fall, burnt orange.
For spring, sage green.
For a holiday version, red can work.
One basket.
Different personality.
Make Smaller Matching Baskets
A set looks really nice.
Try:
One medium garden-tool basket
One small seed-packet basket
One tiny twine basket
Use the same weaving pattern and color palette.
Grouping related sizes makes the recycled material feel much more intentional.
And small baskets are fantastic for using leftover strips.
Nothing goes to waste.
Well, except maybe your entire Sunday afternoon once you realize basket weaving is weirdly addictive.
Can You Wash the Basket?
Light cleaning is possible.
Shake out loose dirt.
Wipe plastic areas with a damp cloth.
Avoid aggressive heat.
Don’t put the basket in a dishwasher.
Don’t machine wash it.
Don’t place it in a clothes dryer.
If you’ve added jute, fabric, cardboard reinforcement, or other absorbent material, use even less water.
Let the basket dry completely before storing it.
Can It Stay Outside?
I’d call this a protected outdoor craft, not permanent all-weather furniture.
Plastic bags can weaken after prolonged exposure to sunlight, temperature changes, wind, and physical wear.
Thread, glue, fabric, jute, and other added materials may weather even faster.
A covered patio or porch is a better location than an exposed garden bed.
Bring the basket inside during severe weather.
And inspect it periodically.
If strips become brittle or damaged, retire or repair the piece.
Don’t Put It Near Fire
Plastic can melt and burn.
Keep your finished basket away from:
Fire pits
Grills
Outdoor heaters
Candles
Fireplaces
Hot cooking appliances
Open flames
Don’t use it to carry hot charcoal, firewood with embers, or anything that could expose the plastic to high heat.
This may be backyard decor.
That doesn’t mean it belongs beside the barbecue.
Give it some space.
Don’t Use It for Food Storage
I would keep this craft for decorative or utility use.
Don’t use unknown grocery-bag plastic as a direct food-storage surface after it’s been cut, handled, woven, stitched, and mixed with craft materials.
Keep produce, snacks, bread, or picnic food in proper food-safe containers.
Then, if you like the look, you can place those containers inside the decorative basket.
Cute outside.
Food-safe container inside.
Everybody wins.
What About 150 Grocery Bags?
You may not need that many.
A huge basket made from thick fused or layered material can consume a surprising number of bags, but a no-heat woven project can be scaled to whatever stash you have.
Start with 30 to 50 bags.
Make several strips.
See how far they go.
For a smaller basket, that may be plenty.
For a large basket with thick braided cords, you can keep adding more.
There’s no prize for hitting exactly 150.
Your under-sink bag collection doesn’t have to disappear in one afternoon.
Ways to Finish the Basket Without Glue
If you’re trying to reduce adhesives, sew the edges.
Use strong polyester thread or cord.
A large blunt-tip needle can work through some woven sections.
Stitch top edges.
Reinforce corners.
Secure handles.
This may take longer than glue, but it creates mechanical connections that aren’t dependent on adhesive alone.
For thicker plastic braids, pre-punching small holes carefully may make stitching easier.
Keep fingers clear of sharp tools.
Common Mistakes to Avoid
Cutting Strips Too Thin
Very thin plastic can stretch and tear.
Wider strips are easier for beginners.
Pulling the Weave Too Tight
Over-tight weaving can distort the basket shape.
Keep tension firm but comfortable.
Making a Weak Base
Double your base material when the basket will carry objects.
Using Dirty Grocery Bags
Start with clean, dry plastic.
No questionable food residue.
Planting Directly in the Basket
Use a proper plant pot inside instead.
Making Handles Too Weak
Reinforce attachment points before carrying anything.
Leaving It in Full Sun Forever
Long outdoor exposure can weaken materials.
Putting It Near Heat
Plastic and high heat are a bad combination.
Making the First Basket Too Large
Start smaller.
Learn the weave.
Then make the patio mega-basket.
Expecting Handmade Plastic Weaving to Support Heavy Loads
Keep expectations reasonable.
This is decorative lightweight storage, not construction equipment.
Why This Upcycling Project Is So Satisfying
I think the fun comes from the before-and-after.
Before:
Wrinkled grocery bags stuffed under the sink.
After:
A textured woven basket sitting beside your patio chair.
That’s a pretty wild transformation.
You also control everything.
Size.
Shape.
Color.
Handles.
Texture.
Style.
And because the raw material is so inexpensive, mistakes aren’t heartbreaking.
If one strip looks bad?
Cut another.
That’s considerably less stressful than experimenting on a $40 roll of designer craft material.
Frequently Asked Questions
How do you make a basket from plastic grocery bags?
Clean the bags, remove the handles and bottom seams, cut the bags into loops, join the loops into long strands, braid or twist those strands, and weave them around a temporary form to create the basket base and sides.
Do I have to melt plastic bags to make a basket?
No. A no-heat method using cut, braided, and woven plastic strips works well and avoids heating unknown household plastic.
How many plastic bags do I need?
It depends on the basket size and strand thickness. A small basket may use a few dozen bags, while larger or heavily braided projects can require far more.
What is plarn?
Plarn is yarn-like material made from strips of plastic bags that are connected into longer strands.
Can I crochet plastic grocery bags?
Yes. Plarn is often crocheted or knitted into bags, mats, and baskets. Use a hook size suited to the thickness of your strands.
Can I use a woven plastic bag basket as a planter?
Use it as a decorative outer cover rather than filling it directly with soil. Place a proper plant pot and saucer inside.
Can this basket get wet?
Plastic itself can tolerate some moisture, but thread, glue, jute, fabric, and other added materials may not. A protected outdoor location is best.
Can the basket stay outside all summer?
I’d keep it on a covered porch or patio and check it periodically for UV damage, stretching, or wear.
Can I wash a plastic bag basket?
Lightly wipe or rinse suitable all-plastic versions and let them dry fully. Avoid heat and follow the care needs of any added materials.
What can I store in it?
Use it for lightweight items such as gardening gloves, seed packets, small garden supplies, outdoor toys, clothespins, or as a decorative plant-pot cover.
Can I use old shopping bags in different colors?
Absolutely. Different colors can create stripes, checkerboard patterns, or intentionally mixed recycled designs.
Is heating plastic grocery bags with an iron necessary?
No. Cutting and weaving gives you a useful alternative without applying direct heat to household plastic.
Final Thoughts
A DIY woven plastic bag basket is one of those projects that makes you look at household clutter a little differently.
That mountain of grocery bags?
It can become actual craft material.
Cut the bags.
Join the loops.
Braid the strands.
Build a woven base.
Bring the sides upward.
Add a sturdy rim and handles.
Then use your finished basket for lightweight backyard storage or as a decorative cover around a proper plant pot.
I especially like the no-heat method because you still get the clever recycled look without melting unknown household plastic under an iron.
And once the finished basket is sitting on the patio beside a terracotta pot and a pair of garden gloves?
Nobody needs to know it started life stuffed under your kitchen sink.
Unless you want to tell them.
Honestly, that’s kind of the best part.