

This is one of those wonderfully simple projects that looks far more dramatic than the effort it takes. You start with an ordinary foam wreath form, a pile of black map pins, and a coat of black paint, then build the surface row by row until the whole thing turns into a richly textured Halloween wreath with a bold, almost sculptural look.
I especially love projects like this because they rely on repetition instead of tricky technique. If you can paint a wreath form and push pins in straight, you can make this. It is a great fit for anyone decorating on a dollar-store budget who still wants something high-impact and polished enough to hang right on the front door or above a mantel.
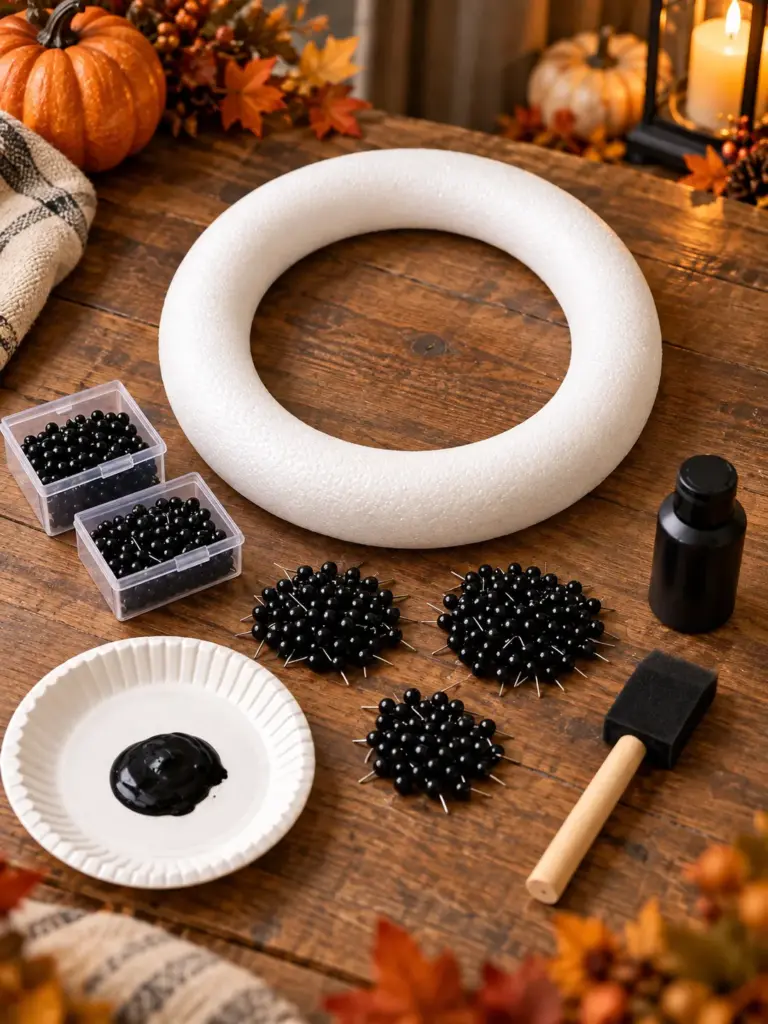
Materials
1 foam wreath form, 12 inches across and about 2 inches thick
300 black map pins, standard dollar store size
2 fluid ounces matte black craft paint
1 foam brush, 1 inch wide
1 paper plate or small paint tray
1 sheet wax paper or scrap cardboard, about 18 x 18 inches, to protect the work surface
1 ribbon for hanging, 24 inches long, optional
Instructions
1. Cover your work surface with wax paper or cardboard, then set the foam wreath form on top. Pour a little black craft paint onto a plate so it is easy to load the brush lightly.
2. Paint the entire wreath form black, including the inner ring, outer edge, and both flat sides. Let it dry completely so no white foam peeks through later between the pins.
3. Start on the outer edge of the wreath and push the first row of black map pins straight into the foam about 1/4 inch deep. Space them evenly so the pin heads sit close together without overlapping.
4. Continue adding pins in rows, working around the wreath one band at a time. Keep each new row lined up with the previous one so the spacing stays neat and the spiky texture looks full instead of random.
5. Cover the front face first, then fill the inner edge and outer edge so the wreath looks dense from every angle. Turn the form as you work to check for thin spots and keep the texture consistent.
6. Add pins to the remaining visible side areas, especially near the inner circle and outer rim where gaps tend to show. If you notice uneven spacing, pull a pin out and reset it before moving on.
7. Once all visible foam is covered, inspect the wreath in good light and add a few extra pins anywhere the black paint still shows too obviously. The finished wreath should take about 300 pins and have an even, richly textured surface all the way around.
8. Tie on a simple ribbon loop for hanging if you like, or hang the wreath directly from a hook. Display it indoors or on a sheltered door to keep the pins and foam in good condition.

Variations & Tips
Add a centerpiece: If you want a little extra Halloween flair, glue a small plastic raven, bat, or skull at the bottom or center after the pinning is finished. I would keep it small so the striking pin texture stays the star.
Try mixed finishes: Matte black pins give the wreath a velvety look, but if you can find glossy black pins, they create a slightly sharper, more reflective finish. You can even mix the two for subtle dimension.
Work in sections: I find it easiest to divide the wreath mentally into quarters and finish one section at a time. That keeps the rows consistent and makes the project feel faster.
Use paint generously but neatly: The black base coat is what makes this look finished rather than homemade in a rushed way. Even if the paint seems unnecessary at first, it is the step that hides tiny gaps and gives the whole piece a polished look.
Keep it sheltered: Foam and map pins hold up best away from heavy rain and direct weather. A covered porch, entryway, or indoor mantel is ideal.
Make it fuller if needed: If your pins are spaced a little wider than mine, pick up an extra pack and fill in the thinnest areas. A dense surface is what gives this wreath its mind-blowing payoff.