

There’s something deeply satisfying about turning yesterday’s coffee into something beautiful today. Out here, we’ve always had a habit of using things up instead of tossing them out, and this little oven-dried dough project has that same thrifty spirit I grew up with. It starts simply enough with used grounds spread out on a sheet pan, and from there you end up with a batch of charming handmade decorations that look warm, old-fashioned, and full of character.
If you enjoy easy kitchen-table crafts that make the whole house feel cozy, this one is for you. The dough is simple to mix, easy to roll, and wonderfully forgiving, and the finished pieces have that homespun look that reminds me of old cookie tins, twine, and handmade holiday trimmings tucked away in a cedar chest.
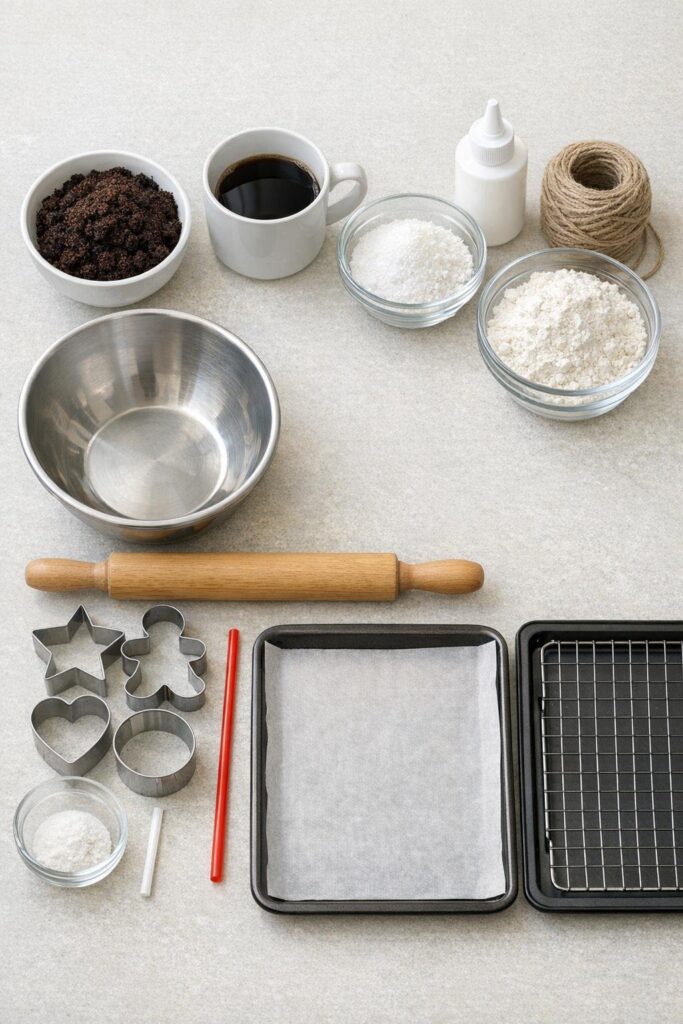
Materials
1 cup used coffee grounds, well drained
1/2 cup cold brewed coffee
1/2 cup table salt
1 1/2 cups all-purpose flour, plus 2 tablespoons extra for dusting
1 tube white puffy paint or 1 white paint pen
6 to 8 feet twine, cut into 8-inch lengths
1 baking sheet, standard half-sheet size
1 sheet parchment paper cut to fit the baking sheet
1 large mixing bowl
1 rolling pin
2 to 4 cookie cutters, gingerbread-style or other simple holiday shapes, about 3 to 5 inches wide
1 drinking straw for making hanging holes
1 oven preheated to 200°F
Instructions
1. Spread the used coffee grounds in a thin, even layer over the parchment-lined baking sheet and bake at 200°F for 25 to 35 minutes, stirring once halfway through, until they feel dry and crumbly rather than damp.
2. Let the grounds cool for 10 minutes, then pour them into a mixing bowl with the flour and salt and stir until the color looks evenly blended.
3. Add the cold coffee a little at a time, mixing with a spoon or your hands until a soft dough forms that holds together like sugar cookie dough.
4. Knead the dough in the bowl or on a lightly floured counter for 1 to 2 minutes, just until smooth; if it feels sticky, work in a spoonful of flour, and if it cracks badly, add a teaspoon of coffee.
5. Roll the dough to about 1/4 inch thick so the finished pieces feel sturdy and bake up with a nice substantial look.
6. Cut out as many shapes as you can, placing them close together, then gather and reroll the scraps once to make more.
7. Use the straw to punch a hole near the top of each shape, keeping it at least 1/2 inch from the edge so it stays strong after baking.
8. Transfer the shapes to the parchment-lined baking sheet, leaving a little space between them, and smooth any rough edges with your fingertip.
9. Bake at 200°F for 1 1/2 to 2 hours, flipping once halfway through, until the ornaments are firm and dry all the way through.
10. Turn off the oven and let them sit inside with the door cracked open for 20 to 30 minutes to finish drying gently and reduce curling.
11. Cool the ornaments completely on the baking sheet, then decorate them with white puffy paint or a white paint pen to mimic piped icing along the edges, cuffs, smiles, buttons, and any little details you like.
12. Let the decoration dry fully, then thread twine through each hole and knot the ends for hanging.

Variations & Tips
For a classic gingerbread look: Gingerbread people, stars, hearts, and little houses all work beautifully here because the white detailing shows up so well against the coffee-colored dough.
If the dough feels fussy: Coffee grounds vary in moisture, so adjust without worry; a spoonful more flour or a teaspoon more coffee is usually all it takes to bring the dough back into line.
For smoother edges: Roll between two sheets of parchment before cutting, then peel away the top sheet and cut your shapes right on the bottom sheet.
For stronger ornaments: Keep them no thinner than 1/4 inch, especially if you’re making larger shapes, and don’t place the hanging hole too close to the top edge.
For extra charm: Add simple dots, scallops, little cuffs, or a tiny bow tie in white paint; those small finishing touches are what make handmade ornaments look polished instead of plain.
For gifting: Tie 3 or 4 together with twine and tuck in a sprig of evergreen or a cinnamon stick. They make a lovely little hostess gift and smell pleasantly of coffee while they hang.
For storage: Keep the finished ornaments in a dry tin or box between sheets of tissue paper, and avoid damp spots so they stay firm from one season to the next.