I have a soft spot for Christmas crafts that start with something you were probably about to throw away.
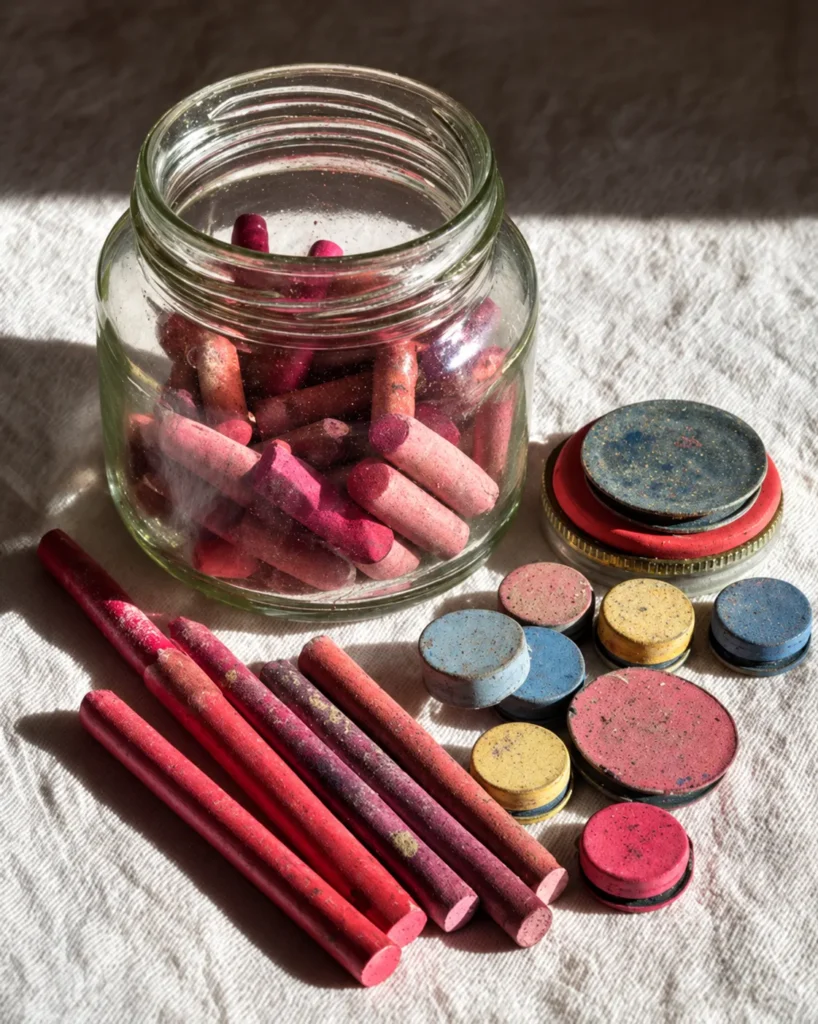
Old crayons? Yep.
Extra jar lids? Absolutely.
Put the two together, add a little heat and a peppermint-inspired swirl, and suddenly you have the cutest little DIY Christmas coasters sitting on your table.
Honestly, this melted crayon craft feels like something straight out of a holiday movie craft scene. The red and white swirls look like peppermint candy, and the finished pieces add a cheerful pop of color to coffee tables, cocoa stations, and Christmas place settings.
Even better, this project gives old crayons another purpose instead of sending them straight to the trash.
These peppermint swirl coasters can work as holiday decorations, handmade gifts, table accents, or simple Christmas crafts for a cozy afternoon at home.
And the supplies? Pretty basic.
If you have kids, there’s a good chance half of them are already hiding in a crayon box somewhere.
One important note before you begin: melted crayons are wax-based craft material, not food-safe material. Keep finished coasters away from direct contact with food, and use good ventilation while heating wax. Jar lids used for this project should stay dedicated to crafts rather than going back into food use.
Peppermint Swirl Coasters Made From Old Crayons
Old crayons and jar lids ready to become peppermint-inspired Christmas coasters.
The charm of this project comes from its simplicity.
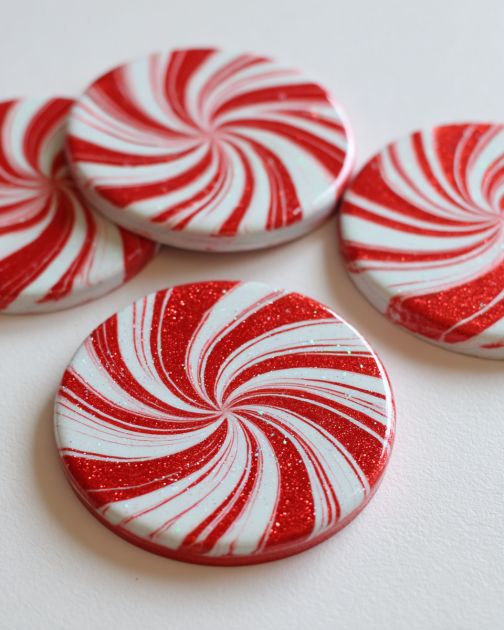
Red crayon wax forms the main color, while white crayons create those familiar candy-cane swirls.
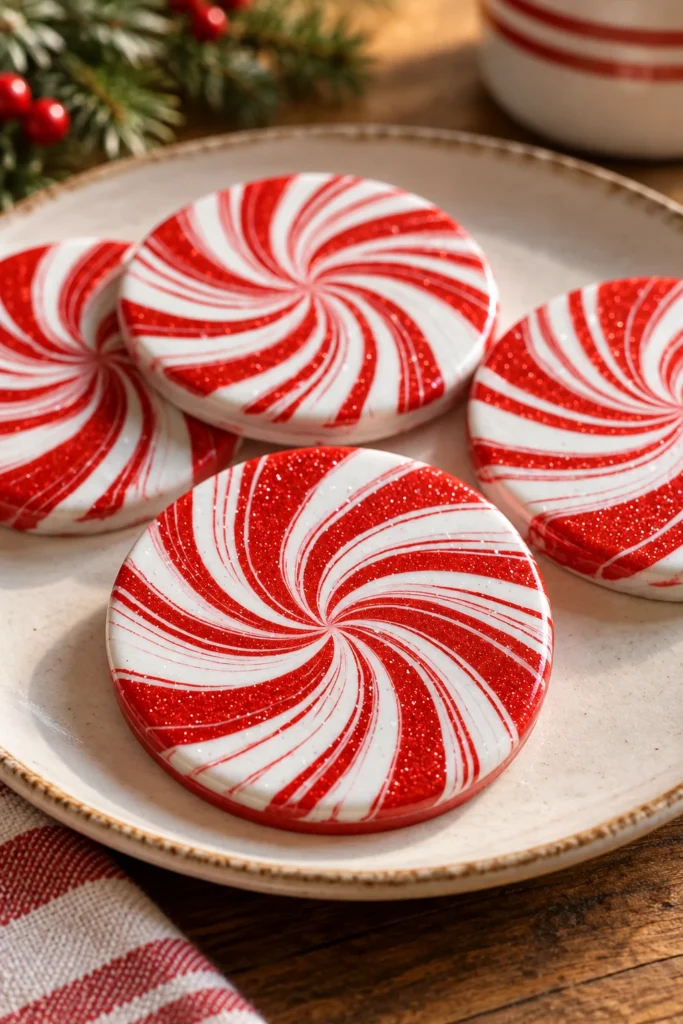
Once everything cools, the finished rounds look almost like oversized peppermint candies.
I especially love how they look next to a mug of hot chocolate.
Add a plaid napkin, a few pinecones, and maybe a sprig of faux holly nearby, and suddenly your coffee table looks ready for December.
Materials for Peppermint Swirl Crayon Coasters
You won’t need much to make these melted crayon Christmas coasters.
Gather the following supplies:
- At least 10 old red crayons
- Several white crayons for the peppermint swirl
- 4 to 6 clean metal jar lids
- 1 baking sheet
- Parchment paper
- Oven mitts
- A wooden stir stick or toothpick
- Felt sheets, optional
- Craft glue, optional
- Scissors, if adding felt backing
Choose jar lids with a shallow, even shape.
Metal lids work best because they can tolerate gentle heating and help hold the melted wax in a neat circle.
Just remember: once you use a jar lid for melted crayon wax, keep it as a craft item.
How to Make Peppermint Swirl Coasters From Old Crayons
1. Remove the Crayon Wrappers
Start by peeling all the paper wrappers from your crayons.
If the paper refuses to cooperate—and somehow crayon wrappers always seem to know when you’re in a hurry—score the wrapper lightly with a craft knife and peel it away.
Adults should handle any cutting tools.
Try to remove as much paper as possible because little scraps can get trapped in the melted wax.
Once the wrappers are gone, break the crayons into small pieces.
Small chunks melt more evenly than whole crayons.
Aim for pieces around half an inch long.
They don’t need to look perfect. You’re melting them anyway.
2. Prepare the Baking Sheet
Line a baking sheet with parchment paper.
The parchment catches any accidental drips and makes cleanup much easier.
Place your jar lids on the baking sheet with the shallow side facing upward.
Make sure the lids sit flat.
A crooked lid can send melted wax toward one edge, and then you’ll end up with a peppermint coaster that looks like it survived a small holiday landslide.
Cute? Maybe.
Ideal? Not exactly.
3. Fill the Jar Lids With Crayon Pieces
Add red crayon pieces to each jar lid.
Then scatter in a few pieces of white crayon.
Don’t overthink the arrangement.
The colors will blend once melted.
For a classic peppermint look, use mostly red with smaller amounts of white.
If you want stronger white streaks, add more white pieces near the center and around the edges.
Fill each lid evenly without piling the crayons too high.
The melted wax should form a flat coaster rather than a thick block.
4. Melt the Crayons Slowly
Set your oven to about 200°F, or 93°C.
Place the baking sheet inside once the oven is warm.
Heat the crayons for roughly 10 to 15 minutes.
Keep a close eye on them.
You want the crayons melted, not smoking or bubbling.
Crayon brands vary, so some may soften faster than others.
Good ventilation matters anytime you heat wax-based craft materials.
Open a nearby window or use an exhaust fan, and never leave melting wax unattended.
A small craft-only toaster oven can also be a handy option for frequent wax crafts, since it keeps craft materials separate from regular food preparation.
5. Create the Peppermint Swirl
Once the crayons have completely melted, carefully remove the baking sheet using oven mitts.
The lids and melted wax will be hot, so keep children and pets away from your work surface during this step.
Now comes the fun part.
While the wax is still liquid, drag a toothpick or wooden stir stick gently through the red and white colors.
Make small curved motions.
Think candy cane rather than paint mixer.
A few light swirls create a much prettier result than stirring everything aggressively.
If you mix too much, the colors can blend into one pink shade.
And while pink is cute, we’re going for peppermint here.
6. Let the Wax Cool Completely
Leave the jar lids sitting flat until the wax becomes fully hard.
Don’t rush this part.
Even when the surface looks firm, the center may still be warm.
Letting the coasters cool naturally helps keep the surface smooth.
Once everything feels completely cool, gently flex or tap the jar lids to loosen the wax.
Depending on the lid shape and crayon type, the wax rounds may pop out easily.
If they resist, don’t force them hard enough to crack.
Give them a little more cooling time first.
Add Felt Backing for a Softer Finish
Plain wax rounds can slide around on smooth furniture.
Felt backing gives them more grip and also protects tables from the metal edge if you choose to leave the coaster inside the lid.
Place a finished coaster on your felt sheet and trace around it.
Cut out the circle.
Add a thin layer of craft glue to the back, then press the felt into place.
Let the glue dry completely before using the coaster.
Red, white, green, or neutral felt all work nicely.
Personally, I like dark green because it gives the peppermint colors a little Christmas-tree contrast.
Should You Remove the Wax From the Jar Lids?
You have two choices here.
You can pop the wax rounds out and use them as decorative coasters, or you can leave the wax inside the jar lids.
Leaving them in the lids can make the coasters sturdier.
It also helps contain the wax if the coaster gets warm from a mug.
Just remember that crayons soften with heat.
These pieces are best used under cool drinks, mildly warm mugs, candles in separate holders, or simply as decorative holiday accents.
Avoid placing extremely hot cookware or freshly boiled containers directly on them.
Why Red and White Crayons Look Like Peppermint Candy
There is something about a red-and-white swirl that instantly screams Christmas.
The colors resemble peppermint candies, candy canes, holiday ribbon, and classic Christmas decorations.
That familiar combination makes this craft easy to fit into existing seasonal décor.
Put a few on a wooden coffee table and they feel warm and rustic.
Place them on a crisp white tablecloth and they suddenly look bright and playful.
Pair them with glass mugs filled with hot cocoa and marshmallows, and… okay, now we’re talking.
Christmas Table Ideas With Peppermint Coasters
These little coaster rounds can become part of a bigger holiday table setup.
Try placing one at every seat during a Christmas brunch.
Add folded red napkins, small pine branches, and white plates.
You can also scatter peppermint candies around the table for a matching theme.
For a coffee or hot chocolate station, stack a few coasters beside your mugs.
Add mini marshmallows, candy canes, cocoa powder, and festive napkins nearby.
It’s a simple setup, but it feels thoughtful.
And honestly, sometimes those small details are what guests remember.
Green and White Crayon Coasters
Red and white isn’t your only option.
Green and white crayons make a fun mint-candy version.
Dark green mixed with bright white gives a strong Christmas look, while pale green creates a softer winter feel.
You can even make half your set red and white and the other half green and white.
That combination looks great for Christmas parties and handmade gift sets.
Try Different Christmas Color Combinations
Old crayons give you a lot of room to play with color.
Try:
- Red and gold
- Green and white
- Blue and silver
- Burgundy and cream
- Pink and white
- Green and gold
- Red, green, and white
You can also mix several shades of the same color.
Two different reds, for example, can create more depth than one flat shade.
The same trick works with green crayons.
Add Glitter Carefully
If sparkles are your thing, you can add a very small amount of craft glitter while the wax is still soft.
A light sprinkle works best.
Too much glitter may create an uneven surface.
You can also use metallic crayons instead of loose glitter for a bit of shimmer without all those tiny sparkles ending up on your sweater, floor, dog, and somehow your dinner three days later.
You know how glitter goes.
Use Different Jar Lid Sizes
Different jar lid sizes can make a fun mismatched coaster set.
Small lids work nicely for narrow glasses, while larger lids suit mugs.
A mix of sizes also gives the finished set a handmade, vintage look.
If you’re making these as gifts, you could stack four different-sized peppermint coasters and tie them together with ribbon.
That makes a sweet little homemade Christmas present without spending much money.
Can You Seal Melted Crayon Coasters?
A protective coating may help the surface resist scratches, but choose craft coatings carefully and follow the manufacturer’s directions.
Some clear coatings can react with wax or remain tacky.
Test any sealant on one coaster first.
A clear resin coating can create a harder top surface, but resin changes this from a simple crayon craft into a more involved project.
For an easy holiday DIY, I would keep things simple and use the coasters mainly as decorative pieces or under cool to moderately warm drinks.
Make Them Into Christmas Ornaments Instead
Here’s another fun idea.
Use smaller metal lids and turn the finished peppermint rounds into Christmas tree ornaments.
Add a small loop of ribbon or string to the back of each lid.
Then hang them on your tree.
The red and white swirls look adorable between traditional ornaments and Christmas lights.
You could even write the year on the back.
That turns a simple crayon craft into a little homemade keepsake.
Make Peppermint Coasters With Kids
Kids can help choose colors, peel crayon wrappers, break crayons, and arrange the pieces inside cool jar lids.
Adults should handle the oven, hot baking sheet, melted wax, cutting tools, and any other heated materials.
This division makes the project fun without putting little hands close to hot wax.
And let’s face it, kids are usually much better at choosing wild color combinations anyway.
Give them a pile of crayons and suddenly you’ll have a purple, lime green, and orange “Christmas peppermint.”
Is it traditional?
Nope.
Will they love it?
Probably.
What to Do If Your Colors Blend Too Much
Sometimes the white and red wax mix into pink.
That usually happens when the colors are stirred too aggressively.
For more distinct peppermint swirls, use fewer stirring motions.
Drag the toothpick gently through the melted wax two or three times.
Then stop.
You can also place larger white crayon pieces farther apart before melting so the white stays more concentrated.
Less mixing means stronger color contrast.
What to Do If the Wax Cracks
Wax can crack if it cools too quickly or if you bend it while removing it from the lid.
Let the coaster cool fully before trying to remove it.
If cracking keeps happening, consider leaving the wax inside the jar lid.
Honestly, I like that version anyway.
The lid gives the coaster a defined edge and adds a little extra structure.
A Cute Way to Reuse Old Christmas Crayons
One of my favorite parts of this project is that it takes something ordinary and gives it a completely different job.
Those broken red crayons sitting at the bottom of the art box?
They suddenly become holiday decorations.
Those extra jar lids hanging around in the kitchen drawer?
Now they can frame colorful peppermint swirls.
It’s cheap, cheerful, and just quirky enough to feel memorable.
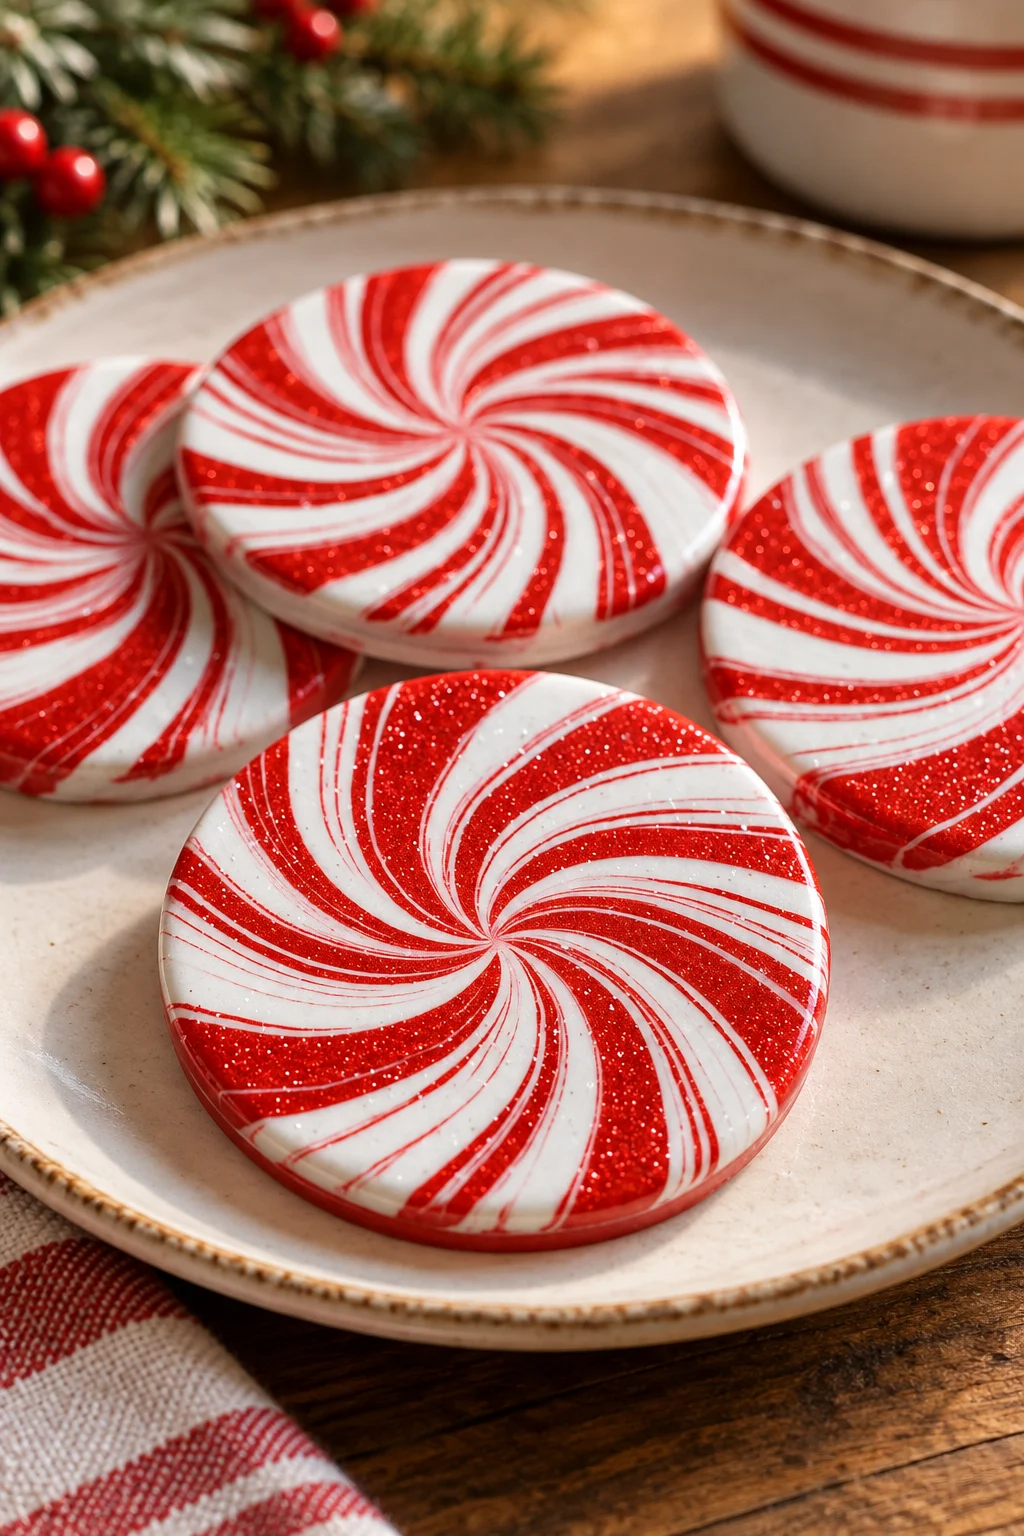
Finished red and white peppermint swirl coasters made from melted crayons
Finished red and white melted crayon coasters with a festive peppermint swirl pattern.
Variations and Tips
Use several shades of red: Dark red, bright red, and burgundy can create a deeper peppermint pattern.
Keep the stirring light: Two or three gentle swirls usually look better than fully mixing the wax.
Add felt underneath: Felt helps protect furniture and keeps lightweight coasters from sliding.
Try smaller molds: Small metal lids can become Christmas ornaments, gift tags, or decorative accents.
Give them as gifts: Stack four coasters, tie them with ribbon, and add a handwritten holiday tag.
Keep heat in mind: Crayon wax can soften when exposed to high temperatures, so avoid extremely hot cookware and open flames.
Protect your work surface: Wax can be difficult to remove once it hardens, so parchment paper is your friend here.
This Christmas DIY Turns Old Crayons Into Something Surprisingly Cute
Christmas crafts don’t always need expensive supplies or complicated tools.
Sometimes a handful of old crayons and a few jar lids are enough.
Melt the red and white crayons, give the colors a gentle swirl, let everything cool, and those forgotten art supplies suddenly look like giant peppermint candies.
The finished peppermint swirl coasters are colorful, inexpensive, and easy to match with classic Christmas décor.
Put them under glasses, add them to a holiday table, turn smaller versions into ornaments, or bundle a few together as a homemade gift.
Not bad for something that started at the bottom of the crayon box.