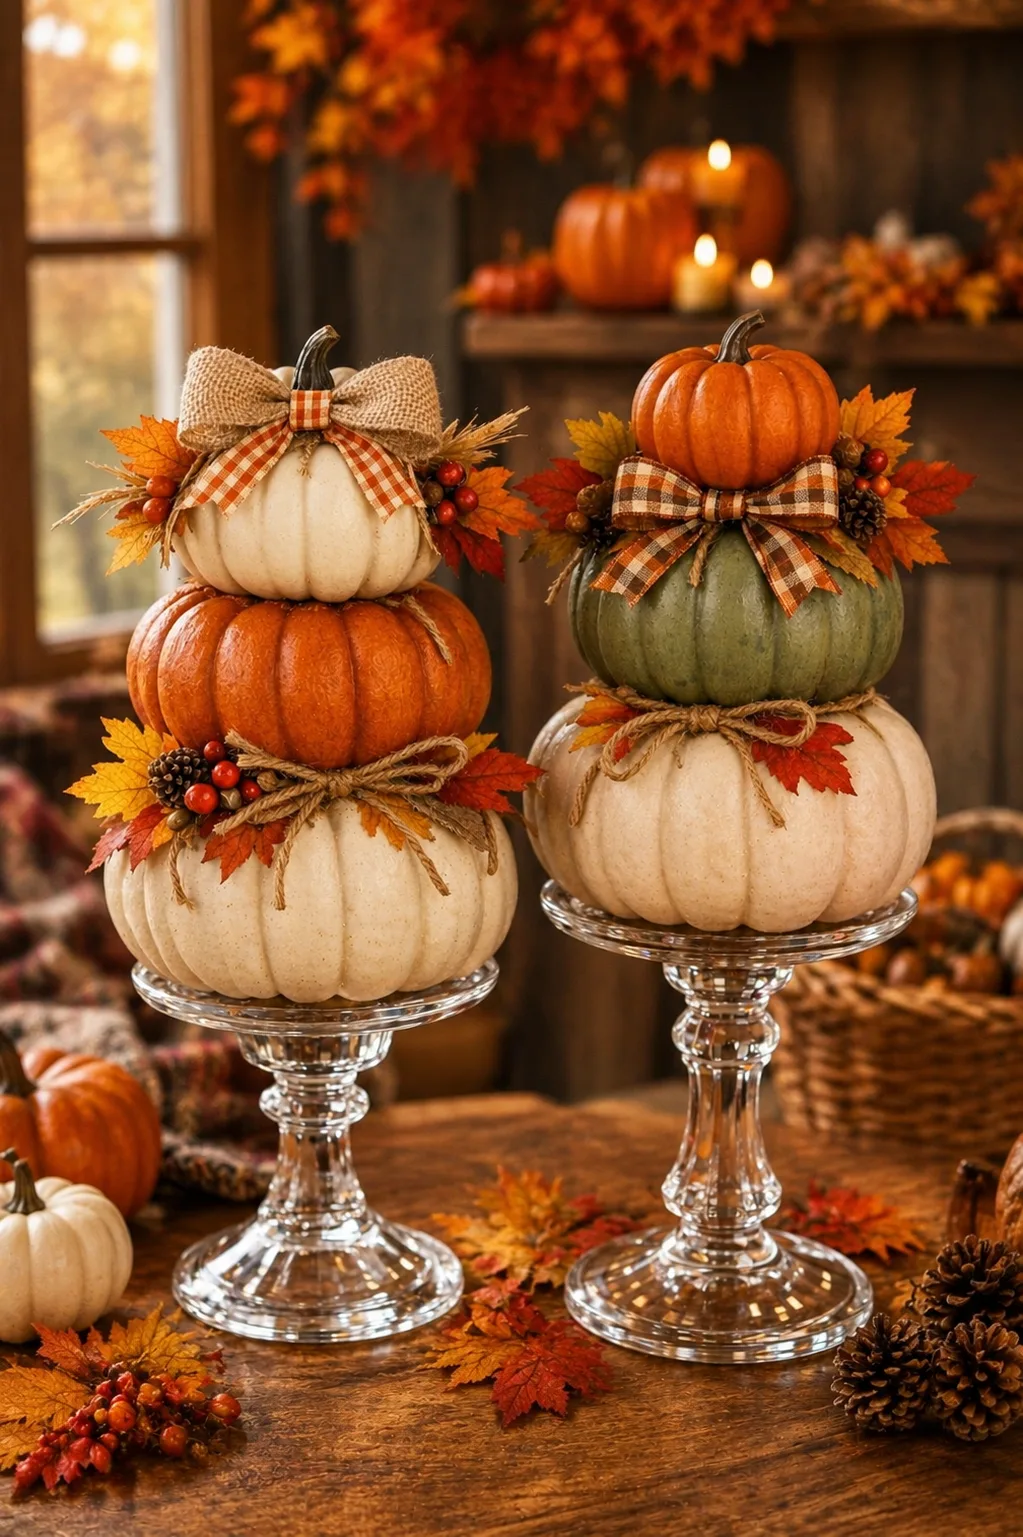
Okay, this is one of those fall crafts that makes me want to immediately check the dollar store and then swing by the thrift shop on the way home.
You start with those lightweight foam pumpkins that show up everywhere once fall rolls around.
You know the ones.
They’re cute enough, but straight from the store they can look a little… well, dollar-store-ish.
Then you grab a few thrifted glass candlestick holders, stack the pumpkins above them, add some paint and fall details, and suddenly you’ve got a DIY foam pumpkin candlestick topiary that looks like something you’d spot in a boutique fall display.
And honestly, that’s my favorite kind of project.
Cheap pieces.
Simple supplies.
Big transformation.
These pumpkin topiaries can sit beside the front door, dress up a covered porch, decorate a fireplace hearth, or become a Thanksgiving centerpiece in a smaller size.
You can also make them farmhouse white, traditional orange, moody black, soft sage green, or totally neutral.
Here’s how I’d make them from start to finish.
Why Foam Pumpkins and Glass Candlesticks Work So Well Together
The combination sounds a little random until you see the proportions.
A tall glass candlestick gives the pumpkin height.
The pumpkin gives the narrow candlestick visual weight.
Stack several pumpkins and you get a decorative tower without needing a heavy wooden structure.
The glass also keeps the project from looking too bulky.
Instead of three pumpkins sitting directly on the porch floor, the transparent pedestal makes them look almost like they’re floating.
Pretty clever for something built from thrift-store glass and foam.
What You’ll Need
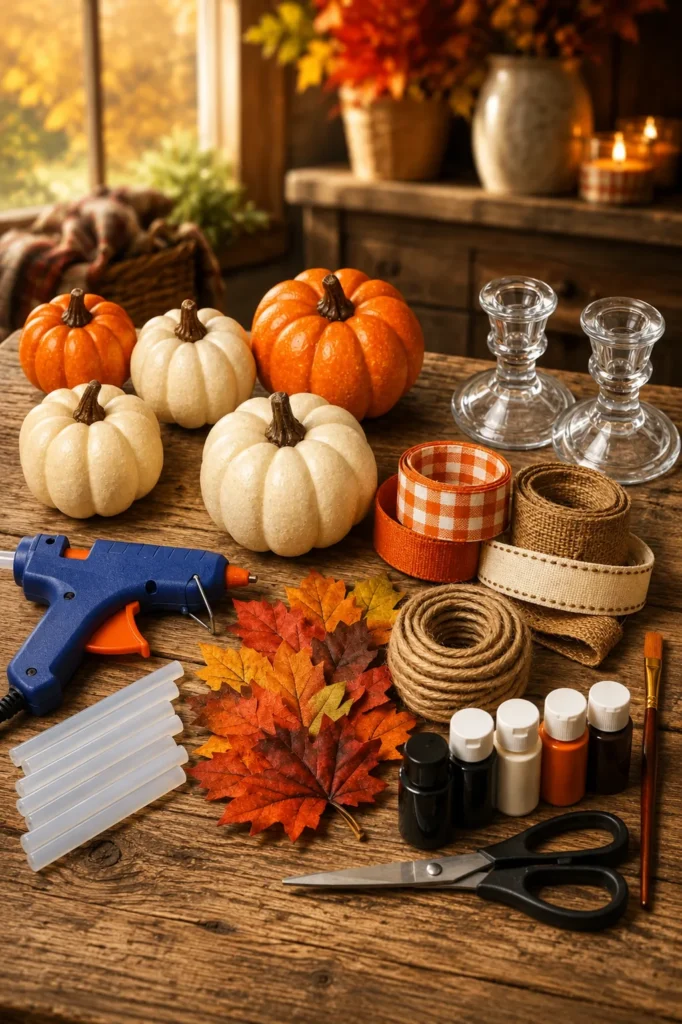
For one pumpkin topiary, gather:
- 2 to 4 lightweight foam pumpkins
- 1 sturdy glass candlestick holder
- Strong adhesive suitable for foam and glass
- Acrylic or craft paint suitable for the pumpkins
- Paintbrushes
- Foam brush, optional
- Fine-grit sandpaper if appropriate for the glass preparation
- Rubbing alcohol for cleaning the glass
- Clean cloths
- Faux fall leaves
- Faux berries, optional
- Jute twine, optional
- Ribbon, optional
- Small faux vines, optional
- Moss, optional
- Wooden dowel for extra internal support, optional
- Exterior-compatible clear protective coating if the project will be used outdoors
- Gloves
- Protective work surface
If you’re making two matching topiaries for either side of the front door, buy everything in pairs.
Trust me.
Finding one perfect thrifted candlestick is easy.
Finding its identical twin three weeks later?
That’s when the universe suddenly develops a sense of humor.
Start With the Right Foam Pumpkins
Look for lightweight pumpkins with shapes you actually like.
They don’t need to match perfectly.
In fact, slightly different shapes can make the finished stack more interesting.
I like using:
A larger pumpkin at the bottom.
A medium pumpkin in the middle.
A smaller pumpkin on top.
That creates a traditional tapered topiary shape.
You can also stack pumpkins that are almost the same size for a chunkier look.
Before buying them, check that the bottoms are relatively flat.
Extremely crooked pumpkins can make stacking harder.
A tiny wobble is fine.
A pumpkin leaning like it’s had a rough Thanksgiving dinner is another story.
Choose a Strong Candlestick Holder
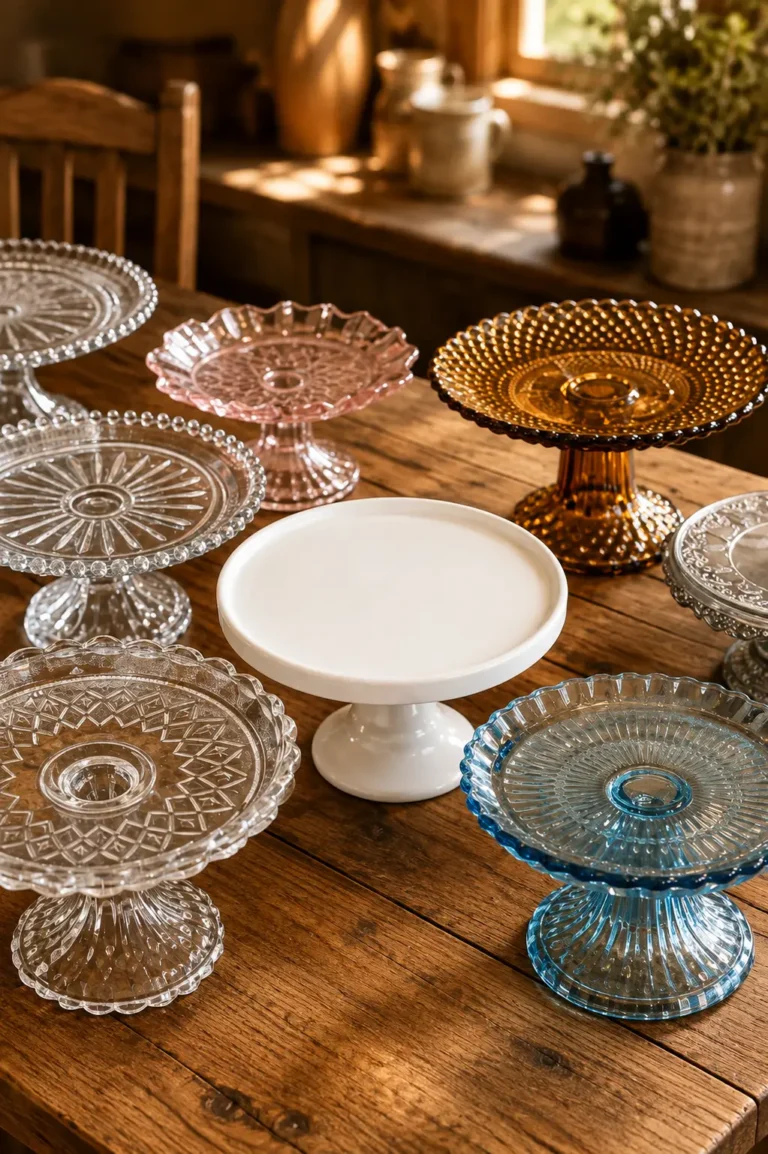
Thrift stores are fantastic for this part.
Look for glass candlesticks with:
- A wide base
- Thick glass
- No cracks
- No chips
- A flat top
- Good overall balance
Avoid very narrow, delicate stems for large pumpkin arrangements.
The taller the topiary becomes, the more important that stable base gets.
Give the candlestick a gentle test on a flat surface.
If it rocks before you put anything on it, leave it at the thrift store.
We’re making fall decor.
Not pumpkin Jenga.
How Tall Should the Candlestick Be?
For tabletop decor, a short candlestick around 4 to 8 inches can look great.
For a porch display, something around 8 to 14 inches creates more drama.
But height changes stability.
A tall narrow candlestick with three large pumpkins can become top-heavy.
If you’re working with a taller pedestal, keep the pumpkins lightweight and make the bottom pumpkin wider than the upper ones.
Always dry-stack everything before gluing.
That one step can save the entire project.
Clean Thrifted Glass Before You Start
Thrifted candlesticks can have wax, dust, fingerprints, stickers, and mystery residue.
Wash the glass appropriately.
Remove old wax carefully.
Take off price stickers.
Then wipe the bonding area with rubbing alcohol if that’s suitable for the glass and adhesive you’re using.
Let it dry completely.
Adhesive needs a clean surface.
Glue sitting on top of old candle wax isn’t really attached to the candlestick.
It’s attached to yesterday’s candle.
Not quite the same thing.
Decide Whether to Keep the Glass Clear
You have two great choices.
Keep the glass transparent for a lighter, slightly fancy look.
Or paint it.
Clear glass works beautifully with traditional orange pumpkins, metallic accents, and elegant Thanksgiving decor.
Painted candlesticks work better for farmhouse, rustic, or modern designs.
Black can look fantastic.
So can cream.
Antique gold is another favorite.
Pick the finish before assembling the pumpkins.
Painting around a completed pumpkin tower is unnecessarily annoying.
Painting the Glass Candlestick
If you want to paint the glass, clean it thoroughly first.
Use primer or paint intended to bond to glass.
Apply light coats.
Let each coat dry according to the product directions.
Rotate the candlestick as you work.
Don’t hold it by freshly painted sections unless fingerprints are part of your artistic vision.
For an aged finish, you can layer two colors and lightly distress selected areas once everything has cured.
Just keep the base level and free from thick paint buildup.
Prepare the Foam Pumpkins
Remove loose tags.
Check the stems.
Wipe away dust.
If the pumpkin surface is shiny, test your paint on a hidden area first.
Some foam products react poorly to certain solvent-based paints.
That’s important.
When in doubt, stick with water-based craft products specifically compatible with foam.
Don’t grab random spray paint and assume it’ll work.
Some solvents can damage exposed foam surprisingly quickly.
Tiny chemistry lesson.
Big craft-saving tip.
Step 1: Choose Your Pumpkin Color Palette
This is where you can completely change the personality of the project.
Traditional fall colors include:
Burnt orange.
Rust.
Mustard.
Deep red.
Brown.
Cream.
For farmhouse decor, try:
White.
Ivory.
Sage green.
Muted tan.
Soft gray.
For modern fall decor:
Matte black.
Cream.
Terracotta.
Olive.
For a softer neutral look:
Warm beige.
Mushroom.
Taupe.
Ivory.
Honestly, those muted colors can make inexpensive foam pumpkins look shockingly good.
Step 2: Paint the Pumpkins
Place each pumpkin on a protected work surface.
Apply a thin coat of compatible paint.
Let it dry.
Add another coat if needed.
Use a smaller brush around the stem and deep grooves.
Don’t load the grooves with huge amounts of paint.
Thin layers preserve the pumpkin texture better.
If you want a natural appearance, use slightly darker paint inside the grooves.
Then lightly brush a softer shade across the raised areas.
That little bit of contrast adds depth.
How to Make Cheap Foam Pumpkins Look More Realistic
Flat orange can scream “craft foam.”
Layered color looks much better.
Start with your main pumpkin color.
Then mix a slightly darker version.
Brush that darker shade lightly into the grooves.
Next, use a lighter shade on the raised sections.
Blend softly.
Don’t make every stripe identical.
Real pumpkins aren’t perfectly uniform.
A little uneven coloring helps.
Suddenly that $2 pumpkin starts acting very confident.
Give White Pumpkins More Depth
If you’re making farmhouse white pumpkins, don’t paint them pure bright white and stop.
Add a little cream or beige.
Use a tiny amount of taupe in the grooves.
Then dry-brush ivory across the raised areas.
This gives the pumpkin warmth.
Bright white can look plastic.
Soft layered white looks much more natural.
It’s a small difference.
But boy, does it matter.
Paint the Stems Too
Those molded plastic stems are usually the giveaway.
Paint them.
Brown works.
Dark brown works better.
You can also use taupe, gray-brown, or even metallic antique gold.
For a natural look, start dark and lightly brush a lighter brown over the raised texture.
Another option is wrapping the stem with jute twine.
That immediately gives it a rustic feel.
Step 3: Dry-Stack Everything Before Gluing
This is non-negotiable for me.
Place the candlestick on a level surface.
Set the largest pumpkin on top.
Then add the next pumpkin.
Then the top pumpkin.
Stand back.
Look from every direction.
Does the tower lean?
Does the bottom pumpkin look too small?
Does one pumpkin have a strange flat spot that should face the back?
Now is the time to change things.
Take a photo once you’re happy with the arrangement.
That gives you a reference when you start gluing.
Step 4: Flatten the Pumpkin Contact Points if Necessary
Some foam pumpkins have stems that interfere with stacking.
Depending on the design, you may need to remove or shorten the lower stems.
Do this carefully.
Use tools suited to the foam material.
Don’t remove more than necessary.
You want each pumpkin to sit securely against the one below it.
For a three-pumpkin tower, the middle pumpkin usually needs a reasonably flat bottom and top contact area.
The upper pumpkin can keep its decorative stem.
Add a Dowel for Extra Stability
If your pumpkins are soft enough and the design allows it, a wooden dowel can help keep the stack aligned.
Measure the pumpkin stack.
Create centered openings carefully.
Slide the pumpkins onto the dowel.
The dowel shouldn’t extend through the visible top.
This gives the stack internal support.
However, the dowel does not replace proper adhesive or a stable base.
Think of it as alignment help.
Not structural engineering.
Step 5: Attach the Bottom Pumpkin to the Candlestick
Choose an adhesive that specifically works with both glass and your pumpkin material.
This matters.
Some adhesives can damage foam.
Others don’t bond well to glass.
Follow the adhesive directions for surface preparation, application amount, clamping, and curing time.
Apply adhesive only where needed.
Center the pumpkin carefully on the candlestick.
Then leave it alone.
I know.
Waiting is terrible.
But picking up the project every seven minutes to “see if it’s dry” is how pumpkins end up permanently leaning toward Ohio.
Give the adhesive time.
Step 6: Attach the Remaining Pumpkins
Once the base connection is stable, add the next pumpkin.
Keep it centered.
Check the tower from the front.
Then check from the side.
Add the final pumpkin.
Again, check alignment.
If using an internal dowel, keep everything centered along it.
Wipe away excess adhesive before it cures if the product directions allow.
Visible dried glue can make an otherwise beautiful project look unfinished.
Step 7: Hide the Seams
This is where the magic happens.
Even carefully stacked pumpkins may have little gaps.
Instead of fighting them, decorate them.
Tuck faux leaves between the pumpkins.
Add a few berry stems.
Wrap a little grapevine-style material around the seam.
Use moss sparingly.
Add tiny faux acorns.
The goal isn’t to bury the entire topiary under decorations.
You’re simply hiding transitions and making the pumpkins feel connected.
Add Faux Fall Leaves
Choose leaves that match your color palette.
For traditional orange pumpkins, use:
Rust.
Mustard.
Deep green.
Burgundy.
For white pumpkins, try:
Muted eucalyptus green.
Beige.
Brown.
Dusty orange.
For modern black pumpkins:
Dark green.
Cream.
Copper.
Use just a few leaves at each transition point.
You still want the pumpkins to be the stars.
Add Berries
Small faux berry clusters can bring color and texture.
Deep red berries look classic.
Cream berries feel farmhouse.
Orange berries feel very fall.
Dark purple berries create a moodier look.
Trim large stems into smaller pieces.
Tuck them between pumpkins.
A few little clusters usually look better than one enormous berry explosion.
Unless enormous berry explosion is your thing.
In that case, carry on.
Add a Bow
A bow can work beautifully near the top pumpkin or around the candlestick stem.
Try:
Burlap ribbon.
Black-and-white gingham.
Velvet ribbon.
Plaid.
Natural linen ribbon.
For a more elegant look, use wide velvet in rust, olive, or deep brown.
Keep the bow proportionate.
A giant bow can swallow the pumpkin tower.
You made pumpkins.
Let us see the pumpkins.
Farmhouse White Pumpkin Version
Paint all three pumpkins warm white.
Add taupe shading.
Paint the stems brown.
Keep the glass candlestick clear or paint it distressed cream.
Add eucalyptus-style leaves.
Finish with a narrow jute bow.
This looks fantastic beside a wooden front door.
Pair it with a neutral doormat and a simple fall wreath.
Farmhouse fall without covering the porch in signs that say “PUMPKIN EVERYTHING.”
Traditional Orange Version
Keep the classic autumn colors.
Paint the pumpkins in slightly different orange shades.
Use dark brown stems.
Keep the glass clear.
Add maple leaves and burgundy berries.
Finish with plaid ribbon.
This version screams October in the nicest possible way.
It also pairs beautifully with real mums.
Modern Black and Cream Version
Want something different?
Paint the bottom pumpkin matte black.
Paint the middle one warm cream.
Paint the top pumpkin black.
Use a black candlestick or keep the glass clear.
Add dark green leaves.
Skip the bow.
This creates a clean, graphic topiary that works beautifully with modern porch decor.
Add a few white mums nearby.
So good.
Sage Green Pumpkin Version
Sage pumpkins have become a fall favorite for a reason.
They’re soft.
They’re neutral.
And they work with both rustic and modern homes.
Paint all three pumpkins slightly different shades of sage.
Use brown or natural-looking stems.
Keep the candlestick clear.
Add cream berries.
A tiny amount of jute finishes it.
This version can stay out from early September through Thanksgiving without looking overly Halloween-ish.
Rustic Terracotta Version
Paint the pumpkins terracotta, clay, and muted orange.
Use a distressed dark candlestick.
Add olive leaves.
Skip glitter.
Skip shiny ribbon.
Use natural twine instead.
The finished piece looks earthy and warm.
Put it beside actual terracotta planters and the whole porch feels connected.
Make a Halloween Pumpkin Topiary
Of course you can take this in a spooky direction.
Paint the pumpkins:
Black.
Orange.
Purple.
Cream.
Add simple painted faces if you want.
Use a black candlestick.
Tie a black gauze ribbon around the base.
You could also add a tiny faux spider.
One spider.
Maybe two.
Let’s not create an arachnid convention.
Add House Numbers
A larger bottom pumpkin can carry house numbers.
Paint or stencil them onto the front.
Use a high-contrast color.
Black numbers on a cream pumpkin look especially good.
This can create a cute entryway accent.
However, keep your normal address numbers visible where required.
Decorative pumpkins shouldn’t replace important permanent house identification.
Make Two Matching Topiaries
This project really shines as a pair.
Place one on each side of the front door.
They don’t have to be perfectly identical.
In fact, thrifted candlesticks with slightly different shapes can still look intentional if you paint them the same color.
Keep the pumpkin colors and decorations consistent.
That creates visual balance without requiring matching vintage glass.
Which is great because thrift stores rarely cooperate with our matching fantasies.
Make One Tall and One Short
If you can’t find matching candlesticks, use the difference on purpose.
Make one topiary taller.
Make the other slightly shorter.
Use the same pumpkins and colors.
Place them together on one side of the porch.
Add a pot of mums between them.
Now the mismatch looks intentional.
That’s basically half of decorating.
Use Them on a Covered Porch
A covered porch is my favorite location for this project.
Foam pumpkins are lightweight.
Glass can become slippery.
Adhesives and paint can react to outdoor weather.
Keeping the topiary under a roof gives it protection from direct rain and harsh sunlight.
You still get the outdoor fall look.
But the materials aren’t fighting the weather every single day.
Everybody’s happier.
Be Careful With Wind
This matters more than you might think.
A tall stack of foam pumpkins is lightweight at the top.
A glass candlestick can provide some weight at the bottom, but strong wind can still knock the entire thing over.
And broken glass on the porch?
No thanks.
If the area gets wind, place the arrangement somewhere protected.
You can also use a heavier base or another secure display method.
Don’t leave a glass-based topiary outside during severe weather.
Bring it in.
Five minutes of moving decorations beats twenty minutes of picking glass out of mulch.
Don’t Put It Directly in a Busy Walkway
Keep the topiary beside the door rather than directly in the path.
People carrying groceries don’t need an obstacle course.
Children can bump lightweight decorations.
Pets can knock them over.
Guests may not notice a clear glass base.
Give the piece its own corner.
It will look better there anyway.
Add Weight to the Base Carefully
If the candlestick design allows a separate decorative base underneath, you can place the entire topiary on a heavier tray or platform.
A wooden round can work nicely.
Paint it to coordinate with the project.
Secure the candlestick appropriately if needed.
This creates a wider footprint and can make the arrangement more stable.
Don’t randomly fill a hollow glass candlestick with heavy objects unless it’s designed to handle that stress.
Glass doesn’t appreciate surprises.
Use Wooden Candlesticks Instead of Glass
Not loving the idea of glass outside?
Use thrifted wooden candlesticks.
They’re fantastic for this project.
Paint them black, cream, brown, or green.
Wood can also be easier to attach to a wooden base.
Just remember that outdoor exposure can still damage unfinished wood.
Prime and paint it properly.
For an exposed porch, I’d personally feel more comfortable with a sturdy wooden pedestal than delicate glass.
Try Metal Candlesticks
Metal pedestal holders are another option.
They can create a more vintage look.
Check for rust.
Clean them thoroughly.
Use paint suited to metal if you’re changing the color.
A black metal candlestick with cream pumpkins?
That’s a winner.
Especially with dark green leaves.
Make a Tabletop Version
Use miniature foam pumpkins and a short candlestick.
Stack two pumpkins instead of three.
Place the finished piece on:
A dining table.
Kitchen island.
Fireplace mantel.
Entryway table.
Buffet.
This smaller version makes a cute Thanksgiving decoration without taking over the entire room.
You can also make several and run them down the center of a long table.
Thanksgiving Centerpiece Version
For Thanksgiving, I’d keep the colors warm and natural.
Use cream pumpkins.
Add brown stems.
Use a clear or antique-gold candlestick.
Tuck in eucalyptus leaves.
Add a few faux berries.
Skip Halloween colors.
Place the topiary near candles, but maintain safe clearance from flames and combustible decorations.
Better yet, use flameless candles.
Foam pumpkins and open flames are not best friends.
Don’t Put Real Candles Near Foam Pumpkins
This should be obvious, but fall decor has a way of collecting candles.
Foam can burn.
Ribbon can burn.
Faux leaves can burn.
Moss can burn.
Keep the finished topiary well away from open flames, fireplaces, heaters, and other heat sources.
Use battery-operated flameless candles if you want that warm evening glow.
Same cozy vibe.
Far less drama.
Make Mini Topiaries for a Fall Tablescape
Tiny foam pumpkins can look adorable on miniature pedestal holders.
Stack two.
Add one little leaf.
That’s it.
Place one at each end of the table.
Or make several in coordinating colors.
This is also a great way to use leftover paint from the larger porch version.
Tiny pumpkins don’t need much.
And yes, suddenly you’ll find yourself painting twelve of them.
Craft math is strange.
Budget Tips
This project can stay very affordable if you shop strategically.
Buy foam pumpkins at discount stores.
Check thrift stores for candlesticks.
Use leftover paint.
Save ribbon scraps.
Reuse faux leaves from older wreaths.
Check your existing fall decor before buying anything new.
You’d be surprised how many random berries and fake leaves are hiding in seasonal storage bins.
My rule?
Shop the basement before shopping the craft store.
How to Make the Project Look Less “Dollar Store”
Stick with a controlled color palette.
Use layered paint.
Paint the plastic stems.
Hide obvious seams.
Avoid excessive glitter.
Choose fewer, better-looking embellishments.
Keep glue invisible.
Balance the pumpkin sizes.
Those little choices matter more than expensive supplies.
A $2 pumpkin painted carefully can look better than a $20 pumpkin covered in random decorations.
Price isn’t doing the decorating.
You are.
Common Mistakes to Avoid
Using an Unstable Candlestick
A narrow base can tip easily.
Skipping the Dry Stack
Always test the arrangement before gluing.
Using the Wrong Adhesive
Some glues can damage foam or fail on glass.
Using Solvent Paint on Exposed Foam
Test products first and choose foam-compatible coatings.
Making the Top Too Heavy
Keep upper decorations lightweight.
Using Too Much Glue
Visible adhesive makes the project look messy.
Forgetting About Wind
Tall glass-based decorations need a protected location.
Leaving Glass Outside During Severe Weather
Bring the topiary inside when conditions get rough.
Adding Too Many Decorations
Leaves, berries, bows, moss, signs, and glitter all at once can overwhelm the pumpkins.
Rushing the Cure Time
Let adhesive cure according to its instructions before moving the piece.
How to Store Your Pumpkin Topiary
Storage depends on whether you made the piece permanent.
If the pumpkins are permanently glued together, wrap the entire topiary loosely in clean packing material.
Store it upright.
Don’t stack heavy boxes on top.
Keep it away from high heat.
If possible, store it somewhere with moderate temperatures.
Foam and adhesives can react poorly to extreme attic heat.
If your design comes apart, even better.
Store the pumpkins separately and wrap the glass candlestick.
Label the box.
Because next September, “Fall Stuff Somewhere in Garage” will not feel as helpful as it does today.
Can You Repaint It Next Year?
Absolutely.
That’s another nice thing about this project.
If your orange pumpkins don’t fit next year’s decor, repaint them.
Orange can become cream.
Cream can become sage.
Sage can become black.
Just make sure the existing surface is clean and stable.
Use compatible paint.
A fresh color can make the same topiary feel completely different.
Frequently Asked Questions
How do you make a foam pumpkin topiary with candlesticks?
Paint lightweight foam pumpkins, arrange them from largest to smallest, attach the bottom pumpkin to a stable candlestick holder with compatible adhesive, then stack and secure the remaining pumpkins.
How many pumpkins do I need?
Two or three pumpkins work well for most topiaries. Four can create a taller display if the base is sturdy enough.
Can I glue foam pumpkins to glass?
Yes, but choose an adhesive specifically compatible with both foam and glass. Some adhesives contain solvents that can damage foam.
What paint works on foam pumpkins?
Water-based acrylic craft paints are commonly suitable, but always check the product and test a hidden area first.
Can I spray-paint foam pumpkins?
Only use spray products specifically suitable for the type of foam you’re working with. Some solvent-based sprays can damage exposed foam.
Can this pumpkin topiary stay outside?
A protected covered porch is better than full outdoor exposure. Rain, sunlight, wind, and temperature changes can affect foam, paint, adhesive, and glass.
How do I stop a pumpkin topiary from tipping?
Choose a wide, sturdy base, keep the largest pumpkin at the bottom, avoid heavy upper decorations, and place the topiary somewhere protected from wind.
Can I use wooden candlesticks instead?
Yes. Thrifted wooden candlesticks are a great alternative and can be painted to match your fall decor.
Can I use real pumpkins?
I wouldn’t permanently glue real pumpkins into this type of reusable topiary. Real pumpkins eventually soften and decay. Lightweight artificial pumpkins are much better for a reusable craft.
What colors work for farmhouse fall decor?
Warm white, ivory, sage, beige, muted orange, taupe, and brown all work beautifully.
How can I make cheap foam pumpkins look expensive?
Use layered colors, add subtle shading in the grooves, paint the stems, keep embellishments simple, and hide visible glue.
Can I use this as Thanksgiving decor?
Absolutely. Choose cream, sage, terracotta, or muted orange pumpkins and pair them with natural-looking leaves and berries.
Final Thoughts
A DIY foam pumpkin candlestick topiary is such a fun example of what happens when two ordinary bargain finds suddenly meet.
On one side, you’ve got inexpensive foam pumpkins.
On the other, you’ve got thrifted glass candlesticks that probably cost a couple of bucks.
Paint the pumpkins.
Give the stems a little attention.
Stack everything carefully.
Add a few leaves or berries.
Then place the finished topiary beside the front door.
Suddenly those basic craft pumpkins look completely different.
I especially love making a matching pair for a covered porch because the extra height gives fall decorations much more presence without filling the entry with dozens of individual pumpkins.
Just remember that glass, lightweight foam, and wind aren’t exactly best buddies.
Keep the display stable.
Give adhesives enough curing time.
Protect it from rough weather.
And don’t put open flames anywhere near the foam or faux greenery.
Then step back and enjoy the fact that your fancy-looking fall porch decoration started with thrift-store glass and pumpkins from the dollar aisle.
Honestly, that’s half the fun.