You know those plain white coffee filters sitting in the kitchen cabinet?
Most of us look at them and think one thing: coffee.
But with a little imagination—and, okay, quite a lot of patience—those inexpensive paper filters can become something completely unexpected.
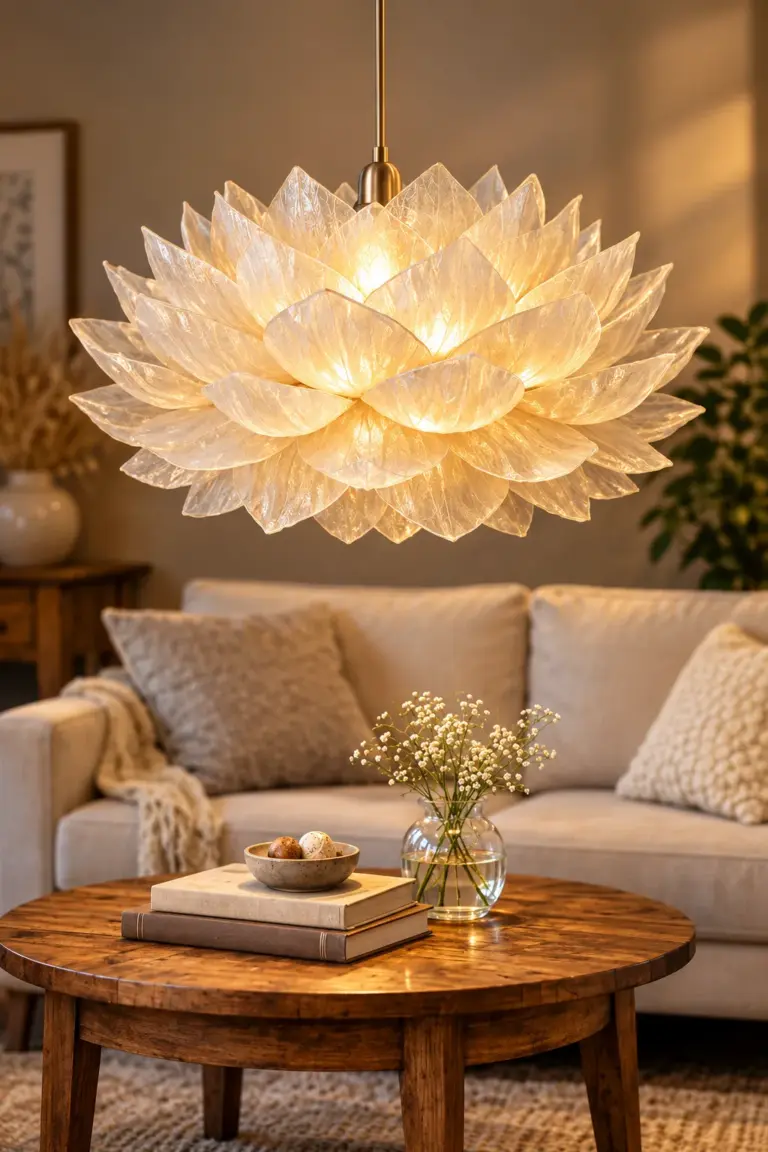
A dramatic lotus-style pendant lamp.
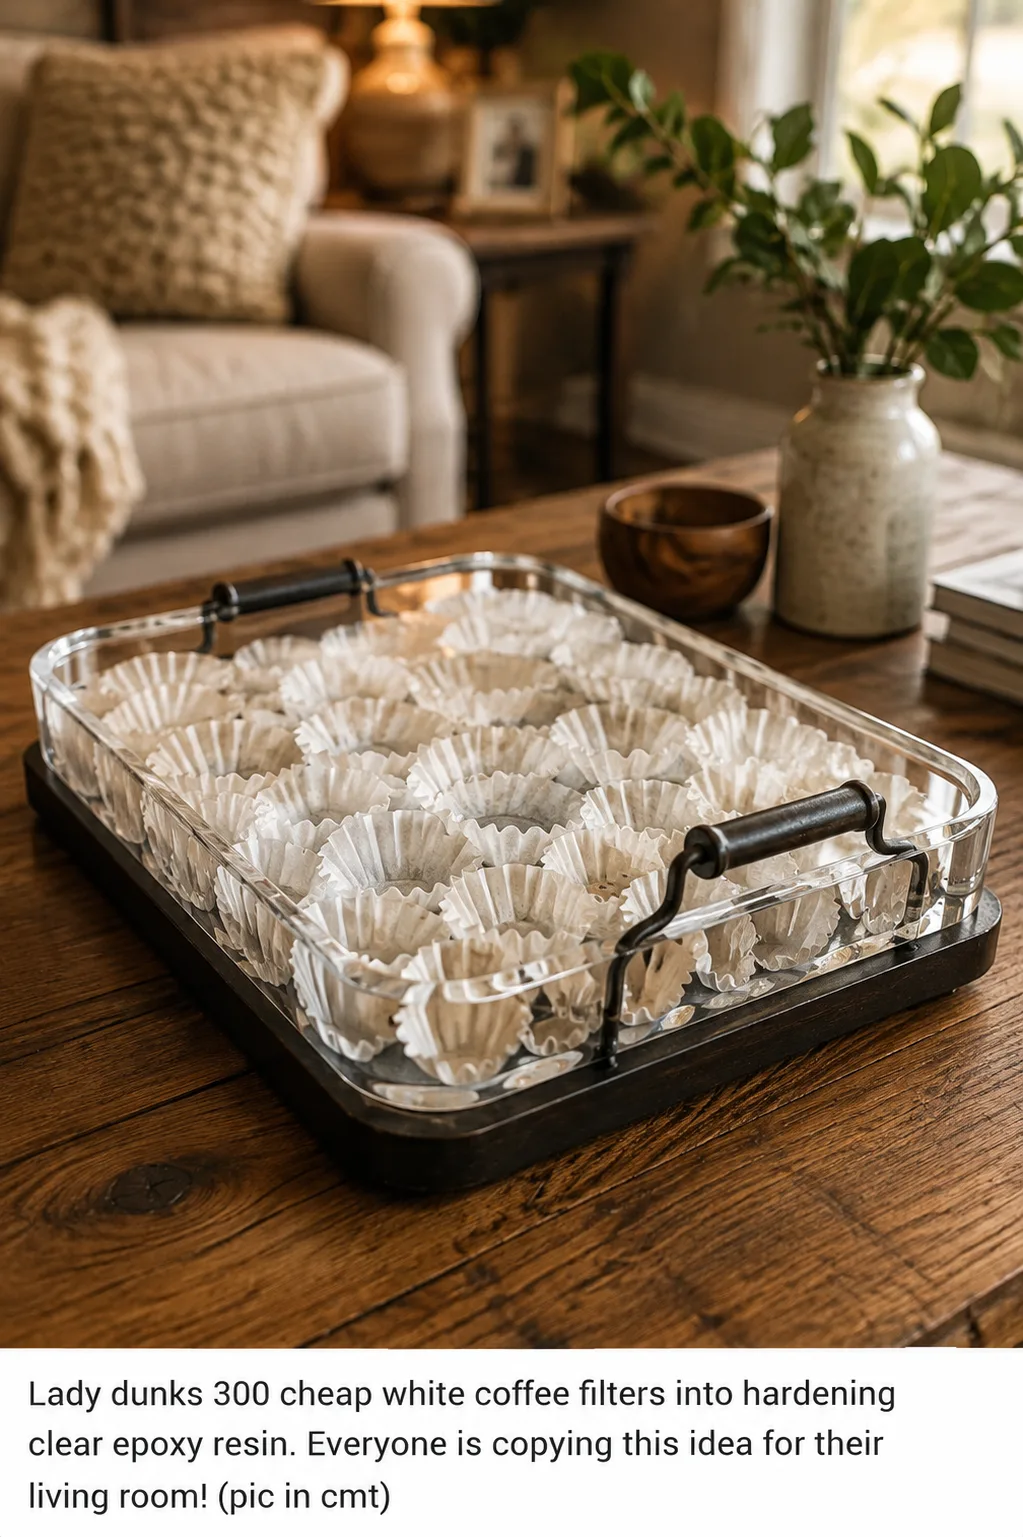
The basic idea uses hundreds of white coffee filters, clear epoxy resin, and a round wire frame. Once the filters are coated and arranged in overlapping layers, they begin to resemble delicate flower petals. After the material fully cures, the finished shade creates a sculptural look that can become a serious statement piece in a living room.
And honestly, if you saw the finished lamp without knowing how it was made, coffee filters probably wouldn’t be your first guess.
This DIY coffee filter pendant light takes time, though. It also involves epoxy resin and electrical components, so careful handling matters.
Here’s how the idea works, what you need, what can go wrong, and how to give the finished lotus lamp a beautiful custom look.
Why Coffee Filters Make Such Interesting DIY Decor
Coffee filters don’t exactly sound glamorous.
They’re thin.
They’re cheap.
They’re disposable.
And that’s precisely why this project is so surprising.
A standard white coffee filter already has a soft curved shape. Fold or bend it slightly and it begins to resemble a flower petal.
Now repeat that shape hundreds of times.
Suddenly, the humble filter becomes part of a large textured surface.
The magic comes from repetition.
One coffee filter looks like, well, a coffee filter.
Three hundred layered coffee filters can look like a giant blooming flower.
Funny how that works.
What Is a Coffee Filter Lotus Lamp?
A coffee filter lotus lamp is a decorative pendant shade made by arranging coffee filters around a supporting frame in overlapping layers.
The filters form the petals.
The frame creates the basic shape.
Clear resin stiffens the paper and helps preserve the sculptural form.
Once the layers are complete, the shade resembles an oversized lotus flower.
When paired with suitable lighting, the overlapping white material can create different levels of brightness and shadow.
Some petals appear brighter.
Others remain slightly darker.
That variation gives the lamp depth and makes the flower shape much more noticeable.
Materials You’ll Need
For a large lotus-style lamp, gather your supplies before beginning.
You may need:
- About 300 white coffee filters
- Clear epoxy resin suitable for the intended craft application
- Circular wire frame
- Large mixing container
- Appropriate stirring tools
- Disposable brushes
- Plastic sheeting or another resin-compatible work covering
- Chemical-resistant gloves appropriate for your resin
- Protective clothing
- Suitable pendant light kit
- Compatible light bulb
- Scissors
- Measuring tools
- Additional protective equipment required by your resin manufacturer
The exact amount of resin will depend on the product, filter size, coating method, and final lamp dimensions.
Don’t mix resin until everything else is ready.
Once you start working with it, you don’t want to suddenly realize your wire frame is still hiding somewhere in the garage.
Choose the Right Coffee Filters
Plain white basket-style coffee filters are an easy choice because their shape naturally creates a broad petal.
Try to use filters of the same size.
Consistent sizing makes layering much easier.
You can still vary the folds and curves of individual filters so the flower doesn’t look overly uniform.
That’s actually part of the charm.
Real flowers aren’t made from 300 perfectly identical petals.
Your lamp doesn’t need to be either.
Why Clear Resin Changes Everything
Untreated coffee filters are soft and flexible.
That’s great for brewing coffee.
Not so great for building a sculptural pendant shade.
Clear epoxy resin can stiffen the filters after it fully cures, helping them hold their arranged shapes.
It can also give the paper a slightly translucent appearance.
When light passes through overlapping resin-treated layers, you can get interesting changes in opacity.
That’s what gives the finished piece much of its visual drama.
But resin isn’t regular craft glue.
It requires much more careful handling.
Prepare Your Workspace First
Before opening any resin container, get organized.
Cover the entire work area with suitable protective material.
Not half the table.
Not “just where I’ll be working.”
Cover everything that could reasonably get dripped on.
Resin has a remarkable talent for finding the one exposed corner you thought was safe.
Arrange your coffee filters within reach.
Set out the frame.
Prepare your tools.
Put on the protective equipment specified for your resin product.
Keep children and pets away from the workspace.
And work only under the environmental and ventilation conditions stated by the resin manufacturer.
Preparation makes the messy part much easier.
Follow Your Epoxy Resin Instructions Exactly
This is one place where improvising isn’t cute.
Different epoxy systems have different mixing ratios, working times, curing periods, temperature requirements, ventilation needs, and safety instructions.
Follow the label for the exact product you purchased.
Measure carefully.
Mix only as directed.
Don’t assume that adding extra hardener will make everything cure faster.
That’s not how properly formulated resin systems work.
Incorrect proportions can leave you with sticky, soft, cloudy, or improperly cured material.
And after handling hundreds of coffee filters, discovering that your resin didn’t cure correctly would be… well, heartbreaking.
Protect Your Skin While Working With Resin
Avoid direct skin contact with uncured epoxy components.
Wear gloves that the product manufacturer recommends for handling the material.
Don’t rely on whatever random pair happens to be sitting under the kitchen sink.
Some people can develop skin irritation or sensitization from epoxy exposure.
Also avoid eating or preparing food in the work area.
Keep resin materials away from children and pets.
And follow any instructions regarding eye protection, clothing, respiratory protection, or ventilation.
The lamp should be memorable because it’s beautiful—not because craft night ended badly.
Test a Few Coffee Filters First
Before committing 300 filters to the project, run a small test.
This is especially helpful if you’ve never worked with resin-coated paper.
Prepare a few filters according to your resin instructions.
See how much material they absorb.
Try shaping them.
Notice how quickly the resin begins to change consistency.
Then let your test pieces cure completely.
This tells you a lot.
You may decide you need less resin per filter.
You may prefer a different fold.
You may discover that your first petal shape looks less like a lotus and more like a taco.
Better to learn that on filter number three.
Shape the Coffee Filters Like Petals
You don’t need every filter to have exactly the same shape.
In fact, slight variation helps.
Try gently folding or pinching sections to give each filter dimension.
Some petals can remain broad and open.
Others can curve inward slightly.
You can also vary the angle at which they sit against the frame.
The goal is to create movement.
A flower looks interesting because its petals overlap, bend, and point in slightly different directions.
Use that idea as your guide.
Coat the Coffee Filters Carefully
Prepare your clear resin according to its manufacturer’s directions.
Then begin coating the filters in manageable batches.
You want enough material to stiffen the paper after curing, but you don’t necessarily want huge pools of excess resin dripping everywhere.
Depending on the resin system and your technique, you may dip or coat the filters carefully.
Keep individual pieces separated.
This is important.
Wet resin-covered filters can stick together quickly.
Three hundred separate petals are useful.
One enormous coffee-filter blob?
Not quite the same vibe.
Work in Manageable Batches
Don’t prepare more mixed resin than you can safely work with during its stated working time.
Epoxy doesn’t wait politely because you got distracted.
Work in smaller batches if your chosen resin allows and instructs you to do so.
Coat several petals.
Position them.
Check their shape.
Then continue according to your product instructions.
A controlled pace will give you much better results than racing through the final 100 filters because the resin is changing consistency.
Slow and steady wins the giant coffee-filter flower.
Start Building the Lotus From the Bottom
Begin placing the prepared petals around the lower section of the circular frame.
Position them close enough that neighboring pieces overlap.
Then work around the circumference.
Once the first section begins taking shape, add another layer slightly above it.
Continue upward.
This overlapping pattern is what hides much of the supporting structure and creates the full lotus appearance.
Think of shingles on a roof—but prettier and significantly more floral.
Overlap the Petals
Don’t place the filters side by side with large gaps.
Each petal should visually connect with the ones around it.
A small overlap helps create fullness.
It also makes the finished shade look less like individual paper pieces attached to wire.
As you build additional rows, stagger the placement.
The center of one petal can sit over the gap between two petals underneath it.
That creates a more natural layered pattern.
Vary the Petal Angles
This little detail can make a huge difference.
If every filter sits at exactly the same angle, the shade may look stiff.
Instead, vary the placement slightly.
Let some petals flare outward.
Allow others to curve closer to the frame.
Keep the changes subtle.
You’re not trying to make random spikes.
You want controlled variation that creates the impression of a flower opening.
Take a few steps away from the project every so often.
You’ll notice shape problems much faster from across the room than you will with your face six inches from the frame.
Use Disposable Tools for Shaping
A disposable brush can help move resin across a filter or gently position a petal, depending on the resin instructions and construction method you’re following.
Disposable tools make cleanup easier.
Keep plenty nearby.
Once resin begins curing on a brush, that brush isn’t exactly volunteering for your next watercolor afternoon.
You can also keep separate tools for mixing and positioning so you’re not constantly switching back and forth.
Organization saves time.
Don’t Rush the Final Rows
The top of the flower deserves extra attention.
By this stage, you’ll probably be tired.
You’ve handled what feels like enough coffee filters to supply a diner for five years.
But the final rows help define the center of the lotus.
Take your time.
Look for visible gaps.
Check the overall balance.
Rotate the piece if possible so you can view it from several directions.
A hanging lamp is seen from more than one angle.
Make every side worth looking at.
Let the Resin Cure Completely
Now comes the hardest part.
Waiting.
Follow the full cure time specified by your resin manufacturer.
Don’t assume the piece is ready just because the surface feels hard.
A resin product may feel dry before it has reached its full stated cure.
Keep the project undisturbed during this period.
Protect it from dust, pets, curious fingers, and anything else that might become permanently acquainted with the surface.
Yes, waiting is boring.
But after placing hundreds of petals, this is not the moment to get impatient.
Inspect the Finished Shade Before Hanging It
Once the resin has fully cured according to the manufacturer’s instructions, inspect the entire structure.
Check the frame.
Look at attachment points.
Look for loose pieces.
Check for sharp resin edges or damaged areas.
Consider the final weight.
A project involving hundreds of resin-treated filters may weigh significantly more than the original bare frame.
That’s important because this object will be hanging overhead.
Don’t treat structural support as an afterthought.
Electrical Safety Matters
A decorative lampshade and a functioning electrical fixture are two different things.
Once electricity enters the project, safety requirements become much more important.
Use lighting components designed and rated for the intended purpose.
Follow all installation instructions supplied with the pendant hardware.
Never exceed the fixture’s bulb rating.
Maintain any required clearance between the bulb and shade material.
And if installation involves permanent household wiring, hire a qualified electrician when appropriate.
I love a good DIY.
I do not love DIY electrical fires.
Choose a Suitable Light Bulb
The bulb affects both appearance and heat.
An appropriate LED bulb may produce less heat than many traditional incandescent bulbs, but compatibility still matters.
Check the ratings for your pendant kit.
Check the resin manufacturer’s relevant temperature information.
Respect clearance requirements.
Don’t select an overly powerful bulb simply because you want the room brighter.
This lamp is primarily a statement piece.
You can always add other room lighting rather than asking one giant lotus to do every job.
Warm White Light Creates a Cozy Look
For a living room, warm white lighting can look beautiful behind white or cream-colored petals.
The warmer glow softens the flower.
It also pairs nicely with wood furniture, beige fabrics, woven baskets, and natural decor.
Because the coffee filters overlap, the light may appear brighter through thinner sections and softer through thicker areas.
That variation is part of the effect.
It gives the lamp depth even after dark.
Try a Dimmable Setup
A dimmable lighting setup can make a large decorative pendant much more flexible, provided all components are compatible.
Brighten the light when the room needs more illumination.
Lower it in the evening.
A softly glowing lotus can create beautiful ambient lighting above a coffee table or seating area.
Just confirm that the bulb, fixture, and dimmer are designed to work together.
Otherwise, you may get flickering instead of cozy.
Not exactly the mood we’re going for.
Make a Blush Pink Lotus Lamp
White looks clean and modern, but color can completely change this project.
Try pale blush filters for a romantic look.
The color should remain soft enough that light can still interact beautifully with the layers.
If you plan to color the filters yourself, test your coloring method first.
Allow the paper to dry completely before applying resin.
Also confirm that anything added to the filters is compatible with your chosen resin.
A test piece is your best friend here.
Try Cream or Beige for a Natural Living Room
If your home has warm neutral colors, bright white may feel too sharp.
Cream, beige, or very pale tan petals can create a softer appearance.
Pair them with:
- Light wood
- Linen curtains
- Woven baskets
- Rattan furniture
- Neutral rugs
- Green plants
- Warm white lighting
The finished lamp can feel earthy without looking overly rustic.
It’s a nice middle ground.
Try Soft Sage for a Botanical Look
A very pale green can give the lotus a botanical personality.
Keep the color muted.
The shape already creates plenty of drama.
You don’t need neon green petals screaming from the ceiling.
Pair pale sage with cream walls, natural wood, and several houseplants.
Suddenly your reading corner feels like a quiet little garden.
Minus the bugs.
Hopefully.
Where to Hang a Lotus Pendant Lamp
A large sculptural lamp needs breathing room.
Good locations may include:
- Above a coffee table
- Over a reading nook
- In a bedroom sitting area
- Above an appropriately sized dining table
- In a large entry area
- In a cozy conversation corner
Consider sightlines before installation.
A beautiful pendant becomes slightly less charming when everybody keeps bumping their head into it.
Measure first.
Your forehead will appreciate the effort.
Pair It With Simple Furniture
A lamp this textured doesn’t need much competition.
If your lotus pendant is large, let it become the focal point.
Neutral furniture works beautifully.
So does warm wood.
Add a simple rug, a few plants, and understated wall decor.
You don’t need five other dramatic objects fighting for attention.
One giant glowing flower is already making a statement.
Let it talk.
Make a Smaller Version
Three hundred coffee filters can feel intimidating.
There’s no rule saying your first version has to be enormous.
A smaller decorative version can help you understand the process.
Use a smaller suitable frame and fewer petals.
However, remember that changing dimensions can also affect structural balance, weight, bulb clearance, and other safety factors if you plan to turn the piece into a functional lamp.
For your first experiment, you could even make a non-electrical decorative flower.
Learn the technique before adding wiring.
That’s a pretty sensible Saturday afternoon.
Create an Ombre Effect
Want something more artistic?
Try an ombre lotus.
Start with darker petals near the bottom and gradually move toward lighter shades at the top.
Blush could fade into white.
Beige could fade into cream.
Pale gray could fade into icy white.
The effect should remain subtle.
Remember, you’ve already got hundreds of overlapping petals.
The lamp doesn’t need 14 colors and glitter fighting for custody of the ceiling.
Why This Project Looks More Expensive Than the Materials
Texture changes everything.
Designer decor often uses repeated shapes to create visual impact.
This project follows the same principle.
The individual coffee filter isn’t impressive.
The collection is.
Hundreds of curved edges create shadows.
Overlapping petals create depth.
Light creates contrast.
And suddenly a common household product doesn’t look common anymore.
That’s one of the most satisfying parts of DIY decor.
Is This Actually a Cheap DIY Lamp?
The coffee filters are cheap.
The entire lamp may not be.
Clear epoxy resin can represent a significant portion of the project cost. You’ll also need a suitable frame, protective supplies, pendant hardware, and a compatible bulb.
So I’d call this a budget-material statement project, not necessarily a dirt-cheap lamp.
The attraction comes from turning an ordinary inexpensive material into something that looks unusual and artistic.
Still pretty cool.
How Long Does This Project Take?
Don’t plan on finishing it during a commercial break.
Coating and positioning hundreds of individual filters takes time.
Then the resin needs to cure according to its manufacturer’s instructions.
After that, you still need to inspect the structure and safely install the lighting components.
This is a weekend-style project—or possibly longer—rather than a quick afternoon craft.
Put on some music.
Grab a drink.
Get comfortable.
You’ve got petals to make.
Common Mistakes to Avoid
The biggest mistake is rushing.
Another is mixing resin without reading its instructions.
Avoid direct skin contact with uncured epoxy.
Don’t work without the ventilation or protective equipment specified by the manufacturer.
Don’t coat hundreds of filters before testing a few.
Don’t allow the petals to collapse into sticky clumps.
Don’t hang the shade until the resin has fully cured.
Don’t ignore the final weight.
Don’t exceed electrical component ratings.
And don’t assume a homemade shade can safely work with any random bulb.
Beautiful is good.
Beautiful and safely constructed is much better.
Frequently Asked Questions
Can you make a lamp from coffee filters?
Coffee filters can form the decorative petals of a lampshade when combined with an appropriate supporting structure. Resin can stiffen the filters and help preserve their sculptural shape after full curing.
How many coffee filters do you need for a lotus lamp?
A large, full lotus-style shade may use around 300 coffee filters. A smaller decorative version can use fewer depending on the frame size and desired density.
What type of coffee filters work best?
Plain white basket-style filters are convenient because their broad curved shape resembles a petal when folded or shaped.
Do I need epoxy resin?
For this particular rigid sculptural style, clear resin provides the hardened petal effect. Other craft methods may create coffee filter lampshades differently, but don’t casually substitute materials when heat or electrical components are involved.
Can I color the coffee filters?
Yes, but test the coloring method first. Allow colored filters to dry completely and confirm compatibility with the resin system you’re using.
How long does epoxy resin take to cure?
Cure times vary significantly between products. Follow the exact manufacturer’s stated working, handling, and full-cure times.
Can I touch epoxy resin with my hands?
Avoid skin contact with uncured epoxy components. Wear the protective equipment specified by the product manufacturer.
Can I use an LED bulb?
A compatible LED bulb may be suitable and often produces less heat than traditional incandescent lighting, but you still need to follow the ratings and clearance requirements for the pendant hardware and finished shade.
Can I make the lamp larger?
You can change the basic dimensions, but a larger lamp changes weight, structural support requirements, material quantities, and possibly bulb clearances. Plan those factors carefully.
Is this a beginner resin project?
The repetitive petal technique itself is straightforward, but the amount of resin, large number of pieces, structural requirements, and electrical component make the full lamp more suitable for someone comfortable following resin safety and construction instructions. Beginners may prefer testing a smaller non-electrical version first.
Final Thoughts
I still love the fact that this whole idea starts with coffee filters.
They’re one of the least glamorous things in the kitchen.
But coat them, shape them, layer them hundreds of times, and suddenly you’ve got a dramatic lotus-inspired piece that looks nothing like its humble beginnings.
The trick is patience.
Test first.
Prepare your workspace.
Follow the resin instructions exactly.
Build the petals gradually.
Allow everything to cure completely.
Then treat the structural and electrical parts seriously.
And don’t feel locked into white.
Try blush, cream, pale sage, or a subtle ombre pattern. Change the petal angles. Make a smaller version. Match the shade to your room.
That’s the fun part of making it yourself.
Because apparently 300 cheap coffee filters weren’t destined for coffee after all.
They were just waiting for their big living-room moment.