I’ll be honest: the first time I heard that a little baking powder could change the texture of pork chops, I had the same reaction I have to most “kitchen hacks” on the internet—skeptical side-eye. I’m a weeknight cook in the Midwest with a full-time job, a sink that is somehow always full, and exactly zero patience for fussy tricks that promise restaurant results and deliver disappointment. But pork chops are one of those proteins I want to love more than I actually do, because they’re affordable, easy to find, and way too often end up dry. So I tried it for myself: I rubbed baking powder over raw pork chops, let them sit for 45 minutes, and paid close attention to what happened.
The short version is that the surface changed in a way that made a real difference once the chops hit the pan. The longer version—and the actually useful one—is that this method only works well if you do it carefully, with the right amount, the right timing, and a good cooking method afterward. Here’s exactly what I used, what the chops looked and felt like after 45 minutes, how they cooked, what they tasted like, and the mistakes I would avoid next time.
1. Why I decided to try baking powder on pork chops
I cook pork chops pretty regularly because they’re usually priced better than steak, and at my local grocery store I can often get boneless center-cut chops for about $3.99 to $5.99 per pound. The problem is that they go from juicy to tough in what feels like 90 seconds. Even when I use a thermometer, I’ve had plenty of chops that were technically done but still a little firmer than I wanted.
I’d already used baking soda in small amounts for tenderizing sliced meat in stir-fries, so the idea that baking powder might help the outside of pork chops brown and stay a bit more tender didn’t seem totally wild. Since baking powder is milder than straight baking soda and easier for many home cooks to use without overdoing it, I figured it was worth a controlled test on a normal Tuesday night.
2. The exact pork chops and ingredients I used
I used 4 boneless pork loin chops, each about 3/4 inch thick and weighing roughly 6 to 7 ounces. Altogether, the package weighed just under 1 3/4 pounds. I chose chops that were fairly even in thickness so they’d cook at the same rate.
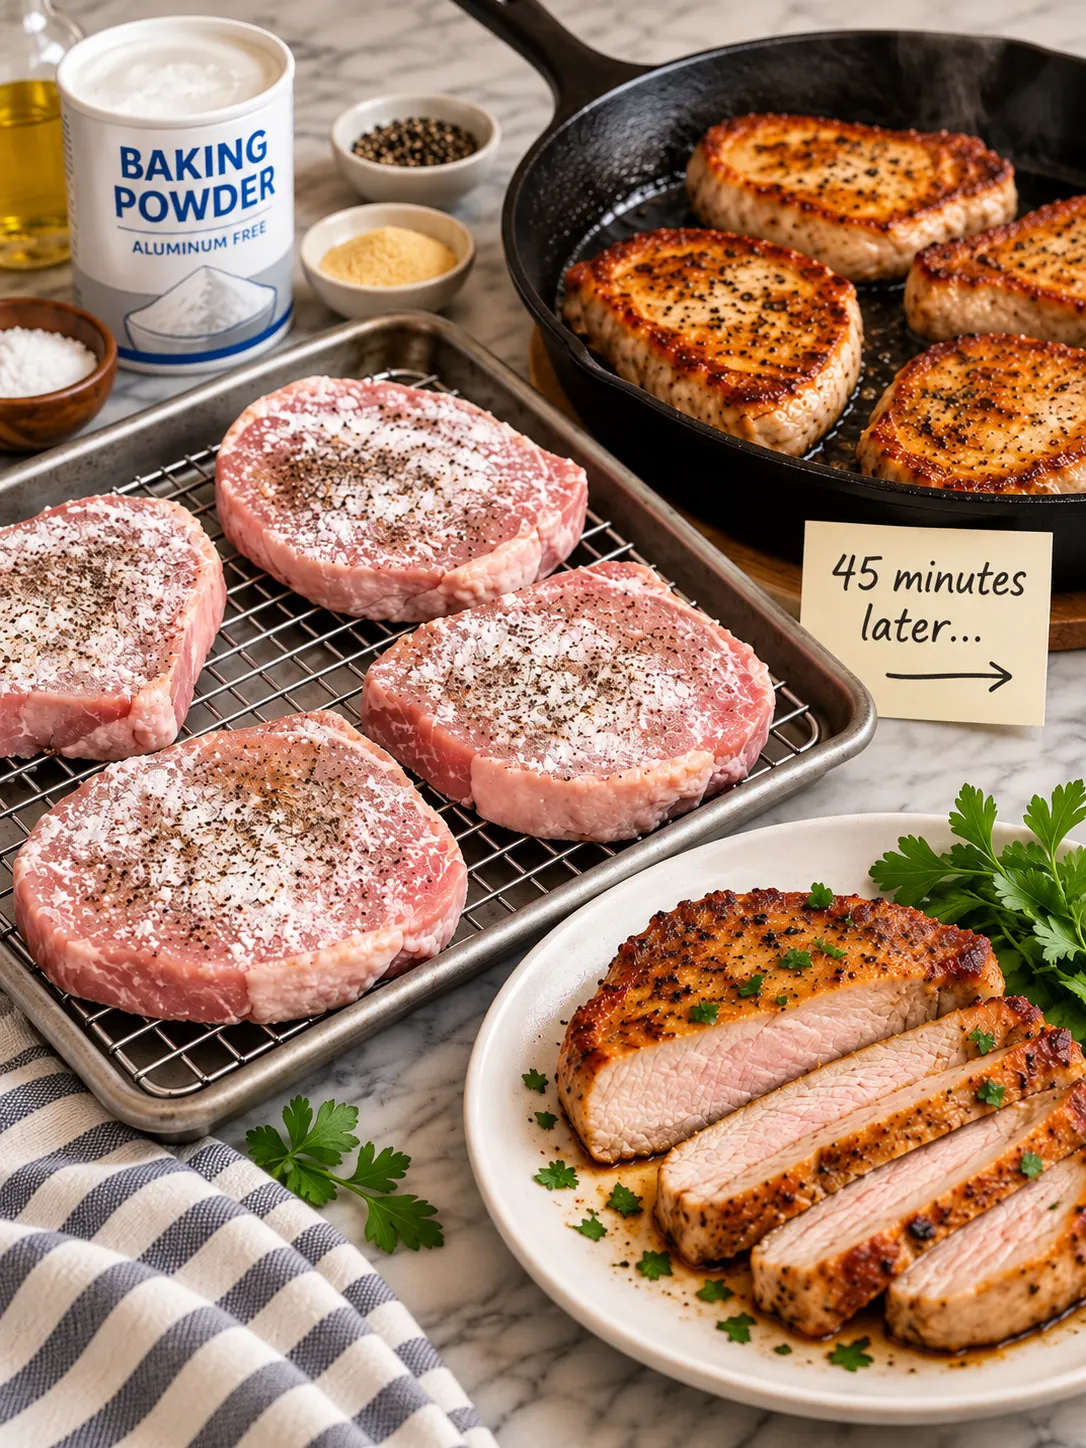
For the baking powder treatment, I used 2 teaspoons of aluminum-free baking powder total, which worked out to a light dusting over all 4 chops. I also used 1 1/4 teaspoons kosher salt, 1/2 teaspoon black pepper, 1 teaspoon garlic powder, and 1 tablespoon neutral oil for cooking. I did not use flour, breadcrumbs, or a marinade, because I wanted to see what the baking powder alone contributed.
3. How I applied it without turning the chops chalky
This part matters more than you might think. I patted the pork chops very dry with paper towels first—really dry, not just a quick dab. Surface moisture can make the powder clump, and that leads to uneven coverage.
Then I sprinkled the baking powder lightly over both sides, using my fingers to spread it into a very thin coat. I’m talking about a dusting, not a crust. If you can visibly see thick white patches, it’s too much. After that, I seasoned the chops with the kosher salt, pepper, and garlic powder and set them on a wire rack over a sheet pan so air could circulate around them.
4. What happened during the 45-minute wait
At the 10-minute mark, the chops still looked mostly normal, but the surface had started to lose that glossy, wet look raw pork usually has right out of the package. By 25 minutes, they looked slightly tacky and drier to the touch.
At 45 minutes, the change was clear. The exterior felt firmer and drier, almost like the beginning stage of air-drying. There was no dramatic color transformation, but the surface was definitely more matte than when I started. That dry exterior turned out to be the biggest visible result before cooking, and honestly, that’s what set the chops up for better browning later.
5. What baking powder is actually doing
Without getting too science-class about it, baking powder helps raise the pH on the surface of the meat a bit, which can encourage browning. It also helps dry out the exterior during that resting time. A drier surface browns faster because the pan doesn’t have to spend as much energy evaporating water first.
That matters for pork chops because they cook quickly. If you can get nice browning in 2 to 3 minutes per side instead of waiting forever for color, you’re less likely to overcook the inside. For a busy home cook, that’s the real win—not magic tenderness, but a better margin for error.
6. The biggest visual difference once they hit the pan
I heated a 12-inch cast-iron skillet over medium-high heat for about 4 minutes, then added 1 tablespoon of avocado oil. As soon as the chops went into the pan, I noticed they sizzled hard right away instead of steaming. That’s always a good sign.
After about 2 1/2 minutes on the first side, they had a noticeably deeper golden-brown crust than I usually get with plain seasoned pork chops. Not burned, not patchy—just more even color. The second side took about 2 minutes, and I reduced the heat slightly so the exterior wouldn’t get too dark before the center finished cooking.
7. How the texture turned out after cooking
This was the part I cared about most. I cooked the chops until the thickest part hit 140 to 142 degrees Fahrenheit on an instant-read thermometer, then rested them for 5 minutes. Carryover heat brought them to around 145 degrees, which is right where I like pork loin chops.
The outside had a lightly crisp, well-browned edge, while the interior stayed juicier than my average weeknight pork chop. I wouldn’t say the baking powder turned a lean loin chop into a rich, fatty cut like pork shoulder—that’s not realistic—but it did help create a better contrast between the browned exterior and the tender center. The meat sliced cleanly and didn’t have that dry, cottony look I sometimes see when chops overcook even a little.
8. What it tasted like and whether the baking powder flavor showed up
This is the question everybody should ask before trying it: can you taste it? In my test, no—but only because I used a small amount. The chops did not taste metallic, soapy, or bitter. They just tasted like well-seasoned pork with better browning.
That said, I can absolutely see how this method could go wrong. If you use too much baking powder, don’t spread it evenly, or let it cake on damp spots, you may notice an off flavor. If you try this, think “light dusting,” not “coating.” More is definitely not better here.
9. The mistakes that would ruin this method
The first mistake is confusing baking powder with baking soda. They are not interchangeable in this situation. Baking soda is much stronger and easier to overdo, and if you use it the same way and in the same quantity, the flavor can become unpleasant fast.
The second mistake is using thick layers. If the chops look visibly powdered like you’re breading them, you’ve gone too far. The third mistake is skipping the rack and leaving the chops flat on a plate, where moisture can pool underneath. And the fourth is letting them sit too long in a very warm kitchen. I kept mine refrigerated for most of the 45 minutes, uncovered on the rack, then let them sit at room temperature for the last 10 minutes before cooking.
10. The best cooking methods after the 45-minute rest
For me, the best follow-up method is a hot skillet, especially cast iron or stainless steel. Those pans reward a dry surface with fast, even browning. If your chops are 3/4 inch thick, plan on roughly 2 to 3 minutes per side over medium-high heat, then check the temperature.
You can also use an oven finish for thicker chops, especially bone-in chops closer to 1 inch or 1 1/4 inches thick. In that case, sear 2 minutes per side, then transfer to a 400-degree Fahrenheit oven for 4 to 8 minutes, depending on thickness. Pull them when they reach 140 to 142 degrees and let carryover heat do the rest.
11. Whether this works better than brining
In my kitchen, this is not a full replacement for brining—it’s a different tool. A salt brine, especially a 30-minute quick brine with 4 cups water and 1/4 cup kosher salt, can add more internal seasoning and help with moisture retention. But brining also means extra bowls, extra cleanup, and remembering to do it ahead of time.
The baking powder approach is easier on a busy night because there’s almost no prep. If I realize at 5:45 p.m. that I want pork chops for dinner by 6:30, this method fits my life better. If I’m planning a nicer weekend meal, I’d still choose a brine or even a dry brine with salt for a few hours.
12. The kind of pork chops I’d use this on again
I’d absolutely use this again on boneless loin chops and thin bone-in chops that benefit from quick searing. These cuts are lean, so getting fast browning without overcooking is especially helpful.
I probably wouldn’t bother with very thick double-cut chops, because those already lend themselves well to reverse-searing or oven roasting. And I wouldn’t use it on heavily marinated chops, since the wet marinade works against the whole point of drying the exterior. This method shines when the meat starts relatively plain and dry.
13. My best weeknight version from here on out
If I were making these again after work, I’d do this: pat dry 4 pork chops, dust with 2 teaspoons baking powder total, season with 1 1/4 teaspoons kosher salt and 1/2 teaspoon pepper, then let them sit on a rack for 45 minutes. While they rest, I’d make a fast side dish like roasted green beans at 425 degrees Fahrenheit or microwave-steamed baby potatoes finished with butter and chives.
Then I’d sear the chops in cast iron, rest them 5 minutes, and finish with a tiny squeeze of lemon or a 1-tablespoon knob of butter with thyme in the pan. That gives dinner a little “I tried” energy without actually creating more than one pan to wash, which is honestly my kind of cooking.
14. My final verdict after 45 minutes
So, what happened 45 minutes after I rubbed baking powder over my raw pork chops? The surface dried out, the chops browned faster and more evenly, and the final texture was better than my usual no-extra-step version. The result wasn’t gimmicky or dramatic in a fake way—it was practical, subtle, and useful.
Would I call it a miracle? No. Would I call it a smart little technique for lean pork chops, especially if you want a stronger sear and a better shot at juicy meat? Absolutely. For something that took less than 2 extra minutes of hands-on effort, it earned a spot in my weeknight rotation.