Cherries in the Snow is a delightful dessert that combines the creamy goodness of a cream cheese layer with the sweet and tart flavors of cherry pie filling. This no-bake treat is perfect for any occasion, whether it’s a family gathering or a simple weeknight dessert. Its beautiful layers make it as pleasing to the eyes as it is to the taste buds!
Why Make This Recipe
This recipe is incredibly easy to prepare and requires minimal cooking skills, making it perfect for anyone, even beginners. Cherries in the Snow is also quick to assemble, which means you can have a delicious dessert ready with little effort. Additionally, its light and fruity flavor offers a refreshing end to any meal, making it a crowd-pleaser!
How to Make Cherries in the Snow
Ingredients:
- 12 oz cream cheese, softened
- 3/4 cup powdered sugar
- 1/3 cup whole milk
- 1/2 tsp vanilla extract
- 1 container (8 oz) whipped topping, thawed
- 2 cans (21 oz each) cherry pie filling
- 1 prepared angel food cake, torn into bite-sized pieces
Directions:
- In a large mixing bowl, beat softened cream cheese and powdered sugar until smooth and creamy.
- Gradually add milk and vanilla extract, mixing until well combined.
- Gently fold in the thawed whipped topping until the mixture is light and fluffy.
- Arrange the angel food cake pieces evenly in the bottom of a 9×13-inch baking dish.
- Spread the cream cheese mixture evenly over the cake layer, smoothing the top with a spatula.
- Spoon the cherry pie filling over the creamy layer, spreading gently to cover the entire surface.
- Cover and refrigerate for at least 2–4 hours until chilled and set.
- Slice into squares and serve cold.
How to Serve Cherries in the Snow
Serve Cherries in the Snow cold, straight from the refrigerator. You can cut it into squares and place them on dessert plates. This dessert is great on its own but can also be paired with a dollop of extra whipped topping or a scoop of vanilla ice cream for added flavor.
How to Store Cherries in the Snow
Store any leftovers in an airtight container in the refrigerator. It can last for about 3-4 days. Just remember to keep it covered to maintain freshness!
Tips to Make Cherries in the Snow
- Make sure your cream cheese is softened for easier mixing.
- If you want a sweeter dessert, adjust the amount of powdered sugar to taste.
- Experiment with different pie fillings, such as blueberry or strawberry, for a new twist.
Variation
For a chocolatey version, you could layer chocolate pudding between the cake and cream cheese mixture. You might also consider adding crushed nuts or chocolate shavings on top for extra texture.
FAQs
1. Can I use different fruits for this dessert?
Yes! You can try other pie fillings like blueberry, strawberry, or peach, depending on your preference.
2. Can I make this dessert ahead of time?
Absolutely! In fact, it tastes better after chilling in the refrigerator for a few hours or overnight.
3. Is there a gluten-free option for this recipe?
Yes! You can use a gluten-free angel food cake to make this dessert gluten-free.
Enjoy making and sharing Cherries in the Snow with your loved ones!
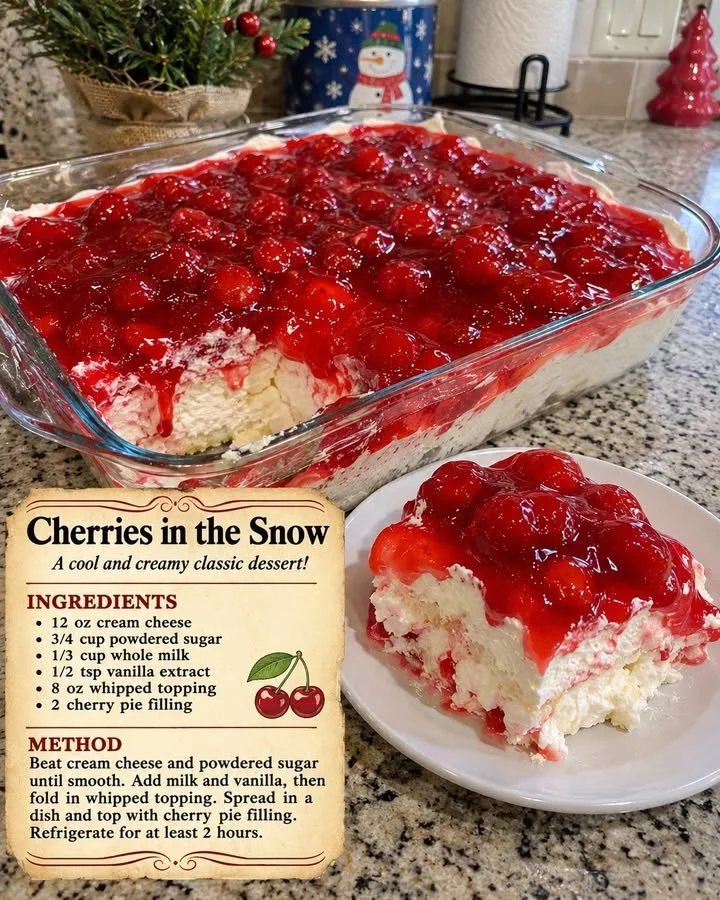
Cherries in the Snow
Ingredients
Method
- In a large mixing bowl, beat softened cream cheese and powdered sugar until smooth and creamy.
- Gradually add milk and vanilla extract, mixing until well combined.
- Gently fold in the thawed whipped topping until the mixture is light and fluffy.
- Arrange the angel food cake pieces evenly in the bottom of a 9x13-inch baking dish.
- Spread the cream cheese mixture evenly over the cake layer, smoothing the top with a spatula.
- Spoon the cherry pie filling over the creamy layer, spreading gently to cover the entire surface.
- Cover and refrigerate for at least 2–4 hours until chilled and set.
- Slice into squares and serve cold, straight from the refrigerator.