
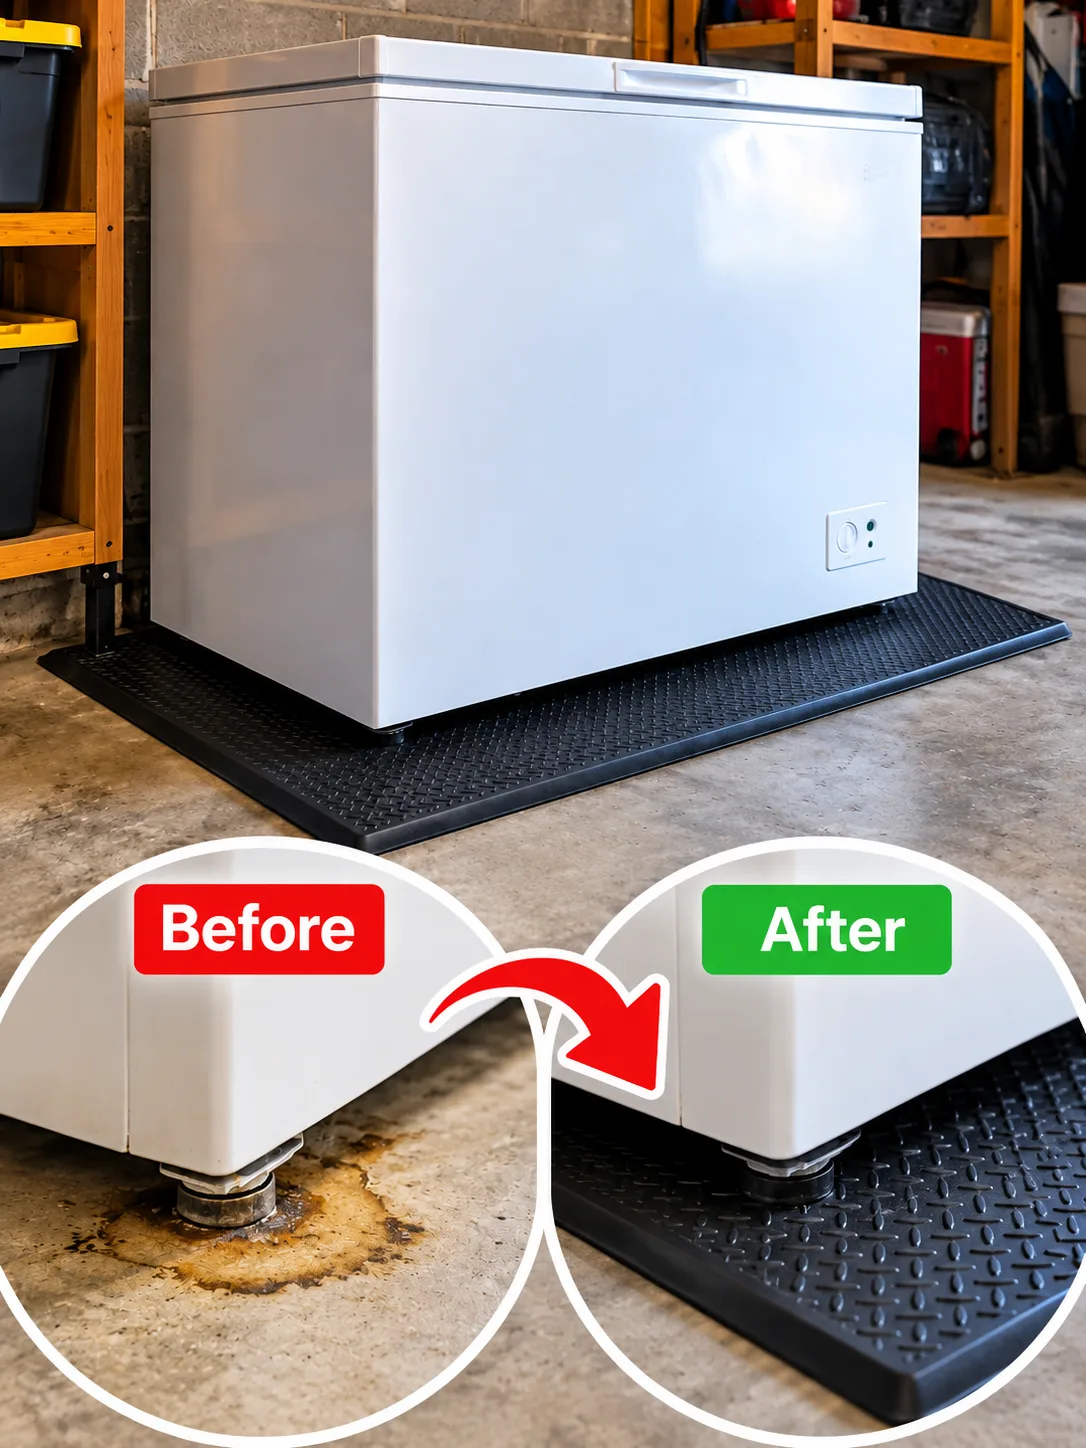
I’ve had a chest freezer sitting in my garage for a while, and honestly, I never gave much thought to what was underneath it. Concrete floor, freezer on top, frozen food inside. Pretty standard garage setup, right?
Then I noticed something that bugged me.
The concrete around the freezer sometimes felt damp, especially after humid days. There were also faint marks where the freezer feet sat on the floor. Nothing dramatic, but enough to make me wonder whether leaving a chest freezer directly on a concrete garage floor was such a great idea.
So I tried a ridiculously simple change.
I bought a heavy-duty rubber mat, placed it under the chest freezer, and left everything else exactly the same.
No fancy platform. No remodeling project. No spending half my Saturday building something out of lumber.
Two weeks later, I checked underneath and around the freezer.
And, yeah, I noticed a few things.
Why I Put a Rubber Mat Under My Chest Freezer
My main concern was moisture.
Garage concrete can feel cold and damp, particularly when outdoor temperatures and humidity swing around. Condensation can also show up around appliances depending on garage conditions.
My chest freezer wasn’t sitting in a puddle or anything that dramatic. Still, I didn’t love the idea of the metal appliance and its feet spending year after year close to a floor that occasionally gets damp.
Then there were the marks.
Every time I moved the freezer slightly for cleaning, I could see exactly where the feet had been sitting. Dirt collected around those spots, and dragging a heavy freezer even an inch across bare concrete didn’t exactly make me feel great about either the appliance or the floor.
A rubber mat seemed like cheap insurance.
More importantly, I wanted something that could protect the concrete while still giving the freezer a firm, level place to sit.
What I Used Under the Freezer
I went with a dense, heavy-duty rubber utility mat.
I specifically avoided anything super soft or squishy. A chest freezer can get seriously heavy once it’s packed with meat, frozen vegetables, pizza, ice cream, and that mystery bag of something you’ve been meaning to identify for six months.
You know the one.
A soft foam mat could compress unevenly under that weight. I wanted the freezer to stay stable, so I chose rubber that barely compressed when I pushed down on it.
I also picked a mat slightly larger than the freezer’s footprint. That gave me a visible border around the appliance and made it easier to check for water, dirt, or anything else collecting nearby.
Before putting the freezer back, I cleaned the concrete and let it dry completely.
That part matters.
Putting rubber directly over already-wet concrete can trap moisture underneath the mat. That’s basically the opposite of what I was trying to accomplish.
The First Thing I Noticed After Two Weeks
The area immediately around my freezer looked cleaner.
That surprised me more than it probably should have.
Garage floors collect everything: dust, leaves, tiny rocks, bugs, sawdust, dirt from tires—you name it. Previously, all that junk seemed to gather around the freezer feet and along the bottom edge.
With the rubber mat underneath, cleanup felt simpler.
Instead of grime collecting right against the appliance, I could see it on the edge of the mat and sweep it away.
Not life-changing, obviously.
But it’s one of those tiny household changes where you think, “Okay, why didn’t I do this sooner?”
The Concrete No Longer Had Fresh Marks From the Freezer Feet
This was the most obvious difference.
The freezer feet weren’t sitting directly against the concrete anymore, so there were no new scuffs where they touched the floor.
The rubber created a protective layer between the two surfaces.
That also made me feel a little better whenever I needed to shift the freezer.
I’m still not dragging a fully loaded chest freezer around the garage for fun—my back has opinions about that—but minor adjustments felt less harsh than moving the feet directly across concrete.
For homeowners with painted, coated, or finished garage floors, this benefit may be even more useful.
The Freezer Felt Surprisingly Stable
I was slightly worried that putting a rubber mat underneath would make the freezer wobble.
It didn’t.
The dense rubber actually gave the feet a pretty solid grip.
Before adding the mat, the freezer could shift slightly if I bumped it hard enough. Afterward, it felt planted in place.
That’s especially handy with a chest freezer because opening the lid can sometimes involve a little tug, particularly when the lid seal is doing its job.
Still, the mat needs to be firm and flat.
A thick, soft exercise mat or plush anti-fatigue mat isn’t the same thing. If the freezer sinks unevenly into the material, stability could become worse instead of better.
What Happened With the Moisture
This was the part I cared about most.
After two weeks, I lifted the edge of the rubber mat and checked the concrete.
The area was mostly dry during my check.
But here’s the important part: a rubber mat doesn’t magically solve a moisture problem.
In fact, nonporous rubber can trap moisture underneath if water gets between the mat and concrete. That’s why I wouldn’t put one down and forget about it for five years.
If your garage regularly floods, gets standing water, or has serious condensation problems, simply placing rubber underneath the freezer isn’t a real fix.
For my garage, the mat worked more as a protective barrier for the floor and a cleaner surface for the freezer feet.
I now lift a corner occasionally to check underneath. Takes about five seconds, and I’d rather catch moisture early than discover a funky surprise months later.
Did the Rubber Mat Make the Chest Freezer More Efficient?
I couldn’t confidently say that it did.
And this is where I think some online advice gets a little carried away.
A rubber mat may provide a small amount of separation between the freezer and cold concrete, but that doesn’t automatically mean you’re going to see a meaningful drop in electricity use.
Chest freezer efficiency depends on many factors, including the appliance design, surrounding temperature, ventilation, thermostat setting, door seal, how often you open it, and how full it is.
So I wouldn’t buy a rubber mat expecting some magical electricity-bill hack.
I certainly didn’t notice an obvious difference in how frequently mine ran.
For me, the benefits were much simpler: floor protection, grip, easier cleaning, and a physical barrier between the freezer feet and concrete.
And honestly, that’s enough.
One Mistake I Would Avoid
Don’t cover ventilation openings.
This is probably the biggest thing I’d tell anyone thinking about putting a mat underneath a chest freezer.
Chest freezers need proper airflow around the areas specified by their manufacturer. Different models have different clearance requirements, ventilation layouts, and installation instructions.
The mat should sit underneath the appliance. It shouldn’t curl upward around the sides or block vents.
I also wouldn’t wrap insulation around the freezer or push it tightly against a wall just because the garage gets hot or cold.
Check the owner’s manual for your exact model.
Yeah, I know. Reading an appliance manual isn’t exactly anyone’s idea of a wild Friday night.
But this is one of those times when it’s worth doing.
Would I Use Plywood Instead?
I considered plywood before choosing rubber.
A sturdy wooden platform can make sense in some garages, particularly if the goal is to raise a freezer slightly above the floor.
But untreated wood has its own relationship with moisture, and I didn’t need much extra height.
I mainly wanted surface protection and grip.
That’s why rubber made more sense for my setup.
If I had recurring standing water in the garage, though, I’d want the freezer properly raised rather than trusting a thin mat to protect it.
A rubber mat is a barrier. It isn’t a flood-control system.
What About an Anti-Vibration Mat?
A dense appliance mat can also help reduce minor vibration transferred to a hard floor.
My freezer wasn’t particularly noisy before, so I wasn’t expecting a dramatic change.
Still, the rubber did seem to soften some of the small vibration I could feel through the concrete nearby.
I wouldn’t call it soundproofing—not even close.
But if your freezer creates a slight hum or vibration against a hard garage floor, a dense rubber layer may reduce some of that direct surface contact.
Just remember that unusual rattling, banging, or loud compressor noises shouldn’t automatically be blamed on the floor.
Sometimes an appliance is trying to tell you something.
The Biggest Downside Nobody Talks About
Rubber can hide what’s underneath it.
That’s both its strength and its weakness.
The top can look perfectly dry while moisture sits between the mat and concrete.
That’s why I wouldn’t recommend throwing down a giant rubber sheet and never checking it again.
Every so often, inspect underneath.
If you notice persistent moisture, mildew, staining, or a funky smell, remove the mat, dry the area, and figure out where the moisture is coming from.
Also, some rubber products can discolor certain painted, coated, or finished flooring. If you’ve got a fancy epoxy garage floor that cost more than my first car, check whether the mat material is compatible with the coating before leaving it there permanently.
A Few Things I’d Do Differently Next Time
If I were setting up another garage chest freezer tomorrow, I’d keep the process simple.
I’d clean and fully dry the concrete first. Then I’d choose a dense rubber appliance or utility mat rated to support substantial weight. I’d keep the freezer level, maintain the manufacturer-required clearance around it, and make sure the mat didn’t interfere with any ventilation.
I’d also check underneath the mat after the first few days.
Then I’d check again after a couple of weeks.
After that, an occasional peek underneath would probably be enough unless the garage suddenly became unusually humid or wet.
One more tip: if you’re buying a new freezer for a garage, check its rated operating temperature range. Not every freezer is designed for extreme garage temperatures.
That’s easy to overlook until winter or summer shows up swinging.
So, Is Putting a Rubber Mat Under a Chest Freezer Worth It?
For my garage, yes.
But not for the dramatic reasons you sometimes see online.
My freezer didn’t suddenly use half the electricity. It didn’t become silent. The frozen chicken didn’t somehow taste better. Sadly, the mat also didn’t organize the freezer for me—and somebody really needs to invent that one.
What I got was much more practical.
The freezer stopped making direct contact with the concrete. The feet stopped leaving fresh marks. The appliance felt stable. Cleaning around it became easier, and I had a sacrificial protective surface between a very heavy appliance and my garage floor.
Two weeks was also enough time to remind me of one important thing: I still need to check for moisture underneath.
So, yes, I’d do it again.
A dense rubber mat can be a simple addition under a chest freezer on a concrete garage floor, provided the freezer stays level, ventilation remains clear, and moisture isn’t allowed to sit trapped underneath.
Sometimes the best garage upgrades aren’t really “hacks.”
They’re just little changes that make you wonder why you didn’t think of them sooner.
And for the price of a basic rubber mat, I’ll take that win.