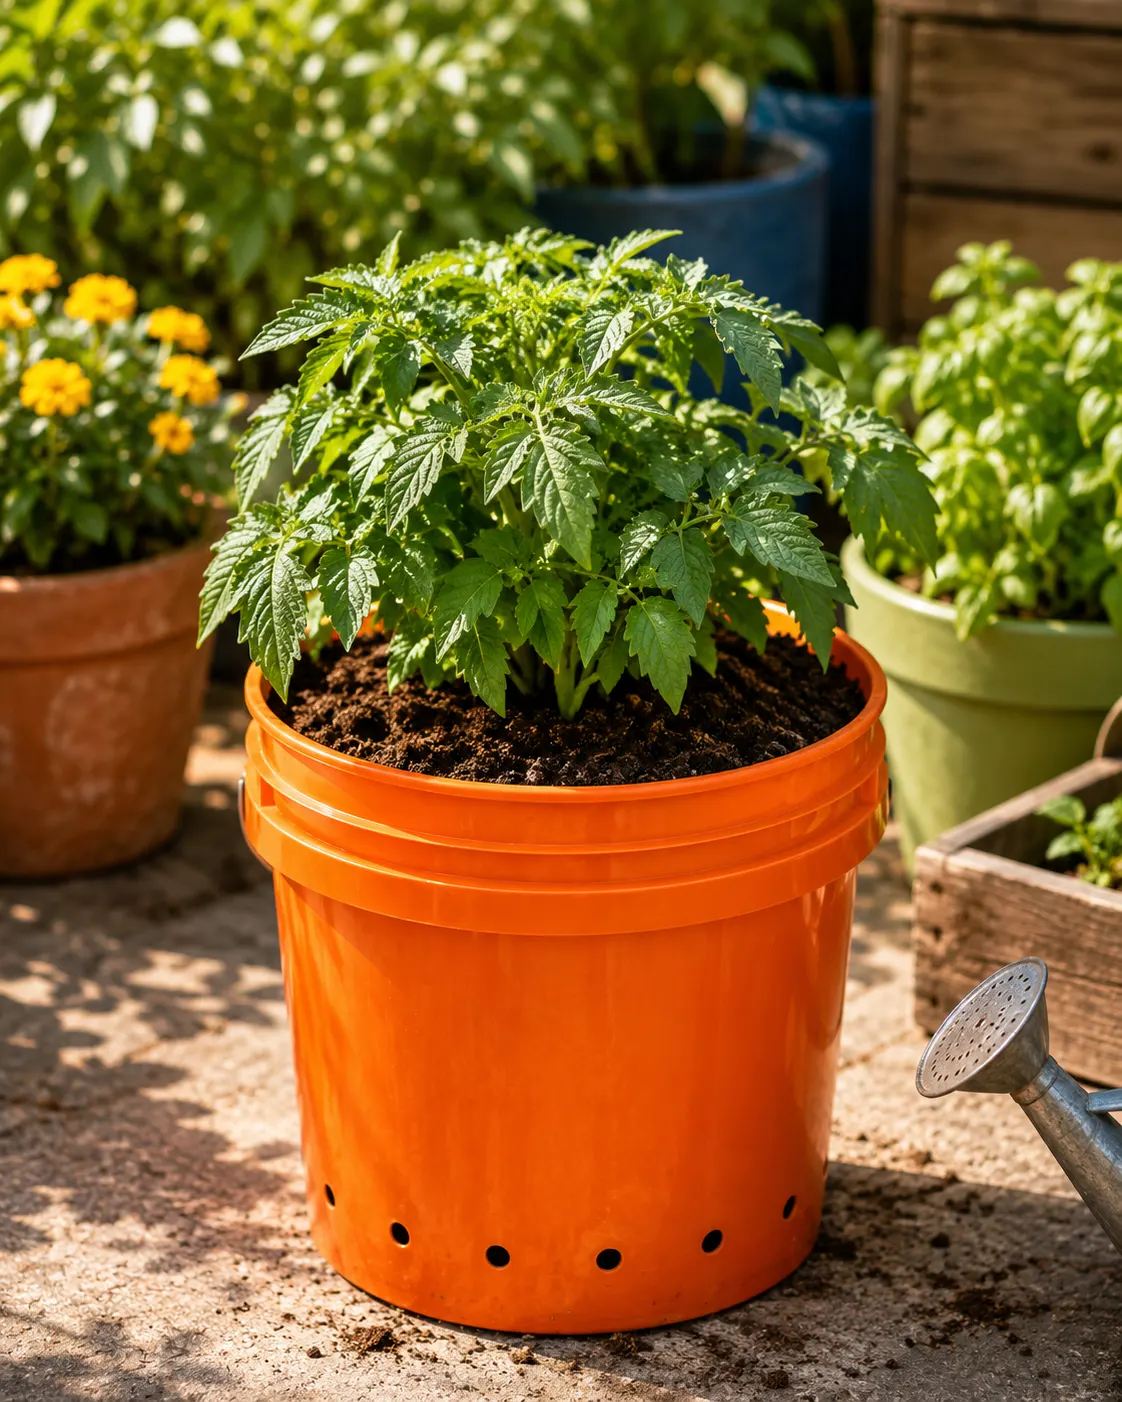
Okay, this is exactly the kind of garden project I love because it starts with stuff that looks almost too basic to matter.
A cheap 5-gallon bucket.
A small plastic basket.
A length of rope.
That’s pretty much it.
And somehow, with a few drilled holes and a little planning, those simple supplies can become a DIY self-watering tomato planter that helps keep container plants more evenly moist between waterings.
If you’ve ever grown tomatoes in pots, you already know how quickly they can dry out in summer. Container tomatoes live in a limited amount of potting mix, so hot weather can turn watering into a daily job—or sometimes more than once a day in very hot conditions.
A self-watering setup gives the plant access to a small water reserve below the soil. Water moves upward through the potting mix with help from capillary action or a wick, so the roots can access moisture more steadily. University extension guidance describes self-watering containers as systems that place growing media above a reservoir and allow water to move upward into the root zone. (Extension de l’Université du Maryland)
And yes, this can work especially well for tomatoes.
A standard tomato generally needs at least about a 5-gallon container, though larger containers can support bigger plants and hold moisture longer. (Extension de l’Université du Maryland)
Here’s how I’d build a simple version, plus the little changes I’d make for better drainage, stronger tomato support, cleaner watering, and a setup that actually makes sense through summer.
Why a Self-Watering Tomato Planter Works
Tomatoes like steady moisture.
They don’t love going from bone-dry soil to a huge soaking and then back to bone-dry again.
That kind of cycle can stress plants.
A self-watering planter helps by keeping a reserve of water near the bottom of the container.
The growing mix above remains separated from most of that standing water, while moisture moves upward gradually.
Depending on the design, this movement can happen through:
- A rope wick
- A column of potting mix
- Openings in an inner basket
- Roots reaching toward the reservoir
University of Maryland Extension notes that self-watering containers commonly use a perforated platform above a reservoir, with water moving upward into the growing medium. (Extension de l’Université du Maryland)
That means the plant gets more consistent access to water without sitting in completely saturated soil.
That balance matters.
Roots need water.
They also need air.
What You’ll Need
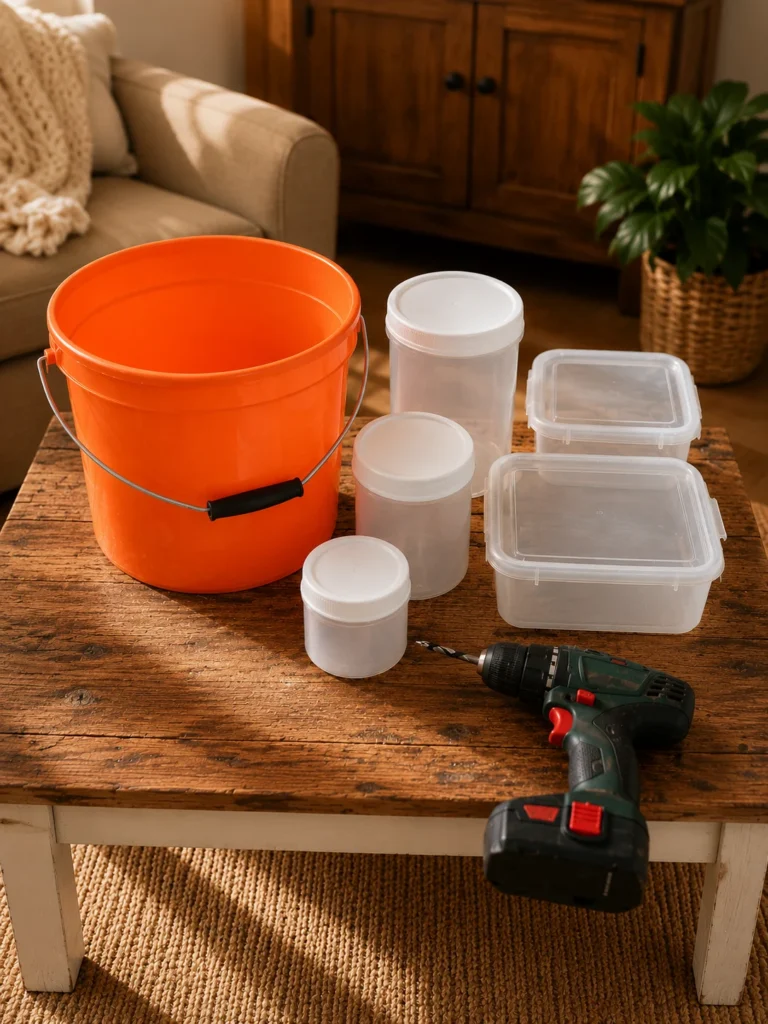
For one DIY self-watering tomato planter, gather:
- 1 clean 5-gallon plastic bucket
- 1 small plastic basket that fits inside the bottom
- 1 length of cotton or synthetic wicking rope, about 2 feet
- Power drill
- 1/4-inch drill bit
- Additional drill bit for an overflow hole
- Potting mix made for containers
- 1 tomato seedling
- Tomato cage or sturdy stake
- Mulch, optional
- Watering can or hose
- Gloves
- Eye protection
- Marker
- Measuring tape
I’d also add one thing that simple versions often skip:
an overflow hole near the reservoir level.
That helps excess water escape instead of allowing the bottom of the container to become completely flooded.
Use a Food-Safe or Garden-Suitable Bucket
Not every old bucket belongs in a vegetable garden.
If you’re growing food, use a clean container that has never held hazardous chemicals, pesticides, solvents, motor oil, paint, or other questionable substances.
A new garden bucket is inexpensive.
So is a clean food-grade bucket that previously held suitable food ingredients.
I wouldn’t gamble with a mysterious garage bucket just because it’s free.
Tomatoes deserve better than “I think this used to hold driveway cleaner.”
Why a 5-Gallon Bucket Is a Good Starting Size
Five gallons is a practical minimum for many standard tomato plants.
University of Maryland Extension lists about 5 gallons as a minimum container size for standard tomatoes, while University of Minnesota Extension also advises at least a 5-gallon pot for container tomatoes. (Extension de l’Université du Maryland)
Larger is often even better.
A bigger container:
Holds more potting mix.
Stores more moisture.
Gives roots more room.
Changes temperature more slowly.
And becomes harder to dry out in blazing summer sun.
If you have room for a 7- or 10-gallon planter, your tomato may appreciate it.
But for a small patio, a 5-gallon bucket is a very workable place to start.
Step 1: Clean the Bucket
Wash the bucket thoroughly.
Remove labels.
Rinse away residue.
Let it dry.
Check for cracks.
Pay attention around the bottom because small splits can become much larger once the bucket is full of wet potting mix.
A 5-gallon planter gets heavy fast.
This is not the time to trust a bucket that already sounds crunchy when you squeeze it.
Step 2: Check How the Basket Fits
Place the small plastic basket upside down inside the bucket.
It should sit flat enough to create a raised platform.
The open space beneath and around the basket becomes part of the water reservoir.
The basket doesn’t need to fill the entire bucket bottom.
You simply need enough structure to keep much of the potting mix raised above the lowest water area.
Choose a basket strong enough that it won’t collapse under wet soil.
Thin flimsy plastic?
I’d skip it.
Once twenty pounds of wet potting mix is sitting above it, “cute little dollar-store basket” suddenly has a serious job.
Step 3: Mark the Reservoir Height
Before drilling, look at how high the inverted basket sits.
Mark the bucket wall slightly below the top of that basket.
That’s roughly where I’d place the overflow hole.
Why?
Because a self-watering container still needs somewhere for excess water to go.
When heavy rain or enthusiastic watering fills the reservoir, the overflow hole prevents the entire lower section from staying completely flooded.
It creates a maximum water level.
That little hole can make the whole setup much more forgiving.
Step 4: Drill the Overflow Hole
Put on eye protection.
Secure the empty bucket so it can’t roll.
Drill one or more small overflow holes through the side at your marked reservoir height.
Remove loose plastic shavings.
Don’t make the opening so tiny that potting mix or roots can easily block it.
The exact size can vary with the bucket and setup.
The goal is simple:
Once the reservoir reaches its intended level, extra water drains away.
Step 5: Drill the Basket
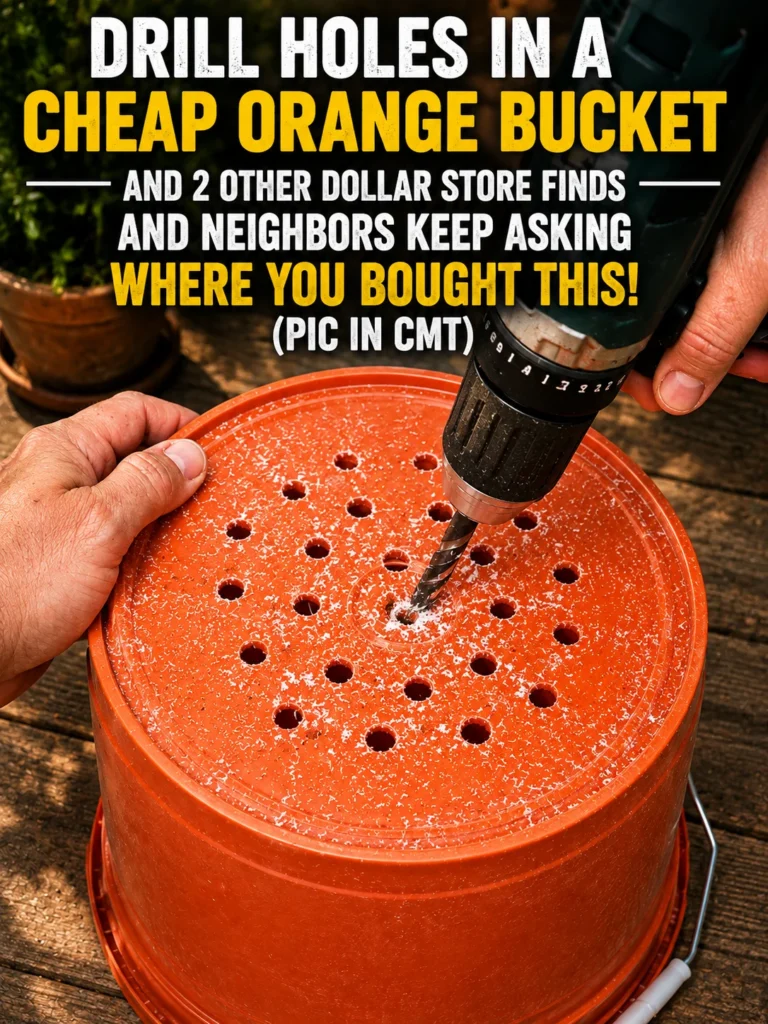
Now drill or enlarge several holes in the plastic basket if it doesn’t already have enough openings.
You need enough contact between the lower moisture area and the potting mix or wick.
Keep the basket structurally strong.
Don’t turn it into Swiss cheese.
One or two openings can accommodate the wicking rope, while the existing basket openings can help allow roots and moisture movement.
Step 6: Prepare the Wick
Cut about 2 feet of wicking rope.
Cotton can move water well, though natural fibers can eventually break down.
A synthetic wicking material may last longer.
The rope should be absorbent.
Test it.
Put one end in water.
If the material remains completely water-repellent and dry, it isn’t doing much wicking.
For a longer-lasting planter, I’d choose a cord sold specifically for wicking or irrigation use.
Step 7: Thread the Wick Through the Basket
Feed one end of the wick through the basket so part of it reaches down into the reservoir.
The remaining length should extend upward into the future potting mix.
You can arrange the upper portion vertically or curve it through the lower soil area.
The idea is to create continuous contact between reservoir water and growing medium.
Don’t leave the whole wick coiled underneath the basket.
That won’t help much if none of it touches the soil.
Step 8: Put the Basket Into the Bucket
Set the basket upside down in the bottom.
Make sure the wick extends below into the reservoir area.
Pull the rest upward.
Check that everything stays stable.
This is a good time to pour a little water into the bottom as a test.
Make sure the overflow hole works.
If water reaches the proper height and exits cleanly, great.
Drain the bucket before adding soil.
Wait—Should You Drill Drainage Holes in the Bottom?
Here’s where self-watering planters differ from ordinary buckets.
A standard bucket planter needs drainage holes in the bottom so excess water can escape. Penn State and Maryland extension guidance both stress the importance of drainage in ordinary containers. (Penn State Extension)
A true self-watering planter, though, needs to retain some water at the bottom.
So drilling lots of open holes directly through the bottom can defeat the reservoir.
That’s why I prefer an overflow hole in the side for this design rather than turning the bottom into a colander.
If you want a simple non-reservoir bucket planter, bottom drainage holes are exactly what you need.
If you want a reservoir, design for one intentionally.
That little distinction matters a lot.
Step 9: Add Container Potting Mix
Use a quality potting mix designed for containers.
Don’t fill the bucket with heavy garden soil.
Garden soil can compact inside pots, reducing air space around roots.
Container growing media is designed to hold both moisture and air while draining appropriately. University of Maryland Extension emphasizes good porosity and drainage for container root health. (Extension de l’Université du Maryland)
Add some mix around the basket first.
Gently press it into contact with the wick.
Then continue filling.
Don’t stomp it down.
You want the mix settled.
Not compressed into a brick.
Why Potting Mix Matters So Much
The plant can’t send roots several feet into the ground searching for better conditions.
Everything it gets comes from that bucket.
Water.
Air.
Nutrients.
Root space.
That makes growing medium one of the most important ingredients in the whole planter.
A fluffy container mix gives roots air spaces while still holding water.
Heavy compacted soil can remain soggy in one area and dry in another.
Spend the extra few bucks on proper potting mix.
Your tomato plant will be living in it all summer.
Step 10: Pre-Moisten the Potting Mix
Dry potting mix can be weirdly difficult to wet evenly.
Before planting, moisten it gradually.
Add water.
Mix gently.
Add more.
The mix should become uniformly damp without turning soupy.
This also helps establish contact around the wick.
Some dry mixes can initially repel water, so taking a few minutes here pays off.
Nobody enjoys watering the top of a container and watching all the water run down one tiny channel while the rest stays dusty.
Step 11: Plant the Tomato Seedling
Make a planting hole in the center.
Remove the tomato seedling carefully from its nursery pot.
Tomatoes can often be planted deeper than many other garden vegetables because they can form roots along buried portions of the stem.
Remove only lower leaves that would otherwise be buried.
Set the plant at an appropriate depth for the variety and transplant size.
Fill around it with potting mix.
Press gently.
One Tomato Per 5-Gallon Bucket
I’d plant one tomato in a 5-gallon container.
Not two.
Definitely not four because the seedlings looked tiny in May.
Tomatoes become large plants with extensive root systems.
Crowding several into one small bucket increases competition for water, nutrients, and root space.
One plant.
One bucket.
Give it room.
In six weeks you’ll wonder how that tiny seedling became a shrub.
Step 12: Add the Support Right Away
Don’t wait until the tomato is three feet tall and flopping sideways.
Install the cage or stake at planting time.
University of Minnesota Extension recommends support even for container tomatoes, with cages or stakes suited to the plant type. (Extension de l’Université du Minnesota)
Adding support early means you’re less likely to damage roots later.
For compact patio tomatoes, a sturdy cage may be enough.
For indeterminate types, you may need stronger support.
And remember:
The plant plus cage can catch a lot of wind.
That bucket needs to remain stable.
Step 13: Water Thoroughly From the Top the First Time
For the first watering, soak the potting mix from above.
You want the entire growing medium moist.
This also helps start the wicking process.
Water until you know the reservoir has some water in it and excess can escape through the overflow.
Then give the system time.
The wick should help maintain moisture afterward.
But a self-watering planter does not mean you never have to check water again.
I wish.
Plants remain stubbornly uninterested in fully automated living.
How Do You Refill the Reservoir?
The simplest version can be watered from the top until excess appears at the overflow.
A more polished version uses a fill tube.
You can add a piece of PVC pipe running from near the reservoir to above the soil surface.
Then you pour water directly into the pipe.
This sends water to the reservoir without repeatedly soaking the foliage or top layer.
Honestly, if I planned to keep the planter all summer, I’d add the fill tube.
It makes routine watering much cleaner.
How to Add a Fill Tube
Use a section of PVC pipe wide enough for easy pouring.
Cut one end at an angle so it doesn’t seal flat against the reservoir floor.
Position it vertically near the bucket edge before adding all the potting mix.
The lower end should reach the reservoir.
The top should extend slightly above the soil.
Keep it away from the tomato stem.
Now you can fill the reservoir directly.
Easy.
How Often Will You Need to Add Water?
That depends on:
Weather.
Plant size.
Container size.
Sun exposure.
Wind.
Tomato variety.
Potting mix.
Fruit load.
A young tomato may use relatively little water.
A large fruiting plant during hot July weather can drink surprisingly fast.
Check the reservoir and soil regularly.
Never assume “self-watering” means “ignore until August.”
Container tomatoes can be thirsty plants, and extension guidance notes they often require frequent watering. (Extension de l’Université du Minnesota)
How to Tell if the Reservoir Is Empty
A fill tube makes checking easier.
You can use a clean dipstick or thin wooden dowel reserved for this purpose.
Lower it carefully through the fill tube.
If it comes back dry, add water.
You can also learn your planter’s rhythm.
After a few weeks, you may notice it needs refilling every couple of days in certain weather.
Hot spell?
Check more often.
Heavy rain?
Probably less.
Plants don’t read schedules.
Weather wins.
Don’t Keep the Soil Constantly Swampy
Consistent moisture is good.
Completely waterlogged root zones are not.
That’s why the overflow opening matters.
If water stays above the intended reservoir and saturates the entire lower soil area for long periods, roots can lose access to enough oxygen.
Self-watering should mean steady moisture.
Not indoor pond gardening.
Add Mulch on Top
A thin layer of mulch can help slow surface moisture loss.
Try clean straw, shredded leaves, or another suitable garden mulch.
Keep it slightly away from the tomato stem.
Mulch can also reduce soil splashing onto lower leaves during watering or rain.
University of Minnesota Extension recommends mulch and base watering as part of good tomato disease-prevention habits. (Extension de l’Université du Minnesota)
Bonus?
The bucket immediately looks more like a real planter and less like something you borrowed from the garage.
Where to Put the Planter
Tomatoes generally need plenty of direct sunlight.
Choose the sunniest suitable location available.
A patio.
Balcony.
Driveway edge.
Deck.
Garden path.
Just remember that a full 5-gallon bucket is heavy.
Place it before filling whenever possible.
Moving a wet tomato planter later is basically strength training you didn’t sign up for.
Make Sure the Surface Is Level
A crooked planter can create uneven reservoir depth.
It can also become easier to tip once the tomato grows tall.
Place the bucket on a flat, stable surface.
If you’re using it on a balcony, make sure the location and structure are suitable for the combined weight.
Wet soil is heavy.
Water is heavy.
Tomato plants get surprisingly heavy.
That cheerful orange bucket can become quite the little unit.
Use a Wide Bucket if You Can
A wider container is generally more stable than a tall narrow one of equal volume.
University of Maryland Extension specifically notes that wider containers can be less top-heavy in breezy conditions. (Extension de l’Université du Maryland)
That matters with tomatoes because the plant itself can act like a sail.
A wide stable base plus a strong cage is a much better combination than a tall narrow bucket wobbling in every thunderstorm.
Can You Paint the Bucket?
Absolutely.
If orange isn’t exactly your garden color, paint the outside.
Use coatings intended to bond to plastic.
Penn State Extension even suggests patio or multi-surface paint for decorated bucket planters. (Penn State Extension)
You could make it:
Sage green.
Matte black.
Terracotta.
Cream.
Navy.
Forest green.
Just keep paint off areas where it could contaminate the growing medium.
Exterior decoration only.
Farmhouse Version
Paint the bucket warm white.
Add a simple black number or tomato label.
Use a dark green cage.
Top the soil with straw mulch.
Simple.
Cute.
And nobody needs a giant wooden sign telling the tomato plant to “GROW.”
It already knows.
Rustic Version
Use terracotta-colored paint.
Wrap a little jute decor around the upper outside edge if it won’t interfere with watering.
Add a natural wooden plant marker.
Use straw mulch.
This version works beautifully near raised beds and wooden fencing.
Modern Version
Paint the bucket matte charcoal.
Use a black plant support.
Skip decorative extras.
Add clean dark mulch.
A basic plastic bucket can look surprisingly sharp once the bright utility color disappears.
Sometimes all a garden project needs is less orange.
Make Matching Planters
Once you’ve built one, making three is almost as easy.
Try one tomato.
One pepper.
One eggplant.
University of Maryland lists peppers and eggplants at about a 5-gallon minimum container volume too. (Extension de l’Université du Maryland)
Line them up along a sunny wall.
Use matching bucket colors.
Suddenly you’ve got a compact vegetable garden without digging a single garden bed.
Can You Grow Peppers in This Setup?
Yes.
Peppers can do very well in containers with steady moisture and good drainage.
A self-watering bucket can reduce the wild wet-dry swings that small pots sometimes experience in summer.
Keep the reservoir modest.
Use good potting mix.
And don’t assume pepper plants need as much water as a giant mature tomato.
Check each container individually.
What About Cucumbers?
Cucumbers can also grow in 5-gallon containers, though they need a strong trellis and can drink plenty of water. University of Maryland lists 5 gallons as a minimum container volume for cucumbers. (Extension de l’Université du Maryland)
A self-watering setup can be handy.
Place the trellis at planting time.
Then train the vines upward.
One cucumber plant climbing vertically can make surprisingly good use of a small patio footprint.
Eggplants Work Too
Eggplants are another good candidate.
They appreciate warm conditions and can grow well in a suitable container.
A 5-gallon planter gives them a reasonable root zone.
Add support because heavy fruit can bend branches.
And keep an eye on the reservoir during hot weather.
A fruiting container vegetable can use more water than you’d guess from looking at that little seedling in spring.
Herbs? Sure, But Scale Down
You can use the same basic concept for herbs.
You probably don’t need a giant 5-gallon self-watering system for one little thyme plant.
Use smaller containers for smaller plants.
Basil is a good candidate because it appreciates steady moisture.
Mint too—although mint will happily take over anything you give it.
Contain that little maniac.
Fertilizing a Self-Watering Tomato Planter
Container plants depend heavily on what you provide because their roots can’t reach beyond the pot.
Tomatoes are heavy feeders.
Use fertilizer according to the potting mix, tomato variety, and fertilizer label.
Don’t pour random extra fertilizer into the reservoir because you think the tomato looks hungry.
Too much can damage roots and create nutrient problems.
Follow a container-tomato feeding schedule suited to your chosen fertilizer.
Watch for Nutrient Buildup
Water leaves.
Mineral salts can remain.
Over time, container growing media can accumulate fertilizer salts, especially when feeding heavily.
Occasional top watering that allows some excess to exit through the overflow can help move accumulated salts through the pot, depending on the system.
Follow your fertilizer directions.
If you see crusty white residue around the soil or bucket, reassess your feeding and water quality.
More plant food isn’t always more tomatoes.
Why Bottom Watering Can Help Leaves Stay Drier
Many tomato diseases do better when foliage stays wet for long periods.
A reservoir system lets you add water near the root zone rather than spraying the entire plant.
University of Minnesota Extension recommends watering tomatoes at the base instead of overhead as one step that can help reduce disease pressure. (Extension de l’Université du Minnesota)
You still can’t control rain.
But you can control your hose.
The tomato doesn’t need a shower every morning.
Clean the Fill Tube
If you add a fill tube, check it periodically.
Leaves can fall inside.
Insects may investigate.
Soil can get knocked into it.
A simple removable cap with ventilation can help keep debris out.
Don’t seal the pipe airtight if the system needs air movement.
The goal is keeping out junk.
Not creating a tiny plumbing project inside the garden project.
Watch for Mosquitoes
Standing water can attract mosquitoes if they can reach it.
A well-built reservoir should limit open access.
Cover large openings with suitable mesh or caps while still allowing airflow and water filling.
Keep overflow openings functioning.
Don’t leave open buckets of water sitting beside the planter.
A tomato planter is great.
A mosquito nursery?
Hard pass.
Don’t Let Roots Completely Block the System
Tomato roots can grow aggressively.
By late summer, they may work their way deep into reservoir areas.
That’s normal to a point.
But check that the overflow remains open.
If roots block the overflow, water levels can rise too high.
Use a small piece of suitable screen over the inside of the overflow if necessary, while keeping drainage unrestricted.
What Happens During Heavy Rain?
This is another reason I love the overflow hole.
Rain fills the potting mix.
Excess drains downward.
The reservoir fills.
Once it reaches the overflow opening, extra water leaves.
Without overflow, a covered reservoir container may become much wetter than intended after storms.
If your planter lives where it gets heavy rain, check that opening often.
A clogged overflow hole turns a clever planter into a bucket of soup.
What About Very Hot Weather?
Dark plastic buckets can heat up in direct summer sun.
Hot roots can stress container plants.
If you’re gardening somewhere extremely hot, consider a lighter-colored container or provide afternoon shade to the bucket itself while keeping the tomato foliage in adequate sun.
You can also place the bucket inside a decorative outer container with an air gap.
Just don’t block the overflow opening.
Add a Decorative Outer Basket
Want to hide the bucket entirely?
Place it inside a larger decorative planter or basket suited to outdoor use.
Make sure there is enough clearance for drainage and airflow.
Keep the overflow visible.
And don’t let water collect around the bucket.
That way you keep all the practical self-watering features while losing the hardware-store aesthetic.
Pretty outside.
Functional inside.
I love that combination.
Don’t Use Plain Garden Dirt
I know it’s tempting.
You already have soil in the yard.
Why buy a bag?
Because container roots need a different structure.
Garden soil can become heavy and compacted in buckets.
Use container potting mix instead.
University extension guidance repeatedly emphasizes lightweight, well-aerated growing media for container vegetables. (Extension de l’Université du Maryland)
Save garden soil for the garden.
Bucket life has different rules.
Don’t Skip the Overflow Hole
If I had to pick one improvement for a DIY reservoir bucket, this would be it.
Water needs a maximum level.
Without overflow, one heavy rain or overenthusiastic watering session can saturate far more of the root zone than intended.
The overflow hole is cheap.
Easy.
And extremely useful.
Drill it before adding soil.
Because drilling into a full planted bucket later?
Yeah, not my favorite plan.
Don’t Overfill the Reservoir Constantly
You don’t need to top off the reservoir every time you walk past the plant.
Let the tomato use some water.
Check moisture.
Watch the plant.
Then refill when needed.
Constantly filling a reservoir that never gets lower may indicate the plant isn’t using much yet or the soil is staying too wet.
Adjust to conditions.
Gardening is observation.
Not automatic refill mode.
Common Mistakes to Avoid
Using a Contaminated Bucket
Use clean, garden-suitable containers.
Drilling Away the Reservoir
Don’t put open drainage holes through the entire bottom if you’re trying to retain water there.
Forgetting an Overflow Hole
Give excess water somewhere to escape.
Using Heavy Garden Soil
Choose container potting mix.
Packing the Mix Too Tight
Roots need air.
Planting Several Tomatoes in One Bucket
One tomato per 5-gallon container is plenty.
Waiting Too Long to Add a Cage
Install support at planting.
Assuming Self-Watering Means No Watering
Check the reservoir regularly.
Ignoring Wind
Tall tomatoes can make small containers top-heavy.
Letting the Overflow Clog
Inspect it throughout the season.
Keeping an Open Reservoir
Limit mosquito access.
Overfertilizing
Follow product directions.
How to Clean the Planter at the End of the Season
Once the plant is finished, remove the old tomato.
Discard diseased plant material appropriately.
Empty the potting mix according to your garden plan.
Remove the basket and wick.
Wash the bucket.
Clean the overflow opening.
Inspect everything for cracks.
If the wick is degraded, replace it next season.
Let all parts dry before storage.
A little cleanup now makes next spring much easier.
Can You Reuse the Potting Mix?
Maybe, but don’t automatically grow another tomato in tired mix without refreshing it.
Container media loses structure and nutrients over time.
Disease can also remain in plant debris or growing media.
If the tomato experienced serious soilborne disease, starting fresh may be smarter.
For healthy plants, old potting mix can often be blended into compost or garden beds where appropriate, or refreshed for less-demanding container uses.
Frequently Asked Questions
How do you make a self-watering tomato planter from a bucket?
Create a small reservoir at the bottom of a 5-gallon bucket, add a raised perforated basket, run an absorbent wick from the reservoir into the potting mix, add an overflow hole, fill with container mix, and plant one tomato seedling.
Is a 5-gallon bucket big enough for a tomato?
A 5-gallon container is a common minimum size for standard container tomatoes, although larger containers can support larger plants and hold more moisture. (Extension de l’Université du Maryland)
Should a self-watering bucket have holes in the bottom?
A true reservoir-style planter needs to retain water at the bottom, so a side overflow hole is often more useful than open drainage holes across the reservoir floor. Ordinary non-reservoir bucket planters do need bottom drainage.
What does the rope do?
The wick helps move water from the lower reservoir into the growing medium through capillary action.
Can I use cotton rope?
Cotton can wick water, but it may break down with time. Synthetic wicking cord can last longer.
Can tomatoes get too much water in a self-watering planter?
Yes. Tomato roots still need oxygen. The system should provide steady moisture without saturating the entire root zone.
What soil should I use?
Use a lightweight potting mix intended for containers rather than dense garden soil.
How often do I refill the reservoir?
It varies with heat, plant size, wind, sun, and container size. Check frequently and refill based on actual water use.
Can I grow peppers in the same type of bucket?
Yes. Peppers are good candidates for 5-gallon container growing. (Extension de l’Université du Maryland)
Can I grow cucumbers in it?
Yes, with proper support. Cucumbers can be grown in 5-gallon containers and benefit from consistent watering. (Extension de l’Université du Maryland)
Do I still need a tomato cage?
Yes. Container tomatoes still need suitable support, especially taller varieties. (Extension de l’Université du Minnesota)
Can I paint the bucket?
Yes. Use paint intended for plastic and keep decorative coatings away from the growing medium.
Final Thoughts
A DIY self-watering tomato planter is one of those garden projects that proves you really don’t need fancy equipment to make container gardening easier.
Start with a clean 5-gallon bucket.
Create a small reservoir.
Add a sturdy basket.
Run a wick into the potting mix.
Give excess water an overflow route.
Plant one tomato.
Add support.
Then keep an eye on the reservoir as summer heats up.
The setup won’t remove every gardening chore.
You’ll still need to fertilize.
You’ll still need to check the plant.
You’ll still need to deal with bugs, pruning, support, and whatever dramatic decision your tomato plant makes next.
But it can make watering much more predictable.
And for anybody who’s ever come home on a 95-degree afternoon to find a container tomato looking like it has emotionally given up?
That little reservoir starts looking pretty darn clever.